Chevrolet Cruze Parts
- Select Vehicle by VIN
- Select Vehicle by Model
For the most accurate results, search by your VIN (Vehicle Identification Number).

Why choose GMPartsGiant
- Large Inventory
The best site to buy Chevrolet Cruze genuine parts for years has been GMPartsGiant.com. We're the best online parts and accessory store for your Chevrolet Cruze. GMPartsGiant.com offers a large parts and accessory inventory to cover all your vehicle's repairs. Feel free to browse through our genuine Chevrolet Cruze parts and accessory catalog to find all your vehicle's needs.
- Fast Shipping Times
All of our Chevrolet Cruze auto parts and accessories are expedited directly from verified dealers and backed by the manufacturer's warranty. Our experienced team ensures the orders are packed to provide quick transit times. The majority of the orders are shipped out within a couple of business days to get the parts out to you as fast as possible.
- Low Prices
Our low prices say it all. You can rest assured that you will always receive unbeatable prices on OEM Chevrolet Cruze parts. Our giant inventory is beyond compare and has everything you need at an extraordinary value not found anywhere else. Whether you're restoring an old vehicle or upgrading the performance of your vehicle you can count on the quality of our products without hurting your bank account.
Popular Genuine Chevrolet Cruze Parts
- Engine Parts View More >
- Front Suspension, Steering Parts View More >
- Fuel System, Exhaust, Emission System Parts View More >
- Brakes Parts View More >
- Transmission - Automatic Parts View More >
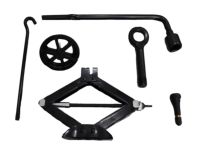
- Frames, Springs, Shocks, Bumpers Parts View More >
- Cooling System, Grille, Oil System Parts View More >
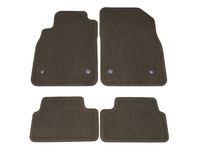
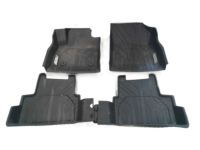
- Interior Trim, Front Seat Trim, Seat Belts Parts View More >


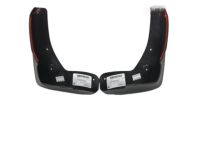
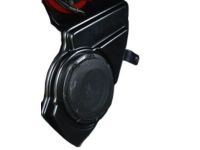
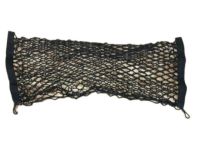
Genuine Chevrolet Cruze Accessories


Shop Genuine Chevrolet Cruze Parts with GMPartsGiant.com
The Chevrolet Cruze, introduced by General Motors in 2008, is a globally developed compact car. Available in a four-door sedan, five-door hatchback, and a station wagon, the Cruze is currently in its second generation. Its power derives from both gasoline and diesel engines. The first generation was powered by Family 1 inline-four engines in 1.6-liter and 1.8-liter variants, a 2.0-liter VM Motori turbocharged diesel engine, and a 1.4-liter Family 0 turbocharged gasoline engine introduced in 2010 for the U.S. market. This engine range generated 138 hp and 148 lb-ft of torque. The second generation boasts the 1.4 L LE2 I4 turbo gasoline, 1.5 L SGE I4 gasoline, and 1.6 L MDE I4 turbo-diesel engines. The Cruze also comes with various transmission options. The first generation featured 5-speed and 6-speed manuals, and 6-speed automatic versions. The second generation offers a 6-speed M32 manual, 6-speed GM 6T35 automatic, and 7-speed DCG DCT, with North American models having a standard six-speed manual. The Cruze stands out for its compact yet spacious dimensions. The first-generation sedan measures 181.0 inches in length, 70.4-70.7 inches in width, and 58.1 inches in height, with varying dimensions for the hatchback and wagon versions. The second-generation sedan is slightly more compact but weighs less. The Cruze is admired for its firm and responsive braking system, requiring only 110 feet to come to a stop from 60 mph, which is outstanding for a compact sedan. The Chevrolet Cruze is a versatile, feature-rich, compact sedan that offers variety, performance, and safety.
Chevrolet Cruze owners frequently report encountering mechanical issues with their vehicles, particularly overheating and electrical problems. The overheating problem is often characterized by reduced fuel economy and engine performance, black smoke emanating from the engine, oil leaks, and illuminated Check Engine or Engine Oil lights. When these issues arise, it's advisable to inspect the coolant temperature sensor, oil filter, and fuel filter. Meanwhile, electrical problems often manifest as vehicle shaking or misfiring, and slow or hesitant acceleration, indicating a possible malfunction in the body control module. Besides these issues, exterior components that are sometimes overlooked also tend to deteriorate. Seat belts, which protect passengers from sudden movements, can be compromised if their pretensioners are activated. Similarly, windshield wipers or wiper blades, responsible for clearing debris and ensuring clear vision for drivers, can fail due to repeated use. Regular attention to these components is crucial for maintaining vehicle safety and performance.
When it comes to quality and durability, OEM parts reign supreme. They are manufactured to meet Chevrolet's exacting factory specifications and undergo rigorous quality control. Our website stands as the go-to online destination for OEM Chevrolet Cruze parts, like Front End Sheet Metal, Heater, Body Moldings, Sheet Metal, Rear Compartment Hardware, Roof Hardware. With complete lines of genuine Chevrolet Cruze parts, such as Transmission - Manual available at unbeatable market prices, we ensure top quality, reliability, and durability. Each part comes backed by the manufacturer's warranty, reinforcing your trust in our offerings.
Chevrolet Cruze Parts Questions & Answers
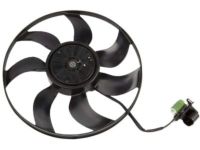
- Q: How do you remove the Radiator fan?A: To remove the radiator fan, start by disconnecting the cable from the negative battery terminal. Then, remove the front bumper cover and the radiator support center bar fasteners and bar. Next, take off the radiator upper air seal and, if applicable, the charge air cooler inlet and outlet pipes on 2016 and later 1.4L engines. Remove the air baffles from both sides of the radiator and the radiator upper mounting bolts. Reposition the radiator by moving it towards the front of the vehicle. Disconnect the fan motor electrical connector and ground wire nut, and separate the harness from the clips on the fan shroud. Position the harness off to the side. Finally, remove the four mounting clips and slide the fan shroud towards the right side, then tilt the left side of the fan shroud up and maneuver it out of the vehicle. To install, simply reverse the removal steps.
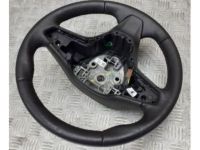
- Q: How do you remove the Steering Wheel?A: To remove the steering wheel, park the vehicle with the wheels pointing straight and disconnect the battery. Disable the airbag system and detach the airbag module by inserting a blunt round tool into the holes on each side of the steering wheel. Carefully lift the airbag module away from the steering wheel and disconnect the electrical connectors. Remove the steering wheel bolt and mark the relationship of the steering wheel to the shaft. Feed the wiring harness through the hole in the wheel and remove the steering wheel from the shaft. To install the clockspring, ensure it is centered with the arrows aligned on the face. If the shaft was turned, follow the steps to center the clockspring. Install the clockspring on the steering column and secure it with the yellow locking tab or tape. Finally, install the steering wheel, aligning the marks on the shaft and hub, and tighten a new steering wheel bolt. Attach the airbag module and enable the airbag system.
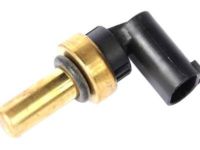
- Q: How Does the Coolant Temperature Sensor Work?A: To monitor coolant temperature, check the gauge or warning light and sending unit. If overheating, check the coolant level and wiring connections. Confirm the indicator light works when the engine is turned on. If the light remains on, check for a grounded wire, faulty sending unit, or ignition switch issue.
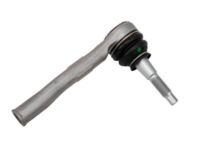
- Q: How do you remove the tie-rod end?A: Start with unscrewing the lug nuts of the wheel and then raising the front part of the car on jackstands to remove tie rod end. Safety requires that parking brakes is applied and rear wheels are blocked. Remove the wheel, and then turn back the lock nut of tie-rod end. For future reference, mark where one can see how a toe in alignment should be restored and connected to a ball stud of tying rod end after disconnecting it from steering knuckle arm by using puller. Take out nut on ball stud, leaving it aside forever. Separate tie rod end from steering knuckle and then unfasten it from tie rod screw thread. While putting back a tie rod ends affix it on marked position on tie rod arm, then connect it into steering arm. On ball stud install new nut and tighten properly to correct torque specifications. Afterward, tighten jam nut securely as well as set up wheel again in its place now lower vehicle using proper torque specs for lug nuts tightening. Last but not least check front- end alignment which may necessitate adjustment if any should be made.