×
My Garage
My Account
My Cart
Genuine Chevrolet Beretta Oil Pan
Oil Drain PanEnter your vehicle info to find more parts and verify fitment
- Select Vehicle by VIN
- Select Vehicle by Model
Select by VIN
orEnter your VIN for the most accurate results.Enter your VIN for the most accurate results.
Select by Model
-- Select Make --
-- Select Model --
-- Select Year --
5 Oil Pans found

Chevrolet Beretta Pan Asm,Oil
Part Number: 12512670- Other Name: PAN, Engine Oil; Oil Pan
$174.96 MSRP: $276.52You Save: $101.56 (37%)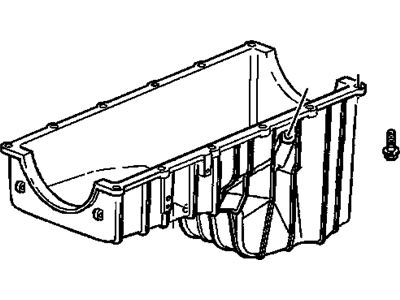
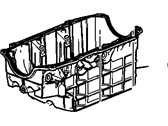
Chevrolet Beretta Pan Asm,Oil
Part Number: 24504719- Other Name: PAN, Engine Oil; Oil Pan
$55.81 MSRP: $136.14You Save: $80.33 (60%)
Chevrolet Beretta Pan,Oil
Part Number: 88890999- Other Name: PAN, Engine Oil; Oil Pan
- Replaces: 12363172, 12513704

Chevrolet Beretta Oil Pan Parts Questions & Answers
- Q: How to remove and reinstall the oil pan in V6 engine for a Chevrolet Beretta?A: Disconnect the cable from the negative battery terminal. Caution: On models equipped with the Delco Loc II audio system, be sure the lockout feature is turned off before performing any procedure which requires disconnecting the battery. Raise the front of the vehicle and place it securely on jackstands. Apply the parking brake and block the rear wheels to keep it from rolling off the stands. Remove the lower splash pan and drain the engine oil. Remove the lower flywheel/driveplate cover. Remove the starter. Remove the serpentine drivebelt. Loosen, but do not remove, the upper air conditioning compressor bolts (if equipped). Remove the right front wheel. Also remove the right side splash shields. Support the engine from above with a hoist or an engine support fixture, then detach the engine mount strut from the suspension support. If equipped, remove the right front ABS wheel speed sensor harness from the right suspension support. Separate the right front balljoint from the steering knuckle, detach the right side stabilizer bar link from the control arm, then remove the right side suspension support. Remove the air conditioning compressor bolts, position compressor aside and support with a piece of wire. Remove the bolts and nuts, then carefully separate the oil pan from the block. Don't pry between the block and the pan or damage to the sealing surfaces could occur and oil leaks may develop. Instead, tap the pan with a soft-face hammer to break the gasket seal. Clean the pan with solvent and remove all old sealant and gasket material from the block and pan mating surfaces. Clean the mating surfaces with lacquer thinner or acetone and make sure the bolt holes in the block are clear. Check the oil pan flange for distortion, particularly around the bolt holes. If necessary, place the pan on a block of wood and use a hammer to flatten and restore the gasket surface. Always use a new gasket whenever the oil pan is installed. Place the oil pan in position on the block and install the nuts/bolts. After the fasteners are installed, tighten them. Starting at the center, follow a criss-cross pattern and work up to the final torque in three steps. The remaining steps are the reverse of the removal procedure. Refill the engine with oil, run it until normal operating temperature is reached and check for leaks.
- Q: How to remove and reinstall the oil pan in 2.0L/2.2L four cylinder overhead valve engine for a Chevrolet Beretta?A: Warm up the engine, then drain the oil and remove the oil filter. Detach the cable from the negative battery terminal. Caution: On models equipped with the Delco Loc II audio system, be sure the lockout feature is turned off before performing any procedure that requires disconnecting the battery. Raise the vehicle and securely support it on jackstands. Remove the exhaust pipe shield. On air-conditioned models, remove the air conditioner brace at the starter and compressor bracket. Remove the starter and bracket. Remove the lower bellhousing cover. On air-conditioned models, remove the air conditioner brace. Remove the four right support bolts. Lower the support slightly to gain clearance for oil pan removal. Remove the oil filter extension (automatic transaxle equipped models only). Remove the bolts and nuts securing the oil pan to the engine block. Tap on the pan with a soft-face hammer to break the gasket seal, then detach the oil pan from the engine. Using a gasket scraper, remove all traces of the old gasket or sealant from the engine block and oil pan. Make sure the threaded bolt holes in the block are clean. Wash the oil pan with solvent and dry it thoroughly. Check the gasket flanges for distortion, particularly around the bolt holes. If necessary, place the pan on a block of wood and use a hammer to flatten and restore the gasket surfaces. Clean the mating surfaces with lacquer thinner or acetone. Place a 2 mm diameter bead of RTV sealant on the oil pan-to-block sealing flanges and the oil pan-to-front cover surface. Apply a thin coat of RTV sealant to the ends of the rear oil pan seal down to the ears. Press the oil pan seal into position. Carefully place the oil pan against the block. Install the bolts/nuts and tighten them in 1/4-turn increments. Start with the bolts closest to the center of the pan and work out in a spiral pattern. Don't overtighten them or leakage may occur. Reinstall components removed for access to the oil pan. Add oil and install a new filter, run the engine, and check for oil leaks.
- Q: How to remove and reinstall the oil pan in 2.3L four cylinder (Quad-4) engine for a Chevrolet Beretta?A: The following procedure is based on the assumption the engine is in place in the vehicle. If its been removed, simply unbolt the oil pan and detach it from the block. Disconnect the negative battery cable from the battery, then drain the oil. Remove the lower splash shield. Detach the lower bellhousing cover. Unbolt the exhaust manifold brace. Remove the radiator outlet pipe-to-oil pan bolt. On manual transaxle equipped models, remove the transaxle-to-oil pan nut and stud with a 7 mm socket. Gently pry the spacer out from between the oil pan and transaxle. Remove the oil pan-to-transaxle bolt. Remove the oil pan mounting bolts. Carefully separate the pan from the block. Don't pry between the block and pan or damage to the sealing surfaces may result and oil leaks may develop. The Crankshaft may have to be rotated to gain clearance for oil pan removal. If you need to get at the crankshaft or other lower end components, remove the oil pan baffle. Clean the sealing surfaces with lacquer thinner or acetone. Make sure the bolt holes in the block are clean. The gasket should be checked carefully and replaced with a new one if damage is noted. Minor imperfections can be repaired with ATV sealant. Use only enough sealant to restore the gasket to its original size and shape. Excess sealant may cause part misalignment and oil leaks. Reinstall the oil pan baffle, if removed. With the gasket in position, carefully hold the pan against the block and install the bolts finger tight. Tighten the bolts. Start at the center of the pan and work out toward the ends in a spiral pattern. Note that the bolts are not all tightened to the same torque figure. The remaining steps are the reverse of removal. Don't forget to refill the engine with oil before starting it. Start the engine and check carefully for oil leaks at the oil pan.
Related Chevrolet Beretta Parts
 Chevrolet Beretta Oil Filter
 Chevrolet Beretta Oil Cooler
 Chevrolet Beretta Crankshaft Thrust Washer Set
 Chevrolet Beretta Drain Plug
 Chevrolet Beretta Oil Pressure Switch
 Chevrolet Beretta Crankshaft
 Chevrolet Beretta Oil Pump
 Chevrolet Beretta Crankshaft Pulley
 Chevrolet Beretta Oil Pan Gasket
 Chevrolet Beretta Rod Bearing
 Chevrolet Beretta Dipstick
 Chevrolet Beretta Dipstick Tube