×
My Garage
My Account
My Cart
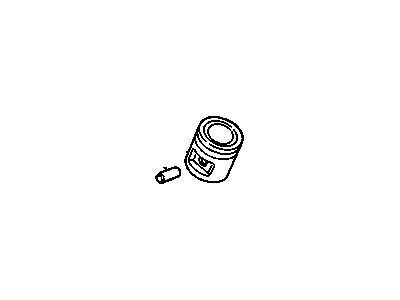
Genuine Chevrolet Beretta Piston
Engine PistonsEnter your vehicle info to find more parts and verify fitment
- Select Vehicle by VIN
- Select Vehicle by Model
Select by VIN
orEnter your VIN for the most accurate results.Enter your VIN for the most accurate results.
Select by Model
-- Select Make --
-- Select Model --
-- Select Year --
22 Pistons found

Chevrolet Beretta Piston Asm,(W/ Pinion)
Part Number: 24508726- Other Name: PISTON, Engine Piston; Piston
$40.86 MSRP: $82.38You Save: $41.52 (51%)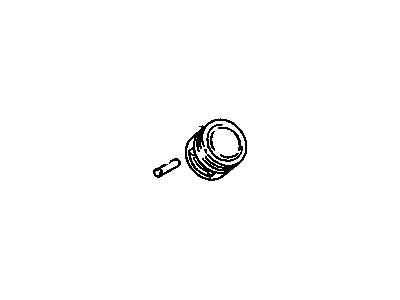
Chevrolet Beretta Pstn & Piston Pinion Asm
Part Number: 14102688- Other Name: PISTON, Engine Piston; Piston, Pistons
$54.38 MSRP: $109.66You Save: $55.28 (51%)
Chevrolet Beretta Piston Asm
Part Number: 10184907- Other Name: PISTON, Engine Piston
$58.74 MSRP: $118.45You Save: $59.71 (51%)Chevrolet Beretta Piston Asm,(W/ Pinion)
Part Number: 24505806- Other Name: PISTON, Engine Piston; Piston
$60.44 MSRP: $121.88You Save: $61.44 (51%)
Chevrolet Beretta Piston,(W/Pinion)
Part Number: 24576691- Other Name: PISTON, Engine Piston; Piston, Pistons
- Replaces: 10141960
$136.21
Chevrolet Beretta Piston & Pinion Asm(1.0Mm Oversize)
Part Number: 10198847- Other Name: PISTON, Engine Piston
$63.40 MSRP: $117.75You Save: $54.35 (47%)Chevrolet Beretta Piston & Pinion, 0.25 Oversize 2.3 L
Part Number: 22548438- Other Name: PISTON, Engine Piston

Chevrolet Beretta Pstn & Piston Pinion Asm, Std
Part Number: 10112366- Other Name: PISTON, Engine Piston; Pistons
Chevrolet Beretta Piston Assembly, (W/ Pinion)
Part Number: 24576692- Other Name: PISTON, Engine Piston
- Replaces: 10141961
Chevrolet Beretta Piston Assembly, W/ Pinion (0.5M Oversize)
Part Number: 24504503- Other Name: PISTON, Engine Piston
Chevrolet Beretta Piston Assembly, W/Pinion(0.5 Mm Oversize)
Part Number: 10208893- Other Name: PISTON, Engine Piston
Chevrolet Beretta Piston Assembly, W/Pinion(1.0 Mm Oversize)
Part Number: 10208894- Other Name: PISTON, Engine Piston
Chevrolet Beretta Piston & Pinion Asm(.04Mm Oversize)
Part Number: 10100061- Other Name: PISTON, Engine Piston
Chevrolet Beretta Piston & Pinion Asm(0.50Mm Oversize)
Part Number: 10198846- Other Name: PISTON, Engine Piston
Chevrolet Beretta Piston Assembly, W/ Pinion
Part Number: 10103688- Other Name: PISTON, Engine Piston; Piston, Pistons
Chevrolet Beretta Piston & Pinion Asm(0.5Mm Oversize)
Part Number: 10100062- Other Name: PISTON, Engine Piston
Chevrolet Beretta Piston & Pinion, Std 2.3L
Part Number: 22548437- Other Name: PISTON, Engine Piston; Piston
Chevrolet Beretta Piston,W/Pinion(0.50Mm Oversize)
Part Number: 12360096- Other Name: PISTON, Engine Piston
| Page 1 of 2 |Next >
1-20 of 22 Results
Chevrolet Beretta Piston Parts Questions & Answers
- Q: How to remove piston/connecting rod assemblies in an engine?A: Prior to removing the piston/connecting rod assemblies, remove the Cylinder Head(s), the oil pan and the oil pump. Use your fingernail to feel if a ridge has formed at the upper limit of ring travel (about 1/4-inch down from the top of each cylinder). If carbon deposits or cylinder wear have produced ridges, they must be completely removed with a special tool. Follow the manufacturer's instructions provided with the tool. Failure to remove the ridges before attempting to remove the piston/connecting rod assemblies may result in piston breakage. After removing all of these ridges from these cylinders, turn an engine upside down so that its Crankshaft faces up. Prior to removing connecting rods, see whether there is any endplay using feeler gauges. Insert feeler gauges between number one connecting rod and crankshaft throw until play is eliminated. Endplays are equal to thickness(es) of feeler gauge(s). When the service limit is over exceeded, new connecting rods need to be ordered accordingly. In case you install new rods (or a new crankshaft), endplay might fall below this minimum. Always check for marks on both caps and connecting rods-they should be there. If there aren't any marks on them, use a small center punch and put an appropriate number of indentations into each rod and cap (1, 2, 3 etc.) depending on what type of engine one is dealing with and which cylinder it relates to Loosen each of these connecting rod cap nuts 1/2 turn at a time until they can hand-removed. Take off bearing insert from number one connect rod cap. Do not let bearing insert accidentally fall out of cap Slip short piece of rubber hose or plastic tubing over each bolt in connecting rod cap while removing pistons so that scratches or grooves cannot damage any crankshaft journal or cylinder wall Push assembly out through top of engine and remove bearing insert. On piston pin hole side, use a wooden or plastic hammer handle to push on upper bearing surface in connecting rod. If you feel any resistance simply double check that the ridge was completely removed from the cylinder. Repeat this process for all remaining cylinders After removal, install connecting rod caps and bearing inserts back into their respective connecting rods and tighten cap nuts finger tight. Until reassembly, consider leaving old bearing inserts in place to prevent the accidental nicking or gouging of the connecting rod bearing surfaces Don't take pistons apart from connecting rods.
- Q: How to inspect piston/connecting rod assemblies and replace piston rings?A: First, before beginning the inspection, clean the piston/connecting rod assemblies and remove the old Piston Rings so that you always use new ones when reassembling the engine. Use a piston ring installation tool to take off the rings without damaging the pistons. Once most of the deposits have been scraped away, scrape every bit off carbon deposits from the piston tops by using a hand-held wire brush or fine emery cloth; do not use a wire brush driven by a drill motor to prevent erosion of the pistons. A tool for cleaning out carbon from a ring groove or an old ring piece should be used to sweep out carbon from ring grooves without scoring their sides. When deposit removal is complete, clean these with solvent and dry with compressed air if available. If neither heavy wear nor damage is found on pistons and cylinder walls, and also no reboring of engine block has occurred then new pistons may not be necessary. Even vertical wear on piston thrust surfaces and slight top ring looseness in its groove are classic symptoms of normal piston wear. If one intends to rebuild an engine, then it's necessary to use new rings for each piston. Every single piston must be thoroughly inspected for cracks at skirt, pin bosses as well as ring lands. Inability to move freely due to scoring or scuffing; burnt areas around crown edge; holes in its crown will mean problems such as overheating abnormal combustion including spark knock needs immediate attention. The presence of small pits indicates that there is coolant leakage which must be rectified. Measure this with feeler gauge next to a new piston ring in each groove at many points. Bore measurements are taken at specific points depending on engine type while diameter checks are made across several positions along side clearance of each groove with reference to feeler gauge readings and specifications provided by vehicle maker require usage of various locations according kind machine used During measurement of heights-which are taken at different locations with respect to ring manufacturers' specifications-these must never go beyond the given limit. However, if the clearances are greater than specified, then it means that the block must be rebored and new pistons and rings installed. If there is any play in a piston-to-rod clearance, this can be checked by taking the assembly to an automotive machine shop where excessive wear can be addressed. In case piston disassembling is required, consult an automotive machine shop but when there, do not take apart pistons as well as connecting rods unless unnecessary and at that stage examine connecting rods for bend and twist too. Look out for cracks or damage in connecting rods doing temporary removal of rod caps to inspect or replace worn bearing inserts before cleaning both rod and cap bearing surfaces so that when connecting rod knock may necessitate a complete rebuild of this engine that is already being done.
- Q: How to begin the installation of the piston/connecting rod assemblies?A: To start with the installation of piston/connecting rod assemblies, ensure that the cylinder walls are spotlessly clean, top edges of each cylinder are chamfered and the Crankshaft is in place. Get off the end cap from number one connecting rod while paying attention to any marks made when it was being removed and wipe the old bearing inserts with a clean, lint-free cloth to keep the connecting rod and cap bearing surfaces spotlessly clean always. To check for clearance on connecting rod bearings, put a new upper bearing insert flat on its backside before placing it in the connecting rod, making sure that the tab on the bearing properly fits into an opening in the rod. Also put a new lower bearing insert flat against its backside then push it up into position in a similar way as one did above while ensuring that its tab aligns well with an opening in a cap. Arrange Piston Ring gaps at 120-degree intervals around piston, lubricate piston and rings lightly with clean engine oil and use aring compressor to compress rings flush with piston while gently pushing the piston/rod assembly into number one cylinder bore making sure it is in correct orientation. Gently tap piston guiding connecting rod onto crankshaft journal but avoid forcing it. Afterward, install Plastigage between caps and later reinstall them without disturbing Plastigage completely then look at thickness of flattened tape by comparing it to specifications. Remove cap without disturbing Plastigage and remove all traces of Plastigage material. For three steps of reinstalling the cap and nuts, spread equal amount of clean moly-base grease or engine assembly lube over both bearing faces evenly. Repeat again this procedure for other pistons/rods checking cleanliness, right piston/rod assemblies, orientation and lubrication as well. Finally after installation turn crankshaft manually make sure there is no binding; check connection rod endplay if necessary.
Related Chevrolet Beretta Parts
 Chevrolet Beretta Crankshaft Thrust Washer Set
 Chevrolet Beretta Drain Plug
 Chevrolet Beretta Crankshaft
 Chevrolet Beretta Crankshaft Gear
 Chevrolet Beretta Crankshaft Pulley
 Chevrolet Beretta Alternator Bracket
 Chevrolet Beretta Automatic Transmission Seal
 Chevrolet Beretta Belt Tensioner Bolt
 Chevrolet Beretta Brake Caliper Bolt