×
My Garage
My Account
My Cart
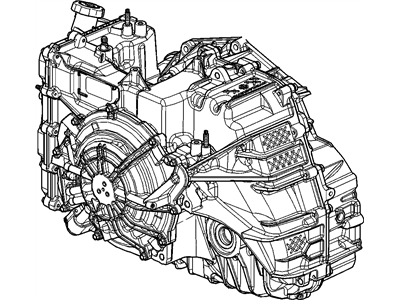
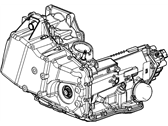
Genuine Chevrolet Impala Transmission Assembly
Trans AssemblyEnter your vehicle info to find more parts and verify fitment
- Select Vehicle by VIN
- Select Vehicle by Model
Select by VIN
orEnter your VIN for the most accurate results.Enter your VIN for the most accurate results.
Select by Model
-- Select Make --
-- Select Model --
-- Select Year --
46 Transmission Assemblies found
Chevrolet Impala Transaxle Assembly, Auto 7Wlk
Part Number: 19417243- Other Name: Transaxle
- Replaces: 24262790, 24278558, 19354260, 24260663, 24257285
$4030.21 MSRP: $4535.30You Save: $505.09 (12%)
Chevrolet Impala Transaxle Asm,Auto (Goodwrench Remanufacture) (09Ajb)
Part Number: 17804089- Other Name: TRANSAXLE, Automatic; Transaxle
- Replaces: 17803973, 17803893, 17803841, 17803728
$2597.70 MSRP: $2921.95You Save: $324.25 (12%)Chevrolet Impala Transaxle Asm,Auto (Goodwrench Remanufacture) (09Lcb)
Part Number: 17804088- Other Name: TRANSAXLE, Automatic; Transaxle
- Replaces: 17803972, 17803840, 17803729, 17803894
$2585.48 MSRP: $2908.13You Save: $322.65 (12%)Chevrolet Impala Transaxle Asm,Auto (Goodwrench Remanufacture) (05Rdb)
Part Number: 24235540- Other Name: TRANSAXLE, Automatic; Transaxle
- Replaces: 24230053
$2827.85 MSRP: $3182.30You Save: $354.45 (12%)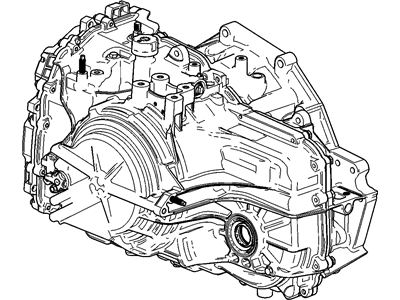
Chevrolet Impala Transaxle Asm,Auto (Service Remanufacture)
Part Number: 19354016- Other Name: TRANSAXLE ASM,AUTO (SERVICE REMAN); Transaxle
- Replaces: 24273863, 24275770, 24278119
$4040.71 MSRP: $4535.30You Save: $494.59 (11%)Chevrolet Impala Transaxle Asm,Auto (Goodwrench Remanufacture) (09Asb)
Part Number: 17804090- Other Name: TRANSAXLE, Automatic; Transaxle
- Replaces: 17803727, 17803974, 17803842, 17803892
$2585.48 MSRP: $2908.13You Save: $322.65 (12%)Chevrolet Impala Transaxle Asm,Auto (Goodwrench Remanufacture) (09Acb)
Part Number: 17804091- Other Name: TRANSAXLE, Automatic; Transaxle
- Replaces: 17803843, 17803888, 17803725, 17803976
$2624.77 MSRP: $2952.56You Save: $327.79 (12%)Chevrolet Impala Transaxle Asm,Auto (Service Remanufacture) *Programming
Part Number: 19332871- Other Name: TRANSAXLE, Automatic; Transaxle
- Replaces: 19303654, 24264094, 24253529
$4069.68 MSRP: $4568.08You Save: $498.40 (11%)Chevrolet Impala Transaxle Assembly, Auto
Part Number: 24278119- Other Name: Transaxle
- Replaced by: 19354016
$4040.71 MSRP: $4535.30You Save: $494.59 (11%)Chevrolet Impala TRANSAXLE ASM,AUTO (SERVICE REMAN) 4EKW *PROGRAMMING
Part Number: 19332227- Other Name: Transaxle
- Replaces: 24260682
$4030.21 MSRP: $4535.30You Save: $505.09 (12%)
Chevrolet Impala Transaxle Asm,Auto (Goodwrench Remanufacture) 00Lcb
Part Number: 89059864- Other Name: TRANSAXLE
- Replaces: 24215105
$739.23 MSRP: $2320.50You Save: $1581.27 (69%)Chevrolet Impala Transaxle Asm,Auto (Goodwrench Remanufacture) 00Rnb
Part Number: 89059861- Other Name: TRANSAXLE
- Replaces: 24215102
$2204.15 MSRP: $2476.75You Save: $272.60 (12%)Chevrolet Impala Transaxle Asm,Auto (Goodwrench Remanufacture) 00Rwb
Part Number: 89059877- Other Name: TRANSAXLE
- Replaces: 24216470
$2379.92 MSRP: $2675.59You Save: $295.67 (12%)Chevrolet Impala TRANSAXLE ASM,AUTO 32WK (2.44 RATIO)*PROGRAMMING
Part Number: 19354256- Other Name: Transaxle
- Replaces: 24255765
$4059.18 MSRP: $4568.08You Save: $508.90 (12%)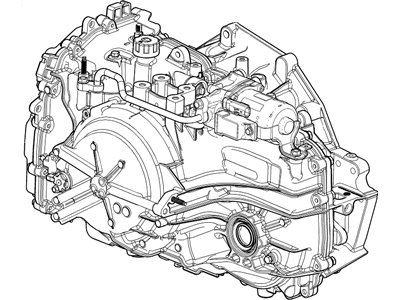
Chevrolet Impala Transaxle Assembly, Auto
Part Number: 24267508- Other Name: Transaxle Assembly, Auto 6Ccw
$4030.21 MSRP: $4535.30You Save: $505.09 (12%)Chevrolet Impala Transmission Asm,Auto (6Bfd) (Remanufactured)
Part Number: 24203888- Other Name: TRANSMISSION, Automatic
Chevrolet Impala Transmission Asm,Auto (4Bfd) (Remanufactured)
Part Number: 8690985- Other Name: TRANSMISSION, Automatic
Chevrolet Impala Transaxle Asm,Auto (Goodwrench Remanufacture) 00Rdb
Part Number: 89059859- Other Name: TRANSAXLE
- Replaces: 24215100
Chevrolet Impala Transmission Asm,Auto (5Bwd) (Remanufactured)
Part Number: 24201929- Other Name: TRANSMISSION, Automatic; Transmission
Chevrolet Impala Transmission Asm,Auto (5Bfd) (Remanufactured)
Part Number: 24201930- Other Name: TRANSMISSION, Automatic
| Page 1 of 3 |Next >
1-20 of 46 Results
Chevrolet Impala Transmission Assembly Parts Questions & Answers
- Q: How do I remove and install a transaxle?A: To remove the transmission assembly, start by disconnecting the cable from the negative battery terminal and loosening the front wheel lug nuts. Remove the engine cover and the air inlet duct from the throttle body and air cleaner housing. Label and disconnect all transmission assembly wiring and grounds accessible from the top. Use a screwdriver to pry the transmission assembly shifter cable from the lever on top of the transmission assembly and move it out of the way. Raise the vehicle and support it securely on jackstands. Attach an engine support fixture or hoist to the engine and raise it to support its weight. Remove the upper transmission assembly-to-engine bolts, front wheels, and inner fender splash shields. Remove the subframe, starter, torque converter bolt access cover, and drive plate-to-torque converter bolts. Disconnect the transmission assembly cooler lines and remove both driveaxles. Disconnect the vehicle speed sensor and support the transmission assembly with a jack. Remove the lower transmission assembly-to-engine mounting bolts and slide the transmission assembly away from the engine before lowering it. To install the transmission assembly, ensure the torque converter is completely seated and apply grease to the nose of the converter. Make sure the transmission assembly seats against the engine completely before tightening the bolts. Tighten all bolts to the specified torque. Also, tighten the subframe mounting bolts, intermediate shaft pinch bolt, control arm balljoint-to-steering knuckle nuts, and tie-rod end-to-steering knuckle nuts to the torque specifications. Securely tighten the transmission assembly mounting fasteners and the wheel lug nuts. Check and adjust the front-end alignment if necessary. Adjust the Shift Cable and check the transmission assembly fluid level, adding fluid as needed.
- Q: What Steps Should Be Taken When Diagnosing Automatic Transaxle Problems, and Why Should Transaxle Removal Be Avoided Without Proper Assessment?A: When a fault occurs, the first step is to determine if it is of electrical, mechanical or hydraulic origin before attempting any repairs. For this reason, an understanding of the transmission assembly's operation and design as well as access to specialized test equipment are necessary. Consequently, problems with the transmission assembly cannot be diagnosed using this manual. Therefore, all vehicle owners having issues with their transmission systems should direct them to Dealer Service Department or Qualified Repair Facility for evaluation. Similarly though a faulty transmission assembly should not be removed without being examined by an informed technician with appropriate tools because troubleshooting has to be performed in vehicle installation of the drive train.
Related Chevrolet Impala Parts
 Chevrolet Impala Torque Converter
 Chevrolet Impala Valve Body
 Chevrolet Impala Transmission Pan
 Chevrolet Impala Transmission Gasket
 Chevrolet Impala Side Cover Gasket
 Chevrolet Impala Transmission Oil Cooler
Browse by Year
2020 Transmission Assembly 2019 Transmission Assembly 2018 Transmission Assembly 2017 Transmission Assembly 2016 Transmission Assembly 2015 Transmission Assembly 2014 Transmission Assembly 2013 Transmission Assembly 2012 Transmission Assembly 2011 Transmission Assembly 2010 Transmission Assembly 2009 Transmission Assembly 2008 Transmission Assembly 2007 Transmission Assembly 2006 Transmission Assembly 2005 Transmission Assembly 2004 Transmission Assembly 2003 Transmission Assembly 2002 Transmission Assembly 2001 Transmission Assembly 2000 Transmission Assembly 1996 Transmission Assembly 1995 Transmission Assembly 1994 Transmission Assembly