


Your vehicle deserves only genuine OEM GM parts and accessories. To ensure reliability, purchase GM part # 15951978 Rear Lower Suspension Control Arm Assembly. It is sometimes referred to as Buick Control Arm, Buick Trailing Arm. Our GM parts and accessories are expedited directly from authorized GM dealers strategically located all across the U.S. and are backed by the manufacturer's 12 month, 12,000 mile warranty. OEM GM parts are the best for restoring your vehicle to factory condition performance. This part fits specific Buick Enclave models.
Affordable, reliable and built to last, GM part # 15951978 Rear Lower Suspension Control Arm Assembly stands out as the smart option. GMPartsGiant.com is your prime online source with the biggest and best selection of genuine GM parts and accessories at giant discounted prices. We have the OEM GM parts and accessories you need at the wholesale prices. GMPartsGiant.com has you covered no matter what type of GM vehicle you drive. For detailed Buick parts information, click here.
×
My Garage
My Account
My Cart
Make sure this part fits your vehicle
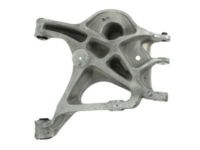
Buick 15951978 Rear Lower Suspension Control Arm Assembly
2008-2017 Buick Enclave


- Part DescriptionArm Assembly, Rear Suspension Lower Control ; Arm, Rear Axle Control Arm
- PositionRear Lower
- ManufacturerGeneral Motors
$202.93 MSRP: $587.55 1
You Save: $384.62 (66%)
Ships in 1-2 Business Days
Product Specifications
Brand Genuine Buick Manufacturer Part Number 15951978 Part Description Arm Assembly, Rear Suspension Lower Control ; Arm, Rear Axle Control Arm Other Names Lower Control Arm Item Dimensions 21.3 x 20.0 x 6.6 inches Item Weight 22.30 Pounds Position Rear Lower Condition New Fitment Type Direct Replacement Manufacturer General Motors SKU 15951978 Warranty This genuine GM part is guaranteed by GM's factory warranty. Shipping & Return Shipping Policy Return Policy Warning: California’s Proposition 65Vehicle Fitment
Year Make Model Engine Important vehicle option details 2008-2017 Buick Enclave 6 Cyl 3.6L SPORT UTILITY VEHICLE 2WD, SPORT UTILITY VEHICLE 4WD, SPORT UTILITY VEHICLE AWD
Customer Questions & Answers
- Q:I am wonder if this is complete and correct part for my vehicle. Posted by GMPartsGiant Specialist
- A:You can Select Your Vehicle to check if 15951978 fits your vehicle.Posted by GMPartsGiant Specialist
- Q:How do you remove the Trailing Arm? Posted by Customer
- A:To remove the upper trailing arm, start by loosening the wheel lug nuts and raising the vehicle on jackstands. Support it securely and block the front wheels. Remove the wheel and detach the ABS wheel speed sensor harness clips from the trailing arm. Use a floor jack to support the lower control arm and remove the upper trailing arm-to-knuckle nut and bolt. Make an alignment mark on the upper trailing arm adjuster cam to the subframe. Hold the adjuster cam bolt with a wrench and unscrew the nut. Remove the nut and cam, then remove the pivot bolt. Finally, remove the upper trailing arm from the knuckle and subframe. For installation, raise the lower control arm to simulate normal ride height and align the marks on the adjuster cam and subframe. Tighten the inner and outer fasteners to the proper torque specifications. Install the wheel, lower the vehicle, and tighten the lug nuts. Have the wheel alignment checked and adjusted if necessary. To remove the lower trailing arm, remove the coil spring and the trailing arm-to-subframe pivot bolts. For installation, raise the outer end of the trailing arm with a floor jack to simulate normal ride height. Install the wheel, lower the vehicle, and tighten the lug nuts. For the adjuster link, remove the rear shock absorber and the adjuster link-to-knuckle nut. Make an alignment mark on the adjuster link adjuster cam to the subframe. Hold the adjuster cam bolt with a wrench and unscrew the nut. Remove the nut and cam, then remove the pivot bolt. Remove the adjuster link from the knuckle and subframe. For installation, raise the outer end of the lower trailing arm with a floor jack to simulate normal ride height. Install the wheel, lower the vehicle, and tighten the lug nuts. Have the wheel alignment checked and adjusted if necessary. To remove the upper trailing arm-to-lower trailing arm link, support the lower trailing arm with a floor jack and remove the upper trailing arm-to-knuckle bolt. Remove the link-to-knuckle bolt and detach the link. For installation, raise the outer end of the trailing arm with a floor jack to simulate normal ride height. Install the wheel, lower the vehicle, and tighten the lug nuts. Have the wheel alignment checked and adjusted if necessary.Posted by GMPartsGiant Specialist
- Q:How do you remove the control arm? Posted by Customer
- A:To remove the control arm, start by loosening the wheel lug nuts and raising the front of the vehicle on jackstands. Remove the wheel and disconnect the tie-rod end from the steering knuckle. Loosen the balljoint nut and use a puller to separate the balljoint from the steering knuckle. Remove the front bushing nut and the control arm pivot bolt nut, then detach the control arm from the sub-frame. Inspect the control arm for distortion and the bushings for wear, replacing any damaged parts. To install the control arm, reverse the removal steps, making sure to leave the pivot bolt nut and front bushing nut finger tight until all other components are installed. Before tightening the pivot nuts, raise the outer end of the control arm to simulate normal ride height and then tighten the nuts to the proper torque specifications. Finally, have the front wheel alignment checked and adjusted if necessary.Posted by GMPartsGiant Specialist
- Q:How do you remove the control arm for the 2009 Chevrolet Traverse? Posted by Customer
- A:To remove the control arm, start by loosening the wheel lug nuts and raising the front of the vehicle on jackstands. Remove the wheel and disconnect the tie-rod end from the steering knuckle. Loosen the balljoint nut and use a puller to separate the balljoint from the steering knuckle. Remove the front bushing nut and the control arm pivot bolt nut, then detach the control arm from the sub-frame.Posted by GMPartsGiant Specialist
- See expert answers on similar Control Arm
- Q:What are the steps to remove the adjuster link for the 2010 Chevrolet Traverse? Posted by Customer
- A:Remove the rear shock absorber and the adjuster link-to-knuckle nut. Make an alignment mark on the adjuster link adjuster cam to the subframe. Hold the adjuster cam bolt with a wrench and unscrew the nut. Remove the nut and cam, then remove the pivot bolt. Remove the adjuster link from the knuckle and subframe.Posted by GMPartsGiant Specialist
- See expert answers on similar Trailing Arm
- Q:What are the steps to remove the upper control arm for the 2008 GMC Acadia? Posted by Customer
- A:Remove the upper control arm-to-knuckle nut and bolt. Make an alignment mark on the upper control arm adjuster cam to the subframe. Hold the adjuster cam bolt with a wrench and unscrew the nut. Remove the nut and cam, the pivot bolt, and then the upper control arm from the knuckle and subframe.Posted by GMPartsGiant Specialist
- See expert answers on similar Trailing Arm
- Q:How do you install the control arm for the 2016 GMC Acadia? Posted by Customer
- A:To install the control arm, you need to reverse the removal steps. Make sure to leave the pivot bolt nut and front bushing nut finger tight until all other components are installed.Posted by GMPartsGiant Specialist
- See expert answers on similar Control Arm
If you have any questions about this product, please don't hesitate to ask us. We will be happy to help you!
Genuine GM Part 15951978, the Right Choice
Why choose GM Parts Giant
- Dedicated Service
Your complete satisfaction is our #1 goal
- Lowest Prices
Best deals on genuine OE parts from dealerships
- Fast Delivery
Orders are processed and delivered promptly