


Your vehicle deserves only genuine OEM GM parts and accessories. To ensure reliability, purchase GM part # 12592195 Seal Assembly, Crankshaft Rear Oil. It is sometimes referred to as Buick Crankshaft Seal. Our GM parts and accessories are expedited directly from authorized GM dealers strategically located all across the U.S. and are backed by the manufacturer's 12 month, 12,000 mile warranty. OEM GM parts are the best for restoring your vehicle to factory condition performance. This part fits specific Buick Century, Regal, Skyhawk models.
Affordable, reliable and built to last, GM part # 12592195 Seal Assembly, Crankshaft Rear Oil stands out as the smart option. GMPartsGiant.com is your prime online source with the biggest and best selection of genuine GM parts and accessories at giant discounted prices. We have the OEM GM parts and accessories you need at the wholesale prices. GMPartsGiant.com has you covered no matter what type of GM vehicle you drive. For detailed Buick parts information, click here.
×
My Garage
My Account
My Cart
Make sure this part fits your vehicle
Buick 12592195 Seal Assembly, Crankshaft Rear Oil
1985-2011 Buick
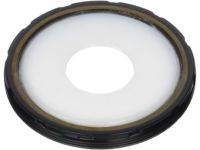


- Part DescriptionSEAL KIT, Engine Rear Main Bearing
- PositionRear
- Replaces14085829
- ManufacturerGeneral Motors
$39.95 MSRP: $69.53 1
You Save: $29.58 (43%)
Ships in 1-2 Business Days
Product Specifications
Brand Genuine Buick Manufacturer Part Number 12592195 Part Description SEAL KIT, Engine Rear Main Bearing Item Dimensions 4.3 x 4.3 x 0.5 inches Item Weight 0.50 Pounds Position Rear Condition New Fitment Type Direct Replacement Replaces 14085829 Manufacturer General Motors SKU 12592195 Warranty This genuine GM part is guaranteed by GM's factory warranty. Shipping & Return Shipping Policy Return Policy Warning: California’s Proposition 65Vehicle Fitment
Year Make Model Engine Important vehicle option details 2000-2005, 1985-1989 Buick Century 6 Cyl 2.8L, 6 Cyl 3.1L CUSTOM, CUSTOM 2 DOOR, CUSTOM 4 DOOR, CUSTOM STATION WAGON, GL, GLX, GS, LIMITED, LIMITED 2 DOOR, LIMITED 4 DOOR, LS 2009-2011 Buick Lucerne 6 Cyl 3.9L, 6 Cyl 3.9L Flex CX 4 DOOR, CXL 4 DOOR, V6 CX/CXL 4 DOOR, V8 CXL/SUPER 4 DOOR, V8 SUPER SERIES 4 DOOR 2000-2004, 1988-1990 Buick Regal 6 Cyl 2.8L, 6 Cyl 3.1L 2 DOOR, 4 DOOR, CUSTOM, CUSTOM 2 DOOR, GL, GLX, GS, LIMITED, LS, REGAL 2005-2007, 2002-2003 Buick Rendezvous 6 Cyl 3.4L, 6 Cyl 3.5L AWD, RENDEZVOUS 1987-1989 Buick Skyhawk 4 Cyl 2.0L 2 DOOR, 4 DOOR, CUSTOM 2 DOOR NOTCHBACK, CUSTOM 4 DOOR, CUSTOM STATION WAGON, LIMITED 2 DOOR, LIMITED 4 DOOR, LIMITED WAGON, SPORT 2 DOOR, STATION WAGON 1985 Buick Skylark 6 Cyl 2.8L CUSTOM 4 DOOR, LIMITED 4 DOOR 2005-2007 Buick Terraza 6 Cyl 3.5L, 6 Cyl 3.9L, 6 Cyl 3.9L Flex CROSSOVER SPORT VAN EXTENDED, CROSSOVER SPORT VAN EXTENDED AWD
Customer Questions & Answers
- Q:I am wonder if this is complete and correct part for my vehicle. Posted by GMPartsGiant Specialist
- A:You can Select Your Vehicle to check if 12592195 fits your vehicle.Posted by GMPartsGiant Specialist
- Q:How to remove and install the lower half of the rear main bearing seal on Buick Century and Regal? Posted by Customer
- A:To remove and install the lower half of the rear Crankshaft Seal on Buick 231, 252, and 350, as well as Oldsmobile 307 engines, start by removing the oil pan and rear main bearing cap. Remove the old oil seal from the bearing cap and apply a sealer to the seal groove. Quickly roll a new seal into the groove with both ends projecting above the cap's parting surface, using a suitable tool. Apply a thin film of chassis grease to the rope seal's working surface, then force it into the groove with a smooth tool or a hammer handle until it projects no more than 1/8 inch (1.5mm) above the groove. Rotate the tool slightly and cut the seal ends flush with the cap's surface using a razor blade. For Buick 231, 252, and 350 engines, soak new neoprene side seals in kerosene for five minutes and place them in the grooves on the bearing cap. Ensure they are not cut to fit. Apply a sealer to the surface of the bearing cap that mates with the block around the seal groove. Reverse the removal steps to install the cap and oil pan. Operate the engine at low rpm when first started after a new seal is installed. For the upper half of the oil seal replacement on Buick engines, though it's recommended to remove the crankshaft, you can replace it without removing the crankshaft. Loosen the other crankshaft main bearings to allow the crankshaft to drop about 1/8 inch (0.062mm). Remove the old upper half of the seal and lubricate the new seal with oil (for 1975-84 vehicles) or chassis grease (for 1985-87 vehicles). Use a soft copper wire to pull the new seal into place around the crankshaft, ensuring it protrudes equally on each side. Remove excess seal if necessary. Check the bearings, torque the bearing cap bolts to specifications, replace the oil pan, and run the engine slowly during the first few minutes of operation to break in the new seal. For 305 and 350 Chevrolet engines, remove the oil pan, pump, and rear main bearing cap. Pry out the lower seal and lightly tap the upper seal out. Clean all mating surfaces and install the new seals by lubricating the seal lips and beads, making sure the lips face the front of the engine. Use an installation tool to protect the seal as you work it around the crankshaft. Ensure there is no oil on mating surfaces, then replace the oil pan, pump, and run the engine to break in the new seals. In the case of 265 and 301 Pontiac engines, remove the oil pan and baffle, the rear main bearing cap, and form a new seal in the cap. Drive the upper seal into the groove on each side until it's tightly packed. Then, cut pieces from the new seal and insert them into the gaps at the end of the seal in the block. No material should be cut off. Apply a 1/16-inch bead of silicone sealer from the center of the seal across to the external gasket groove. Reassemble the cap, tighten the bolts to specification, and reinstall the oil pan. Finally, run the engine slowly for the first few minutes to break in the new seal. For 263, 350, and 403 Oldsmobile engines, you can replace the upper oil seal without removing the crankshaft. Drain the crankcase and remove the oil pan and rear main bearing cap. Drive the upper seal into the groove on each side until it's packed. Cut the pieces of the new seal slightly longer than needed to fill the grooves and install them, packing them into place. Place shim stock between the seal and crankshaft to prevent damage, then trim any protruding seal without scratching the bearing surface. Install a new seal in the bearing cap, reinstall the cap, and tighten the bolts to the specified torque. Finally, reinstall the oil pan.Posted by GMPartsGiant Specialist
- Q:What should you ensure while driving the seal into place for the 1987 Chevrolet Beretta? Posted by Customer
- A:Ensure that the seal enters the bore squarely and stop when the front face is at the appropriate depth.Posted by GMPartsGiant Specialist
- See expert answers on similar Crankshaft Seal
- Q:How do you remove the rear main oil seal for the 1988 Chevrolet Beretta? Posted by Customer
- A:First, remove the oil pan. Then, remove the bolts and detach the seal housing. Drive the old seal out from the back side with a punch and hammer.Posted by GMPartsGiant Specialist
- See expert answers on similar Crankshaft Seal
- Q:How should the new seal be pressed into place for the 1992 Chevrolet Beretta? Posted by Customer
- A:The new seal should be pressed into place with a special tool, if available. If not available, it should be carefully worked over the end of the crankshaft and tapped in with a hammer and blunt punch until seated in the bore.Posted by GMPartsGiant Specialist
- See expert answers on similar Crankshaft Seal
- Q:What should you do before installing the new seal for the 1990 Chevrolet Beretta? Posted by Customer
- A:Apply a thin coat of ATV-type sealant to the outer edge of the new seal.Posted by GMPartsGiant Specialist
- See expert answers on similar Crankshaft Seal
- Q:How to replace a rear main oil seal in 2.0L/2.2L four cylinder overhead valve engines for Chevrolet Beretta? Posted by Customer
- A:Remove the flywheel/driveplate. Carefully remove the Crankshaft Seal from the engine block using a thin screwdriver or seal removal tool. Be very careful not to damage the crankshaft surface while prying the seal out. Clean the bore in the block and the seal contact surface on the crankshaft. Check the seal contact surface on the crankshaft for scratches and nicks that could damage the new seal lip and cause oil leaks. If the crankshaft is damaged, the only alternative is a new or different crankshaft. Inspect the seal bore for nicks and scratches. Carefully smooth it with a fine file if necessary, but don't nick the crankshaft in the process. It is recommended to use a special tool to install the new Crankshaft Seal. Lubricate the Crankshaft Seal lips. Slide the seal onto the mandril until the dust lip bottoms squarely against the collar of the tool. If the special tool isn't available, carefully work the seal lip over the crankshaft and tap it into place with a hammer and punch. Align the dowel pin on the tool with the dowel pin hole in the crankshaft and attach the tool to the crankshaft by hand-tightening the bolts. Turn the tool handle until the collar bottoms against the case, seating the seal. Loosen the tool handle and remove the bolts. Remove the tool. Check the seal and make sure it's seated squarely in the bore. Install the flywheel/driveplate. Install the transaxle.Posted by GMPartsGiant Specialist
- Q:What should be checked after starting the engine for the 1996 Chevrolet Beretta? Posted by Customer
- A:Check for oil leaks at the seal.Posted by GMPartsGiant Specialist
- See expert answers on similar Crankshaft Seal
- Q:Can the rear main bearing oil seal be replaced without removing the oil pan or crankshaft on 2.2L four cylinder engine on Chevrolet Blazer,S10,GMC Jimmy and Sonoma? Posted by Customer
- A:The rear crankshaft seal can be replaced without removing the oil pan or crankshaft. First, remove the transmission. If equipped with a manual transmission, remove the pressure plate and clutch disc. Next, remove the flywheel or driveplate. Using a seal removal tool or a large screwdriver, carefully pry the seal out of the block. Be careful not to scratch or nick the crankshaft in the process. Clean the bore in the block and the seal contact surface on the crankshaft. Check the crankshaft surface for scratches and nicks that could damage the new seal lip and cause oil leaks. If the crankshaft is damaged, the only alternative is a new or different crankshaft. Apply a light coat of clean engine oil to the seal lip and outer edge of the new seal. Press the new seal into place with GM tool no. J34924(if available). The seal lip must face toward the front of the engine. If the special tool isn't available, carefully work the seal lip over the end of the crankshaft and tap the seal in with a hammer and blunt drift until it's seated squarely in the bore. Install the flywheel or driveplate. If equipped with a manual transmission, reinstall the clutch disc and pressure plate. Finally, reinstall the transmission.Posted by GMPartsGiant Specialist
- Q:What components need to be removed after disconnecting the negative battery cable for the 1996 Chevrolet S10? Posted by Customer
- A:The upper and lower fan shrouds, the cooling fan, and the drive belt.Posted by GMPartsGiant Specialist
- See expert answers on similar Crankshaft Seal
- Q:How should you drive the new seal into place for the 1994 Chevrolet S10? Posted by Customer
- A:You should drive the new seal into place with a large socket and a hammer, ensuring it enters the bore squarely and is driven in until the front face is flush with the cover.Posted by GMPartsGiant Specialist
- See expert answers on similar Crankshaft Seal
- Q:How should you drive the new seal into place for the 2003 GMC Sonoma? Posted by Customer
- A:You should drive the new seal into place with a large socket and a hammer, ensuring it enters the bore squarely and is driven in until the front face is flush with the cover.Posted by GMPartsGiant Specialist
- See expert answers on similar Crankshaft Seal
- Q:How should the new seal be positioned in the bore of the cover for the 1997 GMC Sonoma? Posted by Customer
- A:Support the cover on blocks of wood and position the new seal in the bore with the open end of the seal facing IN.Posted by GMPartsGiant Specialist
- See expert answers on similar Crankshaft Seal
- Q:What additional steps are required if the 2002 GMC Sonoma has a manual transmission? Posted by Customer
- A:If the vehicle has a manual transmission, you should also reinstall the clutch disc and pressure plate.Posted by GMPartsGiant Specialist
- See expert answers on similar Crankshaft Seal
If you have any questions about this product, please don't hesitate to ask us. We will be happy to help you!
Genuine GM Part 12592195, the Right Choice
Why choose GM Parts Giant
- Dedicated Service
Your complete satisfaction is our #1 goal
- Lowest Prices
Best deals on genuine OE parts from dealerships
- Fast Delivery
Orders are processed and delivered promptly