Your vehicle deserves only genuine OEM GM parts and accessories. To ensure reliability, purchase GM part # 12572638 Adjuster,Hydraulic Valve Lash. It is sometimes referred to as Cadillac Lash Adjuster. Our GM parts and accessories are expedited directly from authorized GM dealers strategically located all across the U.S. and are backed by the manufacturer's 12 month, 12,000 mile warranty. OEM GM parts are the best for restoring your vehicle to factory condition performance. This part fits specific Cadillac ATS, CTS, Deville models.
Affordable, reliable and built to last, GM part # 12572638 Adjuster,Hydraulic Valve Lash stands out as the smart option. GMPartsGiant.com is your prime online source with the biggest and best selection of genuine GM parts and accessories at giant discounted prices. We have the OEM GM parts and accessories you need at the wholesale prices. GMPartsGiant.com has you covered no matter what type of GM vehicle you drive. For detailed Cadillac parts information, click here.
×
My Garage
My Account
My Cart
Make sure this part fits your vehicle
Cadillac 12572638 Adjuster,Hydraulic Valve Lash
2000-2022 Cadillac
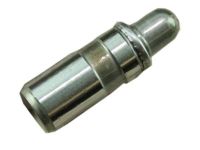


- Part DescriptionADJUSTER, Engine Valve Lifter
- Replaced By12686787
- ManufacturerGeneral Motors
$12.97 MSRP: $21.49 1
You Save: $8.52 (40%)
Ships in 1-2 Business Days
 Bolt/Screw11588713
 Bolt/Screw, Automatic Transmission Oil Pump11515339
 Bolt/Screw,Engine Oil Cooler Coolant Hose11588712
 Bracket, Engine Lift Front12626916
 Key,Valve Stem12575197
 Plug,Cyl Head Oil Gallery11588547
 Retainer, M6 Bolt *Qads11518792
 Seal, Spark Plug Shield12613249
 Spring, Vlv12686721
 Valve,Pcv12663027
Product Specifications
Brand Genuine Cadillac Manufacturer Part Number 12572638 Part Description ADJUSTER, Engine Valve Lifter Other Names Filler Cap O-Ring, Valve Lifters Item Dimensions 3.1 x 3.0 x 3.0 inches Item Weight 0.50 Pounds Condition New Fitment Type Direct Replacement Manufacturer General Motors SKU 12572638 Warranty This genuine GM part is guaranteed by GM's factory warranty. Shipping & Return Shipping Policy Return Policy Warning: California’s Proposition 65Vehicle Fitment
View MoreYear Make Model Engine Important vehicle option details 2013-2019 Cadillac ATS 4 Cyl 2.0L, 4 Cyl 2.5L, 6 Cyl 3.6L 2 DOOR COUPE, 2 DOOR LUXURY COUPE, 2 DOOR PERFORMANCE COUPE, 3 DOOR PREMIUM COUPE, 4 DOOR LUXURY SEDAN, 4 DOOR PERFORMANCE SEDAN, 4 DOOR PREMIUM SEDAN, 4 DOOR SEDAN, V-SERIES 2 DOOR COUPE, V-SERIES 4 DOOR SEDAN 2022 Cadillac CT4 6 Cyl 3.6L V-SERIES NOTCHBACK-BLACKWING 2020-2022 Cadillac CT5 6 Cyl 3.0L LUXURY SEDAN EXT, SPORT SEDAN EXT, V-SERIES SPORT SEDAN EXT 2016-2020 Cadillac CT6 4 Cyl 2.0L, 6 Cyl 3.0L, 6 Cyl 3.6L 4 DOOR SEDAN, BASE 4 DOOR SEDAN, PLATINUM 4 DOOR SEDAN, PREMIUM 4 DOOR SEDAN 2004-2019 Cadillac CTS 4 Cyl 2.0L, 6 Cyl 2.8L, 6 Cyl 3.0L, 6 Cyl 3.6L 2 DOOR COUPE, 4 DOOR, 4 DOOR (RHD), 4 DOOR PERFORMANCE SEDAN, 4 DOOR PLUS SEDAN, 4 DOOR PREMIUM SEDAN, 4 DOOR RHD, 4 DOOR SEDAN, 4 DOOR SEDAN(RHD), 4 DOOR STATION WAGON, 4 DOOR STATION WAGON(RHD), 4 DOOR WAGON, 4 DOOR WAGON(RHD), 4 DOOR(RHD), V 4 DOOR 2006-2011 Cadillac DTS 8 Cyl 4.6L 4 DOOR, FUNERAL COACH, LIMOUSINE 2000-2005 Cadillac Deville 8 Cyl 4.6L DEVILLE, FUNERAL COACH, HIGH LUXURY, LIMOUSINE, SEVILLE, SLS, STS, TOURING 4 DOOR, TOURING SEDAN 2000-2002 Cadillac Eldorado 8 Cyl 4.6L ELDORADO 2004-2016 Cadillac SRX 6 Cyl 2.8L, 6 Cyl 3.0L, 6 Cyl 3.6L, 8 Cyl 4.6L 4 DOOR, 4 DOOR(RHD), CROSSOVER 4 DOOR, SRX, V8 4 DOOR 2005-2011 Cadillac STS 6 Cyl 3.6L, 8 Cyl 4.4L, 8 Cyl 4.6L 4 DOOR, 4 DOOR(RHD), V 4 DOOR
Customer Questions & Answers
- Q:I am wonder if this is complete and correct part for my vehicle. Posted by GMPartsGiant Specialist
- A:You can Select Your Vehicle to check if 12572638 fits your vehicle.Posted by GMPartsGiant Specialist
- Q:How to remove, inspect, and install rocker arms and hydraulic lash adjusters on Buick Enclave,Chevrolet Traverse and GMC Acadia? Posted by Customer
- A:Removal involves removing the valve covers and the camshafts to remove the rockers is the lash adjuster socket on the rocker. Place markings on each rocker arm to ensure they are returned to the same position, then lift each one from the engine. Once the rocker arms are removed, the hydraulic lash adjusters can be lifted from the cylinder head. It is important that any rocker arms or lash adjusters being used again must be returned to their original position on the engine. Inspection involves checking each rocker arm for wear, cracks and other damage, especially where the valve stems contact the rocker arm. Check the rollers for binding and roughness. If the bearings are worn or damaged, replacement of the entire rocker arm will be necessary. Keep in mind that there is no valve adjustment on these engines, so excessive wear or damage in the valve train can easily result in excessive valve clearance, which in tum will cause valve noise when the engine is running. Make sure the oil passage hole in each hydraulic lash adjuster is not blocked. Installation involves applying some camshaft/lifter prelu be to the pivot pockets, roller and the slot that contacts the valve on each rocker arm. Apply clean engine oil into the bores for the hydraulic lash adjusters and install them into the cylinder head. Position the rocker arms onto the lash adjusters. The remainder of installation is the reverse of removal. Before starting and running the engine, change the oil and install a new oil filter.Posted by GMPartsGiant Specialist
- Q:How to remove and inspect a camshaft and Lash Adjuster for Chevrolet Cobalt,HHR and Saturn ION? Posted by Customer
- A:To undertake the challenging procedure of camshaft removal and inspection, prepare the necessary special tools and acquire new camshaft sprocket bolts beforehand. Begin by relieving the fuel system pressure on 2.0L supercharged models and disconnecting the negative battery terminal. Remove the valve cover and set the engine to TDC for cylinder number one, followed by rotating the crankshaft counterclockwise to position the engine at 60-degrees before TDC with the diamond-shaped hole on the intake camshaft at 12 o'clock. Proceed cautiously, ensuring not to remove the camshafts with the engine at TDC number 1 to prevent damage to the valves and pistons. For 2.0L supercharged and 2.2L engines, remove the upper timing chain guide and use a special tool to secure the camshaft sprockets in place. Purchase a camshaft locking tool to accomplish this task. Remove the camshaft sprocket bolts and slide the camshaft sprockets forward, securing them with wingnuts. If working on 2009 and later models, remove the camshaft position actuators; for 2008 and earlier models, remove the timing chain tensioner. Next, disassemble the camshafts, keeping camshaft caps marked for location and direction, and remove the rocker arms and hydraulic lash adjusters. Organize the rocker arms for reinstallation in their original positions and store the lash adjusters with their corresponding rocker arms. Repeat a similar process for the exhaust camshaft, marking the positions of rocker arms, removing them, and lifting the hydraulic lash adjusters. For 2.0L turbocharged and 2.4L engines, special tools secure the chain and camshaft actuators, allowing their removal after loosening the actuator bolts while holding the camshaft with a wrench on the camshaft hex. Ensure the timing chain is supported by the locking tools. If removing camshafts, carefully inspection on all engines, checking hydraulic lash adjusters, rocker arms, camshaft lobes, bearing journals, and bearing journal oil clearance. Replace components as needed. Lubricate the rocker arms and hydraulic lash adjusters before reinstalling them, then lubricate and install the camshafts with proper alignment. Secure the camshaft bearing caps, slide the camshaft sprockets and timing chain, align the slots with sprocket projections, and tighten the camshaft sprockets with new bolts to the specified torque. For 2.0L, 2.4L, and 2009 and later 2.2L engines, reinstall the camshaft actuators aligned with the marked positions and secure them with new bolts, tightening while holding each camshaft. Remove the camshaft locking tool and install the front and rear camshaft caps, torquing them to specifications. Install the upper timing chain guide and reset and install the timing chain tensioner. Perform two manual engine revolutions, checking for resistance. Complete the remaining installation steps, reconnect the battery, and proceed with engine operation.Posted by GMPartsGiant Specialist
- Q:What is involved in the removal process for the 2016 GMC Acadia? Posted by Customer
- A:The removal process involves removing the valve covers and camshafts, then removing the rockers and lash adjuster socket on the rocker.Posted by GMPartsGiant Specialist
- See expert answers on similar Lash Adjuster
- Q:How do you remove the camshafts and Lash Adjuster in V6 engine for Saturn LS and LS1? Posted by Customer
- A:To remove the camshafts, start by disconnecting the cable from the negative battery terminal and setting the engine to 60-degrees before TDC. Remove the valve cover(s) and timing belt. Use a wrench on the hex drive on the camshaft to prevent it from turning, and remove the camshaft sprockets, making sure to mark their original positions. Remove the bearing caps from the cylinder head, making note of their original locations. Lift the camshafts from the cylinder head, along with the camshaft seals. Place each lash adjuster in numbered containers to prevent mixing them up. Repeat this process for the rear cylinder head camshafts. Once the camshafts and lash adjusters are removed, inspect them for wear and roundness. Measure the outside diameter of each lash adjuster and compare the measurements. Check the camshaft lobes for wear and overheating. Measure the lobe height of each cam lobe and compare the measurements. Examine the camshaft bearing journals and cylinder head bearing surfaces for wear or pitting. Measure the diameter of each journal and check for excessive wear. To check the bearing journal running clearance, clean the bearing surfaces and install the camshafts and bearing caps with Plastigage. Measure the width of the compressed strands to determine the journal oil clearance. Check the camshaft endplay using a dial indicator. Tap the camshaft towards and away from the gauge and note the readings. Once the inspection is complete, position the engine at 60-degrees before TDC. Oil the cylinder head lash adjuster bores and lash adjusters, and install the lash adjusters in their original bores. Install new camshaft oil seals. Oil the camshaft bearings and lobes. Install the camshafts, ensuring they are in their original locations and aligning the pins correctly. Apply anaerobic sealant between the camshaft cap and cylinder head on the front caps. Apply camshaft installation lube to the journals and lobes. Install the camshaft bearing caps in their original positions and tighten them down in the proper sequence. Install the camshaft sprockets and complete the reassembly process, including replacing the timing belt and setting the valve timing. Finally, reconnect the battery.Posted by GMPartsGiant Specialist
- Q:How to remove and inspect camshafts and Lash Adjuster in four cylinder engine for Saturn LS and LS1? Posted by Customer
- A:This is a difficult procedure that requires special tools. Disconnect the cable from the negative battery terminal. Remove the valve cover. Set the engine to TDC for cylinder number one, then turn the crankshaft counterclockwise until the engine is set at 60-degrees before TDC. Remove the upper timing chain guide. Install a special tool to secure the camshaft sprockets in position. Remove the camshaft sprocket bolts and slide the camshaft sprockets forward. Remove the intake camshaft by loosening each bearing cap nut and lifting the camshaft parallel to the surface of the cylinder head. Remove the rocker arms and hydraulic lash adjusters from the intake camshaft. Mark the exhaust bearing caps and remove them from the cylinder head. Remove the rocker arms and hydraulic lash adjusters from the exhaust camshaft. Inspect the hydraulic lash adjusters for wear and measure their outside diameter. Inspect the rocker arms for wear or damage. Examine the camshaft lobes for wear, scoring, pitting, galling, and evidence of overheating. Measure the lobe height of each cam lobe and compare the measurements for excessive variation. Inspect the camshaft bearing journals and cylinder head bearing surfaces for wear or damage. Check the bearing journal oil clearance using Plastigage. Measure the camshaft endplay using a dial indicator. Lubricate the rocker arms and hydraulic lash adjusters and install them in their original positions. Lubricate the camshafts and install them in their correct locations. Install the camshaft bearing caps and tighten the bolts to the specified torque. Slide the camshaft sprockets and timing chain along the guide pins and tighten the camshaft sprockets. Install the front and rear camshaft caps and tighten them to the specified torque. Install the upper timing chain guide. Rotate the engine by hand to check for any resistance. Complete the remaining installation steps and reconnect the battery.Posted by GMPartsGiant Specialist
If you have any questions about this product, please don't hesitate to ask us. We will be happy to help you!
Genuine GM Part 12572638, the Right Choice
Why choose GM Parts Giant
- Dedicated Service
Your complete satisfaction is our #1 goal
- Lowest Prices
Best deals on genuine OE parts from dealerships
- Fast Delivery
Orders are processed and delivered promptly