Your vehicle deserves only genuine OEM GM parts and accessories. To ensure reliability, purchase GM part # 10241691 Camshaft,Engine. It is sometimes referred to as GM Camshaft. Our GM parts and accessories are expedited directly from authorized GM dealers strategically located all across the U.S. and are backed by the manufacturer's 12 month, 12,000 mile warranty. OEM GM parts are the best for restoring your vehicle to factory condition performance.
Affordable, reliable and built to last, GM part # 10241691 Camshaft,Engine stands out as the smart option. GMPartsGiant.com is your prime online source with the biggest and best selection of genuine GM parts and accessories at giant discounted prices. We have the OEM GM parts and accessories you need at the wholesale prices. GMPartsGiant.com has you covered no matter what type of GM vehicle you drive.
×
My Garage
My Account
My Cart
Make sure this part fits your vehicle
Cadillac 10241691 Camshaft,Engine
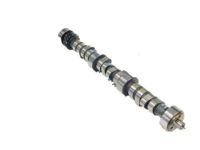


- Part DescriptionCAMSHAFT, Engine
- ManufacturerGeneral Motors
$249.49 MSRP: $394.34 1
You Save: $144.85 (37%)
Ships in 1-3 Business Days
 Bearing, Clutch Pilot12557583
 Bolt, 1/4, 20X7/8 Torx Head T3014088561
 Bolt/Screw, Camshaft Retainer10105912
 Engine Crankshaft12555637
 Gear Kit,Balancer Shaft12513234
 Housing,Crankshaft Rear Oil Seal12595923
 Nut,Connect Rod3866766
 Piston Asm,(W/ Pinion)(Std)88894280
 Ring Kit,Piston12522848
 Ring,Crankshaft Position Sensor Excitor10230149
Product Specifications
| Brand | Genuine Cadillac |
| Manufacturer Part Number | 10241691 |
| Part Description | CAMSHAFT, Engine |
| Other Names | Camshaft |
| Item Dimensions | 27.8 x 3.3 x 3.4 inches |
| Item Weight | 8.40 Pounds |
| Condition | New |
| Fitment Type | Direct Replacement |
| Manufacturer | General Motors |
| SKU | 10241691 |
| Warranty | This genuine GM part is guaranteed by GM's factory warranty. |
| Shipping & Return | Shipping Policy Return Policy |
Warning: California’s Proposition 65
Customer Questions & Answers
- Q:How to remove and install the Camshaft and Lash Adjuster on 2.2L four cylinder engine on Chevrolet Blazer,S10,GMC Jimmy and Sonoma? Posted by Customer
- A:To determine the extent of cam lobe wear, check the lobe lift before removing the camshaft. Position the number one piston at TDC on the compression stroke. Remove the valve cover and loosen the rocker arm nuts to access the pushrods. Mount a dial indicator on the engine and position the plunger against the top of the first pushrod. Zero the dial indicator and slowly turn the crankshaft in the normal direction of rotation until the indicator needle stops and moves in the opposite direction, indicating maximum cam lobe lift. Record this figure and repeat the check for each valve. If the cam lobe lift is less than specified, install a new camshaft. To check for a noisy valve lash adjuster, use a mechanics stethoscope or a length of hose near each valve while listening for excessive clearance in the valvetrain. If a lash adjuster is defective, it will be evident from the noise. Removing the lash adjusters requires removing the cylinder head. Remove the lash adjuster guides and extract the lash adjusters using a special removal tool, magnet, or scribe. Clean the lash adjusters and inspect them for scuffing, score marks, and uneven wear. Check the rollers for wear and damage. Replace the lash adjusters if necessary. To remove the camshaft, remove the front cover, timing chain, and sprockets. Unbolt and remove the oil pump drive and the camshaft thrust plate. Carefully pull the camshaft out of the block. Clean and inspect the bearing journals for damage. Measure the bearing journals and camshaft lobes. Check the lobes for discoloration, score marks, chipped areas, pitting, and uneven wear. If the lobes are in good condition and the measurements are as specified, the camshaft can be reused. Lubricate the camshaft bearing journals and lobes with assembly lube and slide the camshaft into the engine. Install the thrust plate and tighten the bolts. Reinstall the oil pump drive. If reusing the lash adjusters, install them in their original bores and coat them with assembly lube. Lubricate the lash adjuster bores with engine oil and install the lash adjusters. Install the lash adjuster guides and reinstalling the cylinder head. Install the pushrods, pushrod guides, rocker arms, and rocker arm retaining nuts. Tighten the rocker arm nuts.Posted by GMPartsGiant Specialist
- Q:How to remove and install Camshaft and Lash Adjuster on 4.3L V6 engine on Chevrolet Blazer,S10,GMC Jimmy and Sonoma? Posted by Customer
- A:To check Lash Adjuster before removal, start by removing the valve covers and loosening the rocker arm nuts to pivot the rocker arms for access to the pushrods. Mount a dial indicator on the engine, positioning the plunger directly above the first pushrod. Ensure the engine's electrical connectors from the distributor are disconnected. Slowly turn the engine until the pushrod is at its lowest point (base circle of the camshaft lobe), then zero the dial indicator. Rotate the crankshaft in the normal direction until the indicator needle reaches its peak and begins moving in the opposite direction, marking maximum cam lobe lift. Record this measurement and repeat the check for all lobes, comparing the results. If cam lobe lift is 0.003 inches less than specified, cam lobe wear has occurred, necessitating a new camshaft installation. Also, remove the fan shrouds, fan, radiator, and condenser if applicable. Ensure proper labeling and storage of the lifters before removing them, and remove the lifter retainer. Take care not to attempt camshaft withdrawal with the lifters in place. Various methods can be used to extract the lifters from the bores. Afterward, remove the camshaft retainer plate by removing the two Torx bolts, taking note of the correct orientation. Thread three 6-inch long, 5/16-18 bolts into the camshaft sprocket bolt holes for handling when pulling the camshaft straight out, avoiding damage to the bearings. During inspection, visually examine the cam lobes and bearing journals for wear, scoring, pitting, galling, overheating evidence (discoloration), and flaking of the hardened surface. Measure the diameter of each camshaft journal and the lift of each camshaft lobe using a micrometer and compare the measurements with the specifications. If any journal diameter falls below the specified value, replace the camshaft. For camshaft bearing replacement, it's advisable to seek assistance from an automotive machine shop, as it involves specialized tools and expertise. For installation, lubricate the camshaft bearing journals and cam lobes with Lash Adjuster assembly lube, then carefully slide the camshaft into the engine while supporting it near the block to prevent damage to the bearings. Turn the camshaft until the dowel pin is at 3 o'clock and install the camshaft thrust plate, tightening the bolts. Install the balance shaft drive gear, aligning the dowel pin and ensuring proper alignment of the balance shaft timing marks. Proceed to install the timing chain and sprockets. Lubricate the lifters with clean engine oil and install them in the block, making sure to return them to their original locations if reusing the original lifters. If a new camshaft is installed, use new lifters as well. Finally, complete the remaining installation steps in reverse order, and before starting the engine, change the oil and install a new oil filter.Posted by GMPartsGiant Specialist
- Q:How to remove and install Camshaft Bearing,Camshaft and Lash Adjuster for Chevrolet C1500 and K1500? Posted by Customer
- A:To determine the extent of cam lobe wear, check the lobe lift before removing the camshaft. Position the number one piston at TDC on the compression stroke. Loosen the rocker arm nuts and pivot the rocker arms sideways. Mount a dial indicator on the engine and position the plunger against the top of the first pushrod. Zero the dial indicator and slowly turn the crankshaft in the normal direction of rotation until the indicator needle stops and begins to move in the opposite direction. Record this figure and repeat the check for each valve. If the cam lobe lift is less than specified, install a new camshaft. Remove the camshaft and remove the intake manifold, rocker arms, pushrods, timing chain, and camshaft sprocket. Remove the balancer shaft drive and driven gears if applicable. Pull the camshaft out carefully, supporting it near the block. After removing the camshaft, inspect the bearing journals for wear and damage. Measure the bearing journals with a micrometer to check for excessive wear or out-of-round conditions. Check the camshaft lobes for discoloration, score marks, chipped areas, and uneven wear. Clean the lash adjusters and check for scuffing, score marks, and uneven wear. If the lash adjusters are worn or damaged, replace them along with the camshaft. For roller lash adjusters, check the rollers for wear and damage. Lubricate the camshaft bearing journals and lobes with moly-base grease or engine assembly lube. Slide the camshaft into the engine, being careful not to scrape or nick the bearings. Install the balancer shaft drive and driven gears if applicable. Install the timing chain and sprockets. Lubricate the lash adjusters with clean engine oil and install them in the block. Finally, change the oil and install a new oil filter before starting and running the engine.Posted by GMPartsGiant Specialist
- Q:What are the specs on this camshaft? Posted by Customer
- A:This camshaft has factory specsPosted by GMPartsGiant Specialist 8/7/2021
- Q:Will this camshaft work on a 1994 Chevrolet S10 Blazer? Posted by Customer
- A:Yes, this camshaft will work on the 4.3L V6 motorPosted by GMPartsGiant Specialist 8/7/2021
If you have any questions about this product, please don't hesitate to ask us. We will be happy to help you!
Genuine GM Part 10241691, the Right Choice
Why choose GM Parts Giant
- Dedicated Service
Your complete satisfaction is our #1 goal
- Lowest Prices
Best deals on genuine OE parts from dealerships
- Fast Delivery
Orders are processed and delivered promptly