


Your vehicle deserves only genuine OEM GM parts and accessories. To ensure reliability, purchase GM part # 88962346 Fork Asm,Transfer Case High/Low Shift. It is sometimes referred to as Cadillac Shift Fork. Our GM parts and accessories are expedited directly from authorized GM dealers strategically located all across the U.S. and are backed by the manufacturer's 12 month, 12,000 mile warranty. OEM GM parts are the best for restoring your vehicle to factory condition performance. This part fits specific Cadillac Escalade models.
Affordable, reliable and built to last, GM part # 88962346 Fork Asm,Transfer Case High/Low Shift stands out as the smart option. GMPartsGiant.com is your prime online source with the biggest and best selection of genuine GM parts and accessories at giant discounted prices. We have the OEM GM parts and accessories you need at the wholesale prices. GMPartsGiant.com has you covered no matter what type of GM vehicle you drive. For detailed Cadillac parts information, click here.
×
My Garage
My Account
My Cart
Make sure this part fits your vehicle
Cadillac 88962346 Fork Asm,Transfer Case High/Low Shift
2003-2005 Cadillac Escalade
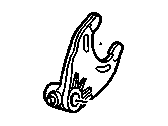

- Part DescriptionFORK, Transfer Case
- Replaces88996467
- ManufacturerGeneral Motors
- Manufacturer's NotesThis part is discontinued.
Product Specifications
Brand Genuine Cadillac Manufacturer Part Number 88962346 Part Description FORK, Transfer Case Item Dimensions 7.1 x 6.6 x 6.5 inches Item Weight 2.20 Pounds Condition New Fitment Type Direct Replacement Replaces 88996467 Manufacturer General Motors SKU 88962346 Warranty This genuine GM part is guaranteed by GM's factory warranty. Shipping & Return Shipping Policy Return Policy Warning: California’s Proposition 65Vehicle Fitment
Year Make Model Engine Important vehicle option details 2003-2005 Cadillac Escalade 8 Cyl 5.3L, 8 Cyl 6.0L 1/2 TON, 3/4 TON, EXT 1/2 TON, EXT 3/4 TON, YUKON/DENALI/ESCALADE
Customer Questions & Answers
- Q:Do these parts fit my vehicle? Posted by GMPartsGiant Specialist
- A:You can Select Your Vehicle to check if 88962346 fits your vehicle.Posted by GMPartsGiant Specialist
- Q:How do you remove and install right Axle Shaft,Shift Fork and Wheel Bearing on 4WD and AWD Chevrolet Avalanche,Silverado,Suburban,Tahoe,GMC Sierra,Yukon,Yukon Denali and Yukon XL? Posted by Customer
- A:To remove and install components in the front differential of selectable 4WD systems, first, loosen the wheel lug nuts and raise the vehicle securely on jackstands. Remove the right front wheel and the differential carrier splash shield if equipped. Drain the lubricant from the front differential. For 4WD systems, unbolt the right driveaxle from the axleshaft flange and support it out of the way. Remove the front axle shift motor and, if applicable, disconnect the front stabilizer link or remove the front shock absorber/coil spring assembly. On 2500/3500 models, remove the front axle bracket bolts and slide the bracket forward for additional clearance. Support the differential carrier with a floor jack and block of wood. Remove the bolts securing the axle tube to the differential carrier and the nuts attaching the tube to its support bracket. Carefully remove the output shaft tube, ensuring no components fall out. Mount the tube in a vise and remove the internal components. Measure and remove the axleshaft bearing using a slide hammer and bearing remover attachment. For installation, install the bearing to the original depth using a bearing driver or socket, then install a new seal and deflector, lubricating the seal lips with grease. Carefully drive in the axleshaft, followed by the internal components. Apply RTV sealant to the tube-to-differential housing mating surface, and install the tube assembly, tightening bolts and nuts to specified torques. Reinstall the driveaxle, front axle shift motor, and fill the differential with lubricant. For AWD systems, remove the stabilizer bar link and, if applicable, the front shock absorber. Unbolt the right driveaxle from the axleshaft flange, supporting it properly. Support the differential carrier with a floor jack and a block of wood. Remove nuts attaching the axle shaft to its support bracket and the bolts securing the axle shaft flange to the differential carrier. Use a brass punch and hammer to separate the axle shaft from the differential case side gear. Remove the inner axle shaft assembly and axle shaft. Replace the inner seal and bearing with a special tool, then apply RTV sealant to the differential sealing surface and install the inner axle shaft housing assembly. Install the axle shaft to the support bracket and align the splines with the differential side gear. Tap the axle shaft with a mallet until the ring (clip) aligns with the groove in the differential case side gear. Install the axle shaft to the inner flange and tighten the bolts. Reinstall the stabilizer link, fill the differential with lubricant, install the differential carrier splash shield, and finally, install the wheel and lug nuts. Lower the vehicle, tighten the lug nuts, and check for proper operation.Posted by GMPartsGiant Specialist
- Q:How do you remove and install components in the front differential for 4WD systems of the 2013 Chevrolet Suburban? Posted by Customer
- A:To remove and install components in the front differential for 4WD systems, follow these steps:Remove the bolts securing the axle tube to the differential carrier and the nuts attaching the tube to its support bracket.Posted by GMPartsGiant Specialist
- See expert answers on similar Shift Fork
- Q:How do you remove and install components in the front differential for AWD systems for the 2012 Chevrolet Silverado? Posted by Customer
- A:To remove and install components in the front differential for AWD systems, follow these steps: Remove the stabilizer bar link and, if applicable, the front shock absorber. Unbolt the right driveaxle from the axleshaft flange, supporting it properly. Support the differential carrier with a floor jack and a block of wood. Remove nuts attaching the axle shaft to its support bracket and the bolts securing the axle shaft flange to the differential carrier. Use a brass punch and hammer to separate the axle shaft from the differential case side gear. Remove the inner axle shaft assembly and axle shaft. Replace the inner seal and bearing with a special tool, then apply RTV sealant to the differential sealing surface and install the inner axle shaft housing assembly. Install the axle shaft to the support bracket and align the splines with the differential side gear. Tap the axle shaft with a mallet until the ring (clip) aligns with the groove in the differential case side gear. Install the axle shaft to the inner flange and tighten the bolts. Reinstall the stabilizer link, fill the differential with lubricant, install the differential carrier splash shield, and finally, install the wheel and lug nuts. Lower the vehicle, tighten the lug nuts, and check for proper operation.Posted by GMPartsGiant Specialist
- See expert answers on similar Shift Fork
- Q:How do you remove and install components in the front differential for 4WD systems for the 2009 Chevrolet Tahoe? Posted by Customer
- A:To remove and install components in the front differential for 4WD systems, follow these steps: Remove the bolts securing the axle tube to the differential carrier and the nuts attaching the tube to its support bracket. Carefully remove the output shaft tube, ensuring no components fall out. Mount the tube in a vise and remove the internal components. Measure and remove the axleshaft bearing using a slide hammer and bearing remover attachment. For installation, install the bearing to the original depth using a bearing driver or socket, then install a new seal and deflector, lubricating the seal lips with grease. Carefully drive in the axleshaft, followed by the internal components. Apply RTV sealant to the tube-to-differential housing mating surface, and install the tube assembly, tightening bolts and nuts to specified torques. Reinstall the driveaxle, front axle shift motor, and fill the differential with lubricant.Posted by GMPartsGiant Specialist
- See expert answers on similar Shift Fork
- Q:How do you remove and install components in the front differential for 4WD systems for the 2007 GMC Sierra? Posted by Customer
- A:To remove and install components in the front differential for 4WD systems, follow these steps: Remove the bolts securing the axle tube to the differential carrier and the nuts attaching the tube to its support bracket. Carefully remove the output shaft tube, ensuring no components fall out. Mount the tube in a vise and remove the internal components. Measure and remove the axleshaft bearing using a slide hammer and bearing remover attachment. For installation, install the bearing to the original depth using a bearing driver or socket, then install a new seal and deflector, lubricating the seal lips with grease. Carefully drive in the axleshaft, followed by the internal components. Apply RTV sealant to the tube-to-differential housing mating surface, and install the tube assembly, tightening bolts and nuts to specified torques. Reinstall the driveaxle, front axle shift motor, and fill the differential with lubricant.Posted by GMPartsGiant Specialist
- See expert answers on similar Shift Fork
If you have any questions about this product, please don't hesitate to ask us. We will be happy to help you!
Genuine GM Part 88962346, the Right Choice
Why choose GM Parts Giant
- Dedicated Service
Your complete satisfaction is our #1 goal
- Lowest Prices
Best deals on genuine OE parts from dealerships
- Fast Delivery
Orders are processed and delivered promptly