×
My Garage
My Account
My Cart
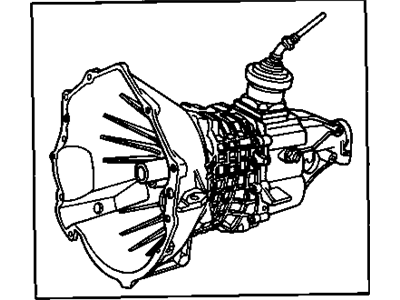
Genuine Chevrolet S10 Transmission Assembly
Trans AssemblyEnter your vehicle info to find more parts and verify fitment
- Select Vehicle by VIN
- Select Vehicle by Model
Select by VIN
orEnter your VIN for the most accurate results.Enter your VIN for the most accurate results.
Select by Model
-- Select Make --
-- Select Model --
-- Select Year --
69 Transmission Assemblies found
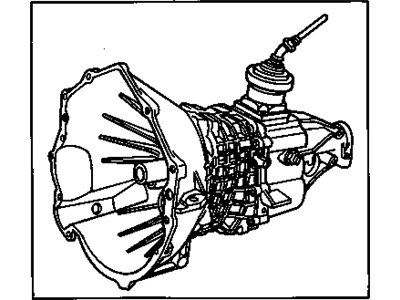
Chevrolet S10 Transmission Assembly, Man (Nv3500)
Part Number: 15067323- Other Name: TRANSMISSION, Automatic; Transmission
- Replaces: 15769697
$733.85 MSRP: $737.91You Save: $4.06 (1%)
Chevrolet S10 Transmission Asm,Auto (4Shd) (Remanufactured)
Part Number: 8688976- Other Name: TRANSMISSION, Automatic
$2254.56 MSRP: $2542.09You Save: $287.53 (12%)Chevrolet S10 Transmission Asm,Auto (4Tbd) (Remanufactured)
Part Number: 8688978- Other Name: TRANSMISSION, Automatic
$2254.56 MSRP: $2542.09You Save: $287.53 (12%)Chevrolet S10 Transmission Asm,Auto (Remanufactured)
Part Number: 8689978- Other Name: TRANSMISSION, Manual(5 Speed)
$2254.56 MSRP: $2542.09You Save: $287.53 (12%)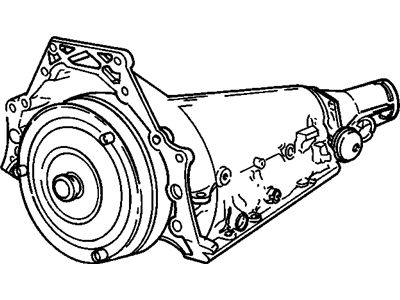
Chevrolet S10 Transmission Asm,Auto (1Sad) (Goodwrench Remanufacture)
Part Number: 24219067- Other Name: TRANSMISSION, Automatic
$2309.81 MSRP: $2604.59You Save: $294.78 (12%)Chevrolet S10 Transmission Asm,Auto (Remanufactured)
Part Number: 24201017- Other Name: TRANSMISSION, Automatic
$2316.69 MSRP: $2612.38You Save: $295.69 (12%)Chevrolet S10 Transmission Asm,Auto (Remanufactured)
Part Number: 8689977- Other Name: TRANSMISSION, Manual(5 Speed)
$2316.69 MSRP: $2612.38You Save: $295.69 (12%)Chevrolet S10 Transmission Asm,Auto (Remanufactured)
Part Number: 8691932- Other Name: TRANSMISSION, Automatic
$2316.69 MSRP: $2612.38You Save: $295.69 (12%)Chevrolet S10 Transmission Asm,Auto (Goodwrench Remanufacture)
Part Number: 24229166- Other Name: TRANSMISSION, Manual(5 Speed); Transmission
- Replaces: 24224230
$2749.58 MSRP: $3093.75You Save: $344.17 (12%)Chevrolet S10 Transmission Asm,Auto (3Tad) (Goodwrench Remanufacture)
Part Number: 24229167- Other Name: TRANSMISSION, Automatic; Transmission
- Replaces: 24224231
$2749.58 MSRP: $3093.75You Save: $344.17 (12%)Chevrolet S10 Transmission,Auto(Goodwrench Remanufacture)
Part Number: 24216088- Other Name: TRANSMISSION, Automatic; Transmission
- Replaces: 24212611
$2371.94 MSRP: $2674.88You Save: $302.94 (12%)Chevrolet S10 Transmission Asm,Auto (Remanufactured)
Part Number: 8689976- Other Name: TRANSMISSION, Automatic
Chevrolet S10 Transmission Asm,Manual Mg290(Remanufactured)(2Ghz)
Part Number: 8672970- Other Name: TRANSMISSION
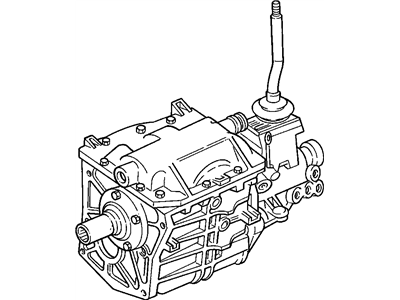
Chevrolet S10 Transmission Assembly, Man (Nv3500)
Part Number: 15067321- Other Name: TRANSMISSION, Manual(5 Speed)
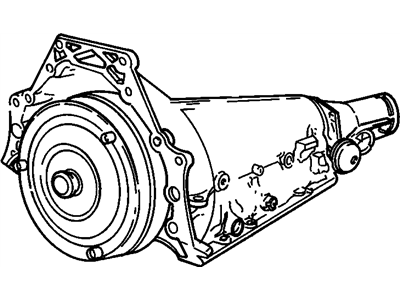
Chevrolet S10 Transmission Asm,Auto (Remanufactured)
Part Number: 8647929- Other Name: TRANSMISSION, Automatic; Transmission
Chevrolet S10 Transmission,Man
Part Number: 12389354- Other Name: TRANSMISSION, Manual(5 Speed); Transmission
Chevrolet S10 Transmission Asm,Manual Mg290(Remanufactured)(2Gjz)
Part Number: 8672995- Other Name: TRANSMISSION, Man
Chevrolet S10 Transmission Asm,Auto (Remanufactured)
Part Number: 8647931- Other Name: TRANSMISSION, Automatic; Transmission
Chevrolet S10 Transmission Asm,Auto (Remanufactured)
Part Number: 8649906- Other Name: TRANSMISSION, Automatic; Transmission
Chevrolet S10 Transmission Asm,Auto (Remanufactured)
Part Number: 8649907- Other Name: TRANSMISSION, Automatic; Transmission
| Page 1 of 4 |Next >
1-20 of 69 Results
Chevrolet S10 Transmission Assembly Parts Questions & Answers
- Q: How do you remove and install a Manual transmission?A: To remove the transmission, start by disconnecting the negative battery cable and removing the shift lever. Raise the vehicle and remove the driveshaft(s), parking brake cable, and any necessary exhaust components. On 4WD models, remove the skid plate and transfer case, and disconnect all electrical connectors. Disconnect the fuel lines and remove the clutch release cylinder or hydraulic line. Support the engine/transmission assembly with a jack and remove the transmission mount bolts, catalytic converter hanger, and support braces. Remove the cover plate from the clutch housing and secure the transmission to a jack. Remove the crossmember and transmission mount, and lower the engine/transmission assembly to detach the fuel line retaining clips. Remove the transmission-to-bell housing or transmission-to-engine bolts, and carefully slide the transmission out from under the vehicle. Inspect the clutch components and consider installing new ones. To install the transmission, first install the clutch components if necessary. Raise the transmission into position and slide it forward to engage the input shaft with the clutch plate hub. Install the transmission-to-engine or transmission-to-clutch housing bolts, and then install the crossmember and transmission mount. Remove the jacks supporting the transmission and engine, and reinstall any previously removed components. Verify all wires and hoses are reconnected and the transmission is filled with lubricant. Finally, connect the negative battery cable, road-test the vehicle, and check for leaks.
- Q: How do I remove the Automatic transmission?A: To remove the transmission, start by disconnecting the negative cable from the battery and raising the vehicle on jackstands. Drain the transmission fluid and reinstall the pan, then unplug all electrical connectors. On 1994 models, disconnect the shift linkage, while on 1995 and later models, disconnect the Shift Cable. Remove the driveshaft and, if applicable, the front driveshaft for 4WD vehicles. If the vehicle has 4WD, remove the transfer case. Relieve the fuel system pressure and disconnect the fuel line fittings. Remove the rear transmission mount-to-crossmember nut(s) and the cross member-to-frame bolts. Take out any exhaust components that may interfere with transmission removal and remove the starter motor. Remove the torque converter cover and mark the torque converter and driveplate for proper reinstallation. Remove the drive plate-to-torque converter bolts by turning the crankshaft. Support the engine and transmission with jacks, then remove the crossmember. Detach the fuel line and wiring harness brackets from the transmission. Remove the transmission-to-engine bolts and the transmission dipstick tube. Lower the transmission slightly and disconnect and plug the transmission fluid cooler lines. Remove the transfer case shifter and move the transmission to the rear to disengage it from the engine block dowel pins. Secure the torque converter to the transmission. To install the transmission, ensure the torque converter hub is securely engaged in the pump. Raise the transmission into position, keeping it level to prevent the torque converter from sliding out. Connect the transmission fluid cooler lines and align the marks on the torque converter and driveplate. Carefully move the transmission forward until the dowel pins engage with the holes in the bell housing. Install the transmission housing-to-engine bolts and tighten them securely. Install the drive plate-to-torque converter bolts and tighten them to the specified torque. Install the crossmember and remove the jacks supporting the transmission and engine. Install the dipstick tube, starter motor, and reconnect the shift linkage or cable. Plug in the transmission wire harness connectors and install the torque converter cover. If applicable, install the transfer case and driveshaft(s). Install any exhaust system components that were removed and lower the vehicle. Finally, fill the transmission with the specified fluid, run the engine, and check for fluid leaks.

Related Chevrolet S10 Parts
 Chevrolet S10 Torque Converter
 Chevrolet S10 Valve Body
 Chevrolet S10 Transmission Pan
 Chevrolet S10 Transmission Gasket
 Chevrolet S10 Transmission Oil Cooler
Browse by Year
2004 Transmission Assembly 2003 Transmission Assembly 2002 Transmission Assembly 2001 Transmission Assembly 2000 Transmission Assembly 1999 Transmission Assembly 1998 Transmission Assembly 1997 Transmission Assembly 1996 Transmission Assembly 1995 Transmission Assembly 1994 Transmission Assembly 1993 Transmission Assembly 1992 Transmission Assembly 1991 Transmission Assembly 1990 Transmission Assembly 1989 Transmission Assembly 1988 Transmission Assembly 1987 Transmission Assembly 1986 Transmission Assembly 1985 Transmission Assembly 1984 Transmission Assembly 1983 Transmission Assembly