×
My Garage
My Account
My Cart
Genuine Cadillac Fleetwood Instrument Cluster
Speedometer Instrument ClusterEnter your vehicle info to find more parts and verify fitment
- Select Vehicle by VIN
- Select Vehicle by Model
Select by VIN
orEnter your VIN for the most accurate results.Enter your VIN for the most accurate results.
Select by Model
-- Select Make --
-- Select Model --
-- Select Year --
6 Instrument Clusters found


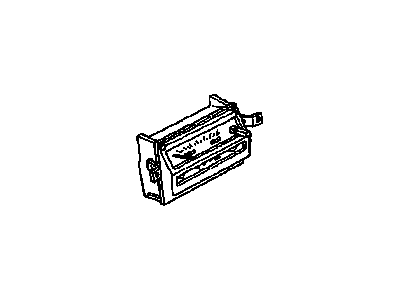
Cadillac Fleetwood Instrument Cluster Assembly
Part Number: 16185816- Other Name: Cluster Assembly, Instrument; Gauge Cluster
Cadillac Fleetwood Instrument Cluster Parts Questions & Answers
- Q: How do you remove and install the instrument cluster in Cadillac ElDorado and Fleetwood?A: Disconnect the negative battery cable to remove and install the instrument cluster in Cadillac DeVille and Fleetwood vehicles. To begin with, pry out the A/C outlets carefully removing its screws from behind each outlet and three screws through the defroster outlet to remove the upper trim pad. Remove the glove box module's retaining screws, unplug it from switches and light, and pull it out. Working through the glove box opening, take out two screws, detach the cabin temperature sensor electrical connector and aspirator tube, and remove upper trim pad. Remove two screws then plate followed by instrument cluster attaching screws. As for the wiring connectors, label them accordingly after detaching them together with shift indicator cable clip before removing instrument cluster. Position instrument cluster where it will be attached using electrical connectors before securing attaching screws at 13 inch lbs (1.5 Nm). Install plate with two screw holes followed by upper trim pad in reverse order of removal. Lastly, install shift indicator cable clip then according to directions move shift indicator. Begin by disconnecting negative battery cable for 1990-91 Eldorado and Seville models before you will have removed instrument cluster trim plate that entails left side A/C vent, radio trim plate and retaining screws & trim plate along with them. Pull out only those screw lines as well as the filter lens because this step involves removing another set of two screw lines besides telltale warning lamp lens hence trip odometer reset button remains untouched throughout this operation . Finally remove two instrument cluster retaining screws and then remove that whole group itself from there! Basically if you follow this method correctly then your Mini Machine Tool will come off easily enough! Align electrical connectors with respect to having secured this stuff right against instrument panel's rear face; so don't forget tightening set screw one must first align PRNDL mechanism screws prior fitting all those clusters back together again since cutting should serve purpose as always? Install trip odometer reset button, telltale warning lamp lens, filter lens and instrument cluster trim plate in the reverse order of removal. Next reconnect negative battery cable and place Fuses in fuse panel to finish the installation process! First disconnect the negative battery cable before removing the specified fuses from the fuse panels for 1992-98 Eldorado and Seville models. Remove the upper trim panel of instrument panel by prying up defroster grille, removing sensors, unscrewing retaining screws through defroster grille opening, removing A/C vents and screws through vent openings. Moreover you should pull out upper trim panel and on top of this cluster unplug two electrical connectors. Remove four cluster-to-instrument panel retaining screws and if equipped with a digital cluster then two screws securing PRNDL mechanism. Raise it then remove cluster, put it in place at dashboard ensuring that analog needles are set to zero! Again when digital cluster is present update PRNDL mechanism's location via screwing back all those clusters representing its display within certain boundaries while taking care not drilling out any more than just one hole either side? Install both PRNDL mechanism screws next with some emphasis on how best to go about replacing such components including reconnecting these connectors behind them since another method involves installing negative battery cable right over main line leading into its related electronics like gas gauge reading but don't forget leaving undone last time used replacement fuse which needs reinserted first .


