×
My Garage
My Account
My Cart
Genuine Chevrolet Tracker Cylinder Head
HeadEnter your vehicle info to find more parts and verify fitment
- Select Vehicle by VIN
- Select Vehicle by Model
Select by VIN
orEnter your VIN for the most accurate results.Enter your VIN for the most accurate results.
Select by Model
-- Select Make --
-- Select Model --
-- Select Year --
5 Cylinder Heads found
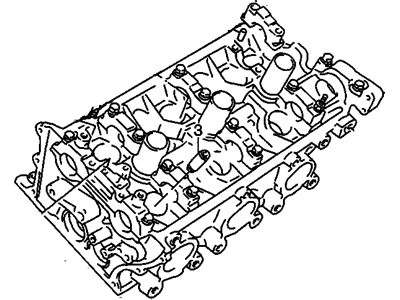
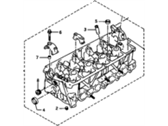
Chevrolet Tracker Cylinder Head Assembly (On Esn)
Part Number: 91177443- Other Name: Head Asm,Cylinder Lh (On Esn) ; Head, Engine Cylinder; Cylinder Head
$457.57 MSRP: $1627.19You Save: $1169.62 (72%)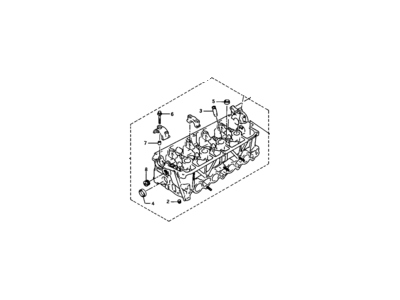
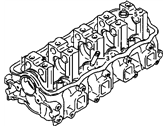
Chevrolet Tracker Cylinder Head Assembly (On Esn)
Part Number: 91177344- Other Name: Head Asm,Cylinder (On Esn) ; Head, Engine Cylinder; Cylinder Head
- Replaces: 96068566
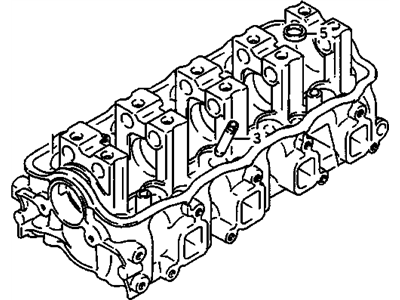
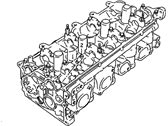
Chevrolet Tracker Cylinder Head Assembly (On Esn)
Part Number: 91177444- Other Name: Head Asm,Cylinder (On Esn) ; Head, Engine Cylinder; Cylinder Head
- Replaces: 91177126, 91175492
Chevrolet Tracker Cylinder Head Parts Questions & Answers
- Q: How to clean and inspect Camshaft and Cylinder Head?A: When performing an engine overhaul, it is necessary to meticulously clean and thoroughly inspect the cylinder head(s) and related valve train components so as to effectively evaluate their condition. It is always important that you look out for any signs of cylinder head warpage especially if the engine has suffered severe overheating. Cleaning involves carefully scraping off old gasket material from surfaces of the head gasket, intake manifold, and exhaust manifold without damaging the cylinder head. Specialized gasket removal solvents might be used and accumulated scale in coolant passages should be cleared. Use a stiff wire brush to remove deposits from holes and clean up threaded holes with an appropriate size tap; while using compressed air to blow away debris. Remove oil from rocker arm shaft holes and then clean up the cylinder head and components with solvent, hastening the drying process by blowing them out with compressed air. Caustic decarbonizing chemicals may be used but handle them carefully. As regards inspection, check for cracks in the cylinder head, coolant leakage or damage; consult an automotive machine shop in case of cracks. Inspect for warpage on the head gasket mating surface using a straight edge and feeler gauge according to specified limits. Examine valve seats in combustion chambers for pitting, cracks or burning. Using a dial indicator measure valve stem-to-guide clearance; ask a machine shop for help on this subject if needed. Check valve faces for wear, distortion, cracks etc; ensure that valve stems, necks are well within standards as well as overall conditions of valves. Measure valve margin width then replace valves with narrow margins. Inspect spring retainers, keepers and rocker arm components in order to ascertain their durability; hence replace parts whose viability is questionable. In SOHC engines assess rocker arm faces, pivot contact areas, shafts and adjusters for damage including wear as well as squareness. Valves could then be reassembled into the cylinder heads if these components are in bad shape or excessively worn. Examine camshaft journals, rocker arms and lobes for damage including wear through signs of overheating. Measure cam lobe height, journal diameter and housing bore to assess wear and roundness. In DOHC engines, lifter contact with sliding surfaces must be looked at for wear, damage and scratches; also ensure that it moves in its bore. Measure lifter and lifter bore diameters in order to determine clearance then replace components or cylinder head when necessary.
- Q: How to remove and reinstall a cylinder head on SOHC engine?A: Allow the engine to cool completely before following this procedure. Position the number one piston at Top Dead Center. Disconnect the negative cable from the battery. Drain the cooling system and remove the spark plugs. Remove the Intake Manifold. Remove the Exhaust Manifold. Remove the distributor, including the cap and wires. On carbureted models, remove the fuel pump. Remove the Timing Belt. Remove the camshaft cover. On 16-valve engines, also remove the camshaft and intake Rocker Arms. Using a 14 mm socket, loosen the cylinder head bolts, 1/4-turn at a time, in the reverse of the sequence shown until they can be removed by hand. Carefully lift the cylinder head straight up and place the head on wooden blocks to prevent damage to the sealing surfaces. If the head sticks to the engine block, dislodge it by prying against a protrusion on the head casting. Note: Cylinder head disassembly and inspection procedures are covered in Part B. It's a good idea to inspect the camshaft and have the head checked for war page, even if you're just replacing the gasket. Remove all traces of old gasket material from the block and head. Do not allow anything to fall into the engine. Clean and inspect all threaded fasteners and be sure the threaded holes in the block are clean and dry. Place a new gasket and the cylinder head in position. The cylinder head bolts should be tightened in several stages following the proper sequence to the torque. Reinstall the timing belt. Reinstall the remaining parts in the reverse order of removal. Be sure to refill the cooling system and check all fluid levels. Rotate the crankshaft clockwise slowly by hand through two complete revolutions. Recheck the camshaft timing marks. Start the engine and set the ignition timing. Run the engine until normal operating temperature is reached. Check for leaks and proper operation. Shut off the engine, remove the camshaft cover and retorque the cylinder head bolts, unless the gasket manufacturer states otherwise. Recheck the valve adjustment.
- Q: How to remove and install a cylinder head in DOHC engine?A: First and foremost, to take off the cylinder head you have to first relieve the system fuel pressure as well as disconnect the negative battery cable. Then drain the engine oil and coolant. After that, remove the strut tower bar and the air intake duct. Finally, disconnect various electrical harnesses and connectors such as EGR valve, IAC valve, TP sensor, EVAP canister purge valve, oxygen sensor, CMP sensor, ECT sensor, fuel injector wire harnesses, ignition coil connectors , ground wires , wiring harness brackets clamps clips. Also disconnect throttle cable or TV if it is there. Other hoses include brake booster hose, vacuum hoses ,canister purge hoses and other coolant hose while others are fuel supply hose return hose heater hose radiator inlet hose. The Intake Manifold rear support bracket should be removed as well as the coolant pipe detached from exhaust pipe. Finally remove Camshaft cover intake manifold Oil Pan Timing Chain cover timing chains camshafts lifters .It also involves removing coolant outlet pipe and elbow. Loosen cylinder head bolts in a specific sequence then remove cylinder head assembly . To install cylinder head clean block and head install knock pins then put new gasket . Apply engine oil to cylinder head bolts hand tighten them . Start with loosening bolt gradually and evenly cross tightening them. Install the coolant outlet elbow pipe camshafts lifters timing chains timing chain cover oil pan intake manifold camshaft cover . In addition one installs Exhaust Manifold support bracket moreover attach exhaust pipe back on it . Reattach of course means installing again hence after installing coolant pipe intake manifold rear support bracket reconnect various hoses (brake booster hose vacuum hoses canister purge hoses etc.). Connect TV cable or throttle cable too . Reconnect different electrical harnesses and connectors again (EGR valve IAC valve TP sensor EVAP cannister purge valve oxygen sensor). Install air intake duct followed by strut tower bar Remove cylinder head from vehicle according to manufacturer's instructions. Refill the engine with oil and coolant after which you should reconnect the negative battery cable. Finally, start the engine realigning ignition timing if necessary, check for leaks and proper operation .
- Q: How to disassemble and inspect cylinder heads?A: New and rebuilt cylinder heads are usually available for most engines at dealerships and auto parts stores. Because some specialized tools are needed to disassemble and inspect the cylinder head, and because some parts may not be available, It might be more practical and economical to buy a replacement head instead of disassembling, inspecting and reconditioning the old head. For SOHC engines, remove the rocker arms and shafts from the cylinder head. Label the parts or store them separately so they can be reinstalled in their original locations. Remove the distributor case from the cylinder head. On 8 valve engines, gently guide the Camshaft out of the cylinder head. Before the valves are removed, arrange to label and store them, along with their related components, so they can be kept separate and reinstalled in the same valve guides they are removed from. Compress the springs on the first valve with a spring compressor and remove the keepers. Carefully release the valve spring compressor and remove the retainer, the spring and the spring seat. Pull the valve out of the head, then remove the oil seal from the guide. Repeat the procedure for the remaining valves. Once the valves and related components have been removed and stored in an organized manner, the head should be thoroughly cleaned and inspected. If a complete engine overhaul is being done, finish the engine disassembly procedures before beginning the cylinder head cleaning and inspection process. For DOHC engines, remove the camshafts and lifters. The remainder of disassembly is similar to the disassembly procedure for SOHC engines except that you'll need a different kind of valve spring compressor. Be very careful not to nick or otherwise damage the lifter bores when compressing the valve springs. There are two valve springs per valve on DOHC engines. Be sure to keep each valve spring pair together. Also, note that each spring has a "top" and "bottom." The largepitch end is the top of the spring; the smallpitch end is the bottom.
- Q: How to reassemble the head after valve service?A: Regardless of whether or not the head was sent to an automotive repair shop for valve servicing, make sure it's clean before beginning reassembly. If the head was sent out for valve servicing, the valves and related components will already be in place. Install new seals on each of the valve guides. Using a hammer and a deep socket or seal installation tool, gently tap each seal into place until it's completely seated on the guide. Don't twist or cock the seals during installation or they won't seal properly on the valve stems. Beginning at one end of the head, lubricate and install the first valve. Apply moly-base grease or clean engine oil to the valve stem. Drop the spring seat or shim(s) (if used) over the valve guide and set the valve spring(s) and retainer in place. On DOHC engines, make sure that the inner and outer springs are installed with the large-pitch end at the top of the spring and the small-pitch end at the bottom. Compress the springs with a valve spring compressor and carefully install the keepers in the groove, then slowly release the compressor and make sure the keepers seat properly. Apply a small dab of grease to each keeper to hold it in place if necessary. Repeat the procedure for the remaining valves. Be sure to return the components to their original locations-don't mix them up! Check the installed valve spring height with a ruler graduated in 1/32-inch increments or a dial caliper. If the head was sent out for service work, the installed height should be correct (but don't automatically assume that it is). The measurement is taken from the top of each spring seat or shim(s) to the bottom of the retainer. If the height is greater than specified, shims can be added under the springs to correct it. Caution: Don't, under any circumstances, shim the springs to the point where the installed height is less than specified. Apply moly-base grease to the rocker arm faces and the Camshaft, then install the camshaft, rocker arms, springs and shafts. On 16-valve engines, tighten the bearing caps to the torque. Reinstall the distributor case, using a new O-ring.

Related Chevrolet Tracker Parts
 Chevrolet Tracker Rocker Arm
 Chevrolet Tracker Timing Cover
 Chevrolet Tracker Camshaft
 Chevrolet Tracker Rocker Shaft Spring Kit
 Chevrolet Tracker Intake Valve
 Chevrolet Tracker Exhaust Valve
 Chevrolet Tracker Rocker Guide
Browse by Year
2004 Cylinder Head 2003 Cylinder Head 2002 Cylinder Head 2001 Cylinder Head 2000 Cylinder Head 1999 Cylinder Head 1998 Cylinder Head 1997 Cylinder Head 1996 Cylinder Head 1995 Cylinder Head 1994 Cylinder Head 1993 Cylinder Head 1992 Cylinder Head 1991 Cylinder Head 1990 Cylinder Head 1989 Cylinder Head