My Garage
My Account
Cart
Genuine 1996 Chevrolet Beretta Crankshaft
Crank Shaft- Select Vehicle by Model
- Select Vehicle by VIN
Select Vehicle by Model
orMake
Model
Year
Select Vehicle by VIN
For the most accurate results, select vehicle by your VIN (Vehicle Identification Number).
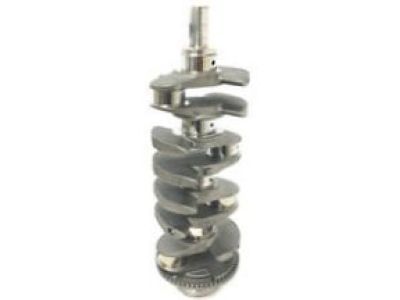
2 Crankshafts found
- Product Specifications
- Item Weight: 36.10 Pounds
- Item Dimensions: 22.3 x 7.7 x 7.5 inches
- Condition: New
- Fitment Type: Direct Replacement
- SKU: 12356587
- Warranty: This genuine part is guaranteed by GM's factory warranty.
1996 Chevrolet Beretta Crankshafts
Part Number: 10146900$455.59 MSRP: $723.33You Save: $267.74 (38%)Product Specifications- Other Name: Crankshaft, Engine; Crankshaft
- Item Weight: 40.40 Pounds
- Item Dimensions: 9.6 x 9.0 x 23.4 inches
- Condition: New
- Fitment Type: Direct Replacement
- SKU: 10146900
- Warranty: This genuine part is guaranteed by GM's factory warranty.
1996 Chevrolet Beretta Crankshaft
We are your prime source for competitively priced and high-quality OEM 1996 Chevrolet Beretta Crankshaft. We provide you with parts that will allow you to save a lot of money without sacrificing quality. All our OEM parts are backed by the manufacturer's warranty and shipped out at a swift rate.
1996 Chevrolet Beretta Crankshaft Parts Questions & Experts Answers
- Q: How to install the crankshaft on 1996 Chevrolet Beretta?A: Assuming the prior cleaning, inspection, and potential repair or reconditioning of the engine block and crankshaft, the first step in engine reassembly is the installation of the crankshaft. Remove the main bearing cap bolts with the engine positioned bottom-side up and carefully lift out the caps, ensuring their proper order for later installation. If original bearing inserts still remain in place on the block and caps then remove them from there before carefully cleaning lint free cloth. The cleanliness should be maintained at all costs during this process. Those inserts should be cleaned by raking off any build-up on their back surfaces before one insert is placed into each main bearing saddle in this block while another one goes into its corresponding main bearing cap. For correct positioning, make sure that grooved insert is oriented properly in block and tab on bearing insert must align with recess in block or cap. Moreover, oil holes in block have to match those provided for bearing inserts. Depending on the engine type, flanged thrust bearing should be installed at designated cap and saddle location. Additionally, clean faces of bearings in block and crankshaft main bearing journals. Finally, lay it carefully into position in main bearings with taking care to verify cleanliness of crankshaft as well as measure clearance of main bearings oil. For measuring this clearance, Plastigage is used by putting pieces on each crankshaft main bearing journal and installing caps without destroying Plastigage. As always take care not to rotate crankshaft while tightening main bearing cap bolts stages should work from center mains outwardly. When caps are removed compare width of crushed Plastigage with scale provided to determine if it meets specifications for oil clearance of main bearings. If these values are different then some other types of bearings may be needed instead. Clean all traces of Plastigage material from main bearing journals and also their respective faces if need arises again as a part of final crankshaft installation lift out engine followed by cleaning bearing faces in block, applying uniform layer moly-base grease or engine assembly lube on bearing surfaces (including thrust faces) and laying crankshaft back in place. Apply lubricant to the faces of the bearings in the caps and install them in their original locations with the arrows pointing forward. After that, progressively tighten bolts, tapping gently on the ends of crankshaft to align main bearing with crankshaft thrust surfaces. All main bearing cap bolts should be retightened and the crankshaft should be rotated manually to check for any binding. Finally check this by feeling endplay with feeler gauges or dial indicator before installing new rear main oil seal.


