My Garage
My Account
Cart
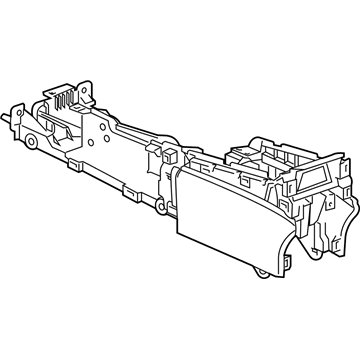
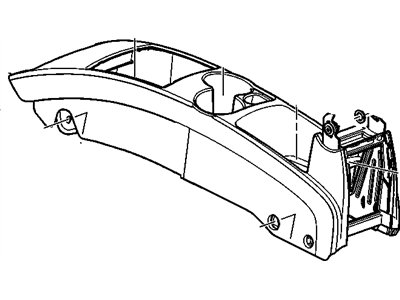
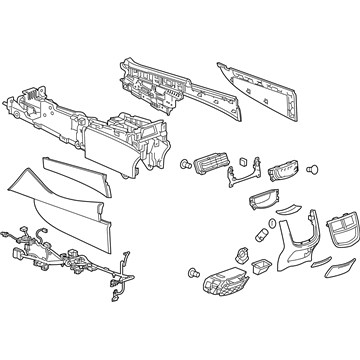
Genuine Cadillac CTS Center Console
Floor Console Assembly- Select Vehicle by Model
- Select Vehicle by VIN
Select Vehicle by Model
orMake
Model
Year
Select Vehicle by VIN
For the most accurate results, select vehicle by your VIN (Vehicle Identification Number).
221 Center Consoles found
Cadillac CTS Nut, Push In
Part Number: 11561629$7.93 MSRP: $12.47You Save: $4.54 (37%)Ships in 1-3 Business DaysCadillac CTS Console Assembly, Front Floor Lower *Cashmere E
Part Number: 23424758$160.86 MSRP: $241.58You Save: $80.72 (34%)Ships in 1-3 Business DaysCadillac CTS Console Assembly, Front Floor *Cashmere
Part Number: 22983604$562.81 MSRP: $849.05You Save: $286.24 (34%)Ships in 1-3 Business DaysCadillac CTS Console Assembly, Front Floor *Morello Red
Part Number: 23206034$1053.47 MSRP: $1589.27You Save: $535.80 (34%)Ships in 1-3 Business DaysCadillac CTS Front Floor Console Assembly Black
Part Number: 23206061$1093.83 MSRP: $1650.15You Save: $556.32 (34%)Ships in 1-3 Business DaysCadillac CTS Console Assembly, Front Floor *Ebony
Part Number: 22983614$197.00 MSRP: $868.89You Save: $671.89 (78%)Ships in 1-2 Business DaysCadillac CTS Console, Front Floor *Neutral
Part Number: 25760653$27.55 MSRP: $267.15You Save: $239.60 (90%)Ships in 1-2 Business DaysCadillac CTS Front Floor Console Assembly Black
Part Number: 23384593$973.28 MSRP: $1468.29You Save: $495.01 (34%)Ships in 1-3 Business DaysCadillac CTS Front Floor Console Assembly *Jet Black
Part Number: 84379554$1123.84 MSRP: $1695.42You Save: $571.58 (34%)Ships in 1-3 Business DaysCadillac CTS Front Floor Console Assembly Black
Part Number: 84152782$1021.15 MSRP: $1540.51You Save: $519.36 (34%)Ships in 1-3 Business DaysCadillac CTS Console Assembly, Front Floor *Ebony
Part Number: 22780589$187.40 MSRP: $392.96You Save: $205.56 (53%)Ships in 1-2 Business DaysCadillac CTS Console, Front Floor *Neutral
Part Number: 25740597$9.49 MSRP: $184.02You Save: $174.53 (95%)Ships in 1-2 Business DaysCadillac CTS Console, Front Floor *Gray
Part Number: 25740592$14.18 MSRP: $171.72You Save: $157.54 (92%)Ships in 1-2 Business DaysCadillac CTS Console, Front Floor *Neutral
Part Number: 25740593$14.55 MSRP: $176.36You Save: $161.81 (92%)Ships in 1-2 Business DaysCadillac CTS Console,Front Floor *Vy Dark Pewter
Part Number: 25737784$16.09 MSRP: $195.00You Save: $178.91 (92%)Ships in 1-2 Business DaysCadillac CTS Front Floor Console Assembly *Ebony
Part Number: 22780577$171.95 MSRP: $700.14You Save: $528.19 (76%)Ships in 1-2 Business DaysCadillac CTS Console Assembly, Front Floor *Titanium
Part Number: 22983601$211.85 MSRP: $735.78You Save: $523.93 (72%)Ships in 1-2 Business DaysCadillac CTS Console Assembly, Front Floor *Titanium
Part Number: 22983617$183.33 MSRP: $739.25You Save: $555.92 (76%)Ships in 1-2 Business Days
| Page 1 of 12 |Next >
1-20 of 221 Results
Cadillac CTS Center Console
The Cadillac CTS has what Cadillac has described as a 'center console' which is aimed at managing the belongings as well as the gadgets that occupants take inside the car. This console is an organizer compartment that is used for storing things such as money, phones, and keys and among others in a convenient place as one drives. The Cadillac CTS has been undergoing the changes of the consoles over the course of the years and it was discovered that newer models of the consoles may have cup holders and even provision for refrigeration. So, the contour of center console has changed to fulfill the recent requirements, including the buttons to control an audio and climate. Though some brands have located the gear stick position to create easy accessibility for the driver, the console acts together with the driver as well as the passenger. The Cadillac CTS console must be kept clean due to the fact that it gets previous and dirty overtime thus affecting the look and performance of the Cadillac CTS.
Each OEM Cadillac CTS Center Console we offer is competitively priced and comes with the assurance of the manufacturer's warranty for the part. Furthermore, we guarantee the speedy delivery of your orders right to your doorstep. Our hassle-free return policy is also in place for your peace of mind.
Cadillac CTS Center Console Parts Questions & Experts Answers
- Q: How to remove the center console on Cadillac CTS?A:To begin with the 2007 and earlier models, the front seats need to be put to their rear position; the console side trim panels should be pried out; the bolts in front of the console on each side removed and the seats should then be moved forward. Fourth, take out the four bolts at the rear of console, each on the two sides of the car. Depress the shift lever trim ring by pushing on the part-number tab and pull the trim ring and wiring away from the console. Raise the console and pull out all the electrical connectors before taking out the center console: the process of center console installation is the reverse of its removal. For 2008 and later models, move the front seats to their farthest forward position and lift console outer trim. Release the shift boot from the shift console trim ring and, in case of models with manual transmission, the shifter handle must also be pulled out. To remove this it is necessary to pry out the shift console trim ring and for vehicles with manual transmission the shift boot and the ring are to be removed as one piece. For 2010 and later models: there are several screws on the back side of the panel to be removed, then the top center console top panel can be pulled up forward. Take the console storage compartment fasteners and then lift out the compartment, finally, disconnect by the connectors. Fold the forward most part of the rear seats completely backward, then dismantle the carpet entirely so as to access the bolts, then put back the seats. Raise the carpet to unscrew the rear bolts of the console, two of them while others can be at the top side of the console. Last of all, raise the console, pull out all the electrical connectors and then at last, you can pull out the center console while installation is the reverse of the process.
Related Cadillac CTS Parts
Browse by Year
2019 Center Console 2018 Center Console 2017 Center Console 2016 Center Console 2015 Center Console 2014 Center Console 2013 Center Console 2012 Center Console 2011 Center Console 2010 Center Console 2009 Center Console 2008 Center Console 2007 Center Console 2006 Center Console 2005 Center Console 2004 Center Console 2003 Center Console


