My Garage
My Account
Cart
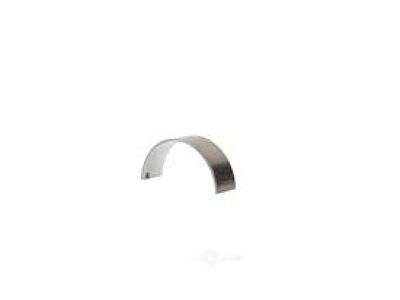
Genuine Chevrolet Caprice Rod Bearing
Engine Connecting Rod Bearing- Select Vehicle by Model
- Select Vehicle by VIN
Select Vehicle by Model
orMake
Model
Year
Select Vehicle by VIN
For the most accurate results, select vehicle by your VIN (Vehicle Identification Number).
11 Rod Bearings found
Chevrolet Caprice Connect Rod Bearing Kit
Part Number: 19256448$15.87 MSRP: $26.27You Save: $10.40 (40%)Ships in 1-2 Business DaysChevrolet Caprice Bearing Pkg, Rod (.001)
Part Number: 12523925$14.79 MSRP: $29.83You Save: $15.04 (51%)Chevrolet Caprice Connect Rod Bearing Kit
Part Number: 12523924$32.23 MSRP: $53.34You Save: $21.11 (40%)Ships in 1 Business DayChevrolet Caprice Bearing Kit,Connect Rod
Part Number: 89017700$15.23 MSRP: $25.21You Save: $9.98 (40%)Ships in 1-2 Business DaysChevrolet Caprice Bearing Kit,Connect Rod (.002U/S)
Part Number: 12329426$3.87 MSRP: $20.29You Save: $16.42 (81%)Ships in 1-2 Business Days
Chevrolet Caprice Rod Bearing
Chevrolet Caprice vehicles are equipped with the Rod Bearing, which has the responsibility of function support for the crankshaft as well as connecting rod to rotate the required direction easily with least friction. These are normally plain bearings usually made from bi-metal or tri-metal. The bimetal bearings have an aluminum alloy layer with added silicone for increasing the hardness while the trimetal bearings have copper alloy layer and lead tin copper overlay for higher strength and for resistance to wear. In recent years there have been numerous kinds of Rod Bearings used in various Chevrolet Caprice car models, whereas Carrera models were equipped with high-performance parts made with special materials and coatings to lessen friction and increase life expectancy. These performance Rod Bearings are features for compatibility with high output engines, with personalized eccentricity and oil passage enhancements. Oil clearance is critical to the longevity of the Rod Bearings to enhance the performance of Chevrolet Caprice.
Each OEM Chevrolet Caprice Rod Bearing we offer is competitively priced and comes with the assurance of the manufacturer's warranty for the part. Furthermore, we guarantee the speedy delivery of your orders right to your doorstep. Our hassle-free return policy is also in place for your peace of mind.
Chevrolet Caprice Rod Bearing Parts Questions & Experts Answers
- Q: What precautions should be taken when using Plastigage to check Rod Bearing clearances in V8 engine on Chevrolet Caprice?A:When working with Plastigage, three precautions should be taken, Before testing, make sure that all the oil and grease have been removed from the Crankshaft and bearing surfaces, do not rotate the crankshaft whilst it has the Plastigage in position, and, when removing the Plastigage after the testing process, be very careful not to harm the crankshaft or the bearing surfaces; this can be done via wiping off the Plastigage with a fingernail or a blunt wood stick rather All major and big-end bearings should be checked for clearance when an engine is being overhauled, a procedure which applies whether new or reconditioned bearings are being fitted. First, it is advisable to fit in the main bearings and caps into the engine block after which you have to clean the crankshaft and the bearing portions with oil, grime, and other interferences. Take a strip of Plastigage and fit it along the extent of each of the main bearing journals, then fasten and snug each of the main bearing caps into position in accordance with the torque specifications and in such a way that the arrow on the cap points towards the front part of the engine. Following this tighten all bearing caps and then withdraw them with a view of measuring the flattened width of the Plastigage strip using the scale present on the Plastigage envelope to determine the bearing clearance. To find out if the cylinder bores are out of round, unbolt the Plastigage gently, turn the crankshaft 90 deg and then measure the clearances again using Plastigage the values with the first measurements to gauge for eccentricity. For connecting rod bearing clearance, assembled each Piston/rod assembly as well as using the Plastigage as mentioned earlier and also for connecting rod side clearance. If the bearings are within tolerances they may be installed as described above, if not they must be replaced by correct size bearings and where upper and lower bearings are affected they must be replaced together.
