My Garage
My Account
Cart
Genuine Chevrolet Colorado Instrument Cluster
Speedometer Instrument Cluster- Select Vehicle by Model
- Select Vehicle by VIN
Select Vehicle by Model
orMake
Model
Year
Select Vehicle by VIN
For the most accurate results, select vehicle by your VIN (Vehicle Identification Number).
128 Instrument Clusters found
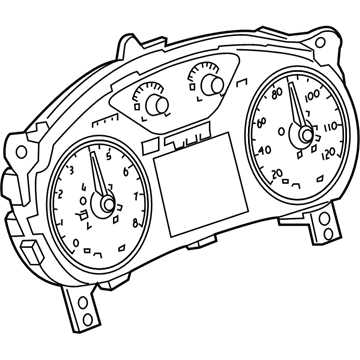
Chevrolet Colorado Instrument Cluster Assembly
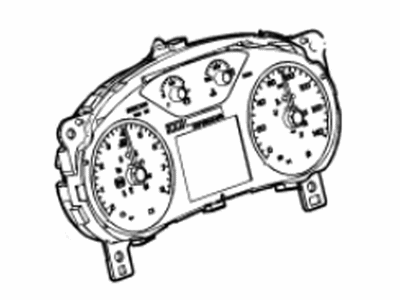
Part Number: 84624950$205.17 MSRP: $310.86You Save: $105.69 (34%)Ships in 1-3 Business DaysChevrolet Colorado Instrument Panel Gage Cluster
Part Number: 25894033$73.78 MSRP: $116.00You Save: $42.22 (37%)Ships in 1-2 Business DaysChevrolet Colorado Instrument Cluster Assembly
Part Number: 84560526$287.29 MSRP: $435.39You Save: $148.10 (35%)Ships in 1-3 Business DaysChevrolet Colorado Instrument Cluster Assembly
Part Number: 23231648$188.44 MSRP: $285.58You Save: $97.14 (35%)Ships in 1-3 Business DaysChevrolet Colorado Instrument Cluster Assembly
Part Number: 85641298$104.68 MSRP: $158.60You Save: $53.92 (34%)Ships in 1-2 Business DaysChevrolet Colorado Instrument Cluster Assembly
Part Number: 84624947$172.23 MSRP: $270.85You Save: $98.62 (37%)Ships in 1-3 Business DaysChevrolet Colorado Instrument Cluster Assembly
Part Number: 84076682$185.12 MSRP: $280.54You Save: $95.42 (35%)Ships in 1-3 Business DaysChevrolet Colorado Instrument Cluster Assembly
Part Number: 84560525$304.89 MSRP: $462.04You Save: $157.15 (35%)Ships in 1-3 Business DaysChevrolet Colorado Instrument Cluster Assembly
Part Number: 84033922$168.66 MSRP: $265.23You Save: $96.57 (37%)Ships in 1-3 Business DaysChevrolet Colorado Instrument Cluster Assembly
Part Number: 84624949$176.70 MSRP: $267.78You Save: $91.08 (35%)Ships in 1-3 Business DaysChevrolet Colorado Instrument Cluster Assembly
Part Number: 84900514$163.87 MSRP: $257.70You Save: $93.83 (37%)Ships in 1-3 Business DaysChevrolet Colorado Instrument Cluster Assembly
Part Number: 84398584$205.17 MSRP: $310.86You Save: $105.69 (34%)Ships in 1-3 Business DaysChevrolet Colorado Instrument Cluster Assembly
Part Number: 84474088$207.25 MSRP: $314.06You Save: $106.81 (35%)Ships in 1-3 Business DaysChevrolet Colorado Instrument Cluster Assembly
Part Number: 84033923$186.33 MSRP: $282.36You Save: $96.03 (35%)Ships in 1-3 Business DaysChevrolet Colorado Instrument Cluster Assembly
Part Number: 84474091$186.33 MSRP: $282.37You Save: $96.04 (35%)Ships in 1-3 Business DaysChevrolet Colorado Instrument Cluster Assembly
Part Number: 84560527$320.00 MSRP: $480.49You Save: $160.49 (34%)Chevrolet Colorado Instrument Cluster Assembly
Part Number: 85153724$305.35 MSRP: $458.58You Save: $153.23 (34%)Chevrolet Colorado Instrument Cluster Assembly
Part Number: 84681080$258.77 MSRP: $388.55You Save: $129.78 (34%)Chevrolet Colorado Instrument Panel Gage Cluster
Part Number: 25847479$91.94 MSRP: $137.43You Save: $45.49 (34%)Chevrolet Colorado Instrument Cluster Assembly
Part Number: 84703258$192.61 MSRP: $289.24You Save: $96.63 (34%)
| Page 1 of 7 |Next >
1-20 of 128 Results
Chevrolet Colorado Instrument Cluster
The necessary driving information about the conditions of the vehicles is delivered in the Chevrolet Colorado through the Instrument Cluster. Located to the right of the steering column, it has the speedometer, the tachometer, the actual fuel gauge and various warning lights that relay information on the operational status of the car to the driver. For the years, Chevrolet Colorado employed various forms for the Instrument Clusters, ranging from lowly analog to more complex digital. These are improvement to the function so that real time information regarding vehicle parameters and other usability factors can be provided. The Instrument Cluster has to be kept in good working order so that the readings are clear and precise; sometimes problems can arise which may cause the removal of the factory unit and its replacement with a refurbished one.
Each OEM Chevrolet Colorado Instrument Cluster we offer is competitively priced and comes with the assurance of the manufacturer's warranty for the part. Furthermore, we guarantee the speedy delivery of your orders right to your doorstep. Our hassle-free return policy is also in place for your peace of mind.
Chevrolet Colorado Instrument Cluster Parts Questions & Experts Answers
- Q: Is instrument cluster removal a recommended procedure for home mechanics on Chevrolet Colorado?A:This procedure is lengthy and difficult, even for an experienced mechanic, and due to the number of electrical connections, fasteners, and various safety systems involved, instrument panel removal is not recommended for the home mechanic. Begin by turning the front wheels to the straight-ahead position and locking the steering column, then disconnect the negative battery cable. Disable the airbag system, then use a trim tool to remove the windshield post interior trim strips. Carefully pull up the three trim covers along the upper trim pad, detach the covers from the instrument panel near the windshield, and remove the nuts underneath. Locate the ambient light sensor in the center of the trim pad, pry it from the pad with a small screwdriver, and disconnect the electrical connector. Remove the Center Console and all panels, including the instrument cluster. Detach the steering column from the dash and lower it; if planning to remove the instrument panel support structure, remove the steering column completely. Remove the left and right HVAC outlets, the radio, and, if applicable, the upper front speakers. Remove the heater/air conditioning control module and free its wiring harness from the retainer. Remove the panel mounting screw located behind the instrument cluster and the instrument panel mounting screws where the glove box was mounted, along with the screws securing the glove box door latch and the passenger airbag. Through the hole left by removing the glove box, remove the screw holding the instrument panel to the carrier, then remove the end closure panels and the screws on each side of the instrument panel. Have an assistant help lift the instrument panel out of the vehicle, pulling out on the lower corners to release the clips securing it. Once free, release all wiring harness clips on the back of the instrument panel and remove it, with installation being the reverse of removal.
Related Chevrolet Colorado Parts
Browse by Year
2024 Instrument Cluster 2023 Instrument Cluster 2022 Instrument Cluster 2021 Instrument Cluster 2020 Instrument Cluster 2019 Instrument Cluster 2018 Instrument Cluster 2017 Instrument Cluster 2016 Instrument Cluster 2015 Instrument Cluster 2012 Instrument Cluster 2011 Instrument Cluster 2010 Instrument Cluster 2009 Instrument Cluster 2008 Instrument Cluster 2007 Instrument Cluster 2006 Instrument Cluster 2005 Instrument Cluster 2004 Instrument Cluster


