My Garage
My Account
Cart
Genuine Chevrolet Corvette Piston
Engine Pistons- Select Vehicle by Model
- Select Vehicle by VIN
Select Vehicle by Model
orMake
Model
Year
Select Vehicle by VIN
For the most accurate results, select vehicle by your VIN (Vehicle Identification Number).
31 Pistons found
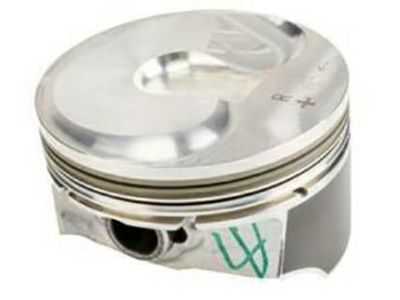
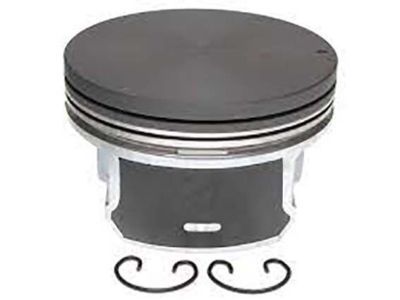
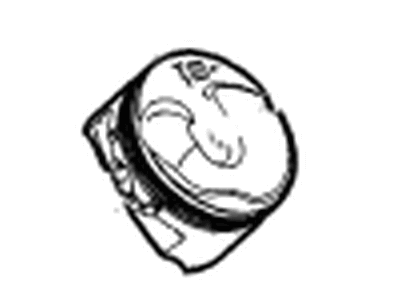
Chevrolet Corvette Piston Kit (Std RH)
Part Number: 12656874$52.84 MSRP: $91.13You Save: $38.29 (43%)Ships in 1-3 Business DaysChevrolet Corvette Piston Asm,(W/ Pinion .5Mm Outside)
Part Number: 19209708$264.54 MSRP: $437.74You Save: $173.20 (40%)Ships in 1-3 Business DaysChevrolet Corvette Piston Kit,Engine
Part Number: 19178305$86.55 MSRP: $138.04You Save: $51.49 (38%)Ships in 1-3 Business DaysChevrolet Corvette Piston, (W/Pinion)
Part Number: 19207287$60.21 MSRP: $145.79You Save: $85.58 (59%)Ships in 1-3 Business DaysChevrolet Corvette Piston Kit (Right Hnd .5Mm Outside)
Part Number: 12658744$261.54 MSRP: $416.97You Save: $155.43 (38%)Ships in 1-3 Business DaysChevrolet Corvette Piston Kit (Left Hand .5Mm Outside)
Part Number: 12658743$261.54 MSRP: $416.97You Save: $155.43 (38%)Ships in 1-3 Business DaysChevrolet Corvette Piston Kit (.5Mm O/S, Lt4 Lh)
Part Number: 12690483$141.72 MSRP: $234.88You Save: $93.16 (40%)Ships in 1-3 Business DaysChevrolet Corvette PISTON ASM,(W/PIN)
Part Number: 19434034$149.64 MSRP: $238.65You Save: $89.01 (38%)Ships in 1-2 Business DaysChevrolet Corvette Piston Assembly,(W/ Pinion, Std)
Part Number: 19303744$246.99 MSRP: $393.94You Save: $146.95 (38%)Chevrolet Corvette PISTON KIT, (STD - LH)
Part Number: 19431933$201.31 MSRP: $321.08You Save: $119.77 (38%)Chevrolet Corvette PISTON KIT (.5MM O/S LT4 RH)
Part Number: 12690484$359.79 MSRP: $587.20You Save: $227.41 (39%)Ships in 1-3 Business DaysChevrolet Corvette PISTON KIT, (STD - RH)
Part Number: 19431932$201.31 MSRP: $321.08You Save: $119.77 (38%)Chevrolet Corvette Piston, (W/Pinion)
Part Number: 19207288$192.01 MSRP: $306.23You Save: $114.22 (38%)Ships in 1-3 Business DaysChevrolet Corvette Piston Kit (.5Mm Outside)
Part Number: 19178568$133.44 MSRP: $212.82You Save: $79.38 (38%)Ships in 1-3 Business DaysChevrolet Corvette Piston Asm,(W/ Pinion)(.030 Oversize)
Part Number: 12528830$20.33 MSRP: $184.08You Save: $163.75 (89%)Ships in 1-2 Business DaysChevrolet Corvette Piston Asm,(W/ Pinion)
Part Number: 19207289$164.84 MSRP: $260.52You Save: $95.68 (37%)Ships in 1-3 Business DaysChevrolet Corvette Piston Kit (RH .5Mm Outside)
Part Number: 12661869$505.55 MSRP: $802.64You Save: $297.09 (38%)Ships in 1-3 Business DaysChevrolet Corvette PISTON KIT,ENG
Part Number: 12725752$183.33 MSRP: $303.41You Save: $120.08 (40%)Ships in 1-3 Business DaysChevrolet Corvette Piston, (W/Pinion)
Part Number: 88984245$116.53 MSRP: $184.17You Save: $67.64 (37%)
| Page 1 of 2 |Next >
1-20 of 31 Results
Chevrolet Corvette Piston
The Piston used in Chevrolet Corvette automobiles is an essential item that helps transform power developed by combustion into energy that propels the car. Being one of the key parts of an engine, the Chevrolet Corvette Piston is in charge of transferring force from expanding gases to the crankshaft and thus providing proper engine performance. Usually made from aluminum alloys for reinforcement and light-weight features, some race variants may come in forged or billet construction. Many styles of pistons have been used in Chevrolet Corvette models in years trunk pistons for petrol and diesel engines supporting the side force and have the oil rings. Furthermore, racing pistons are optimized to be thinner thereby increasing balance and efficiency at high RPM. These pistons have been well designed to keep Chevrolet Corvette as capable and long lasting as it is capable throughout different driving conditions.
Each OEM Chevrolet Corvette Piston we offer is competitively priced and comes with the assurance of the manufacturer's warranty for the part. Furthermore, we guarantee the speedy delivery of your orders right to your doorstep. Our hassle-free return policy is also in place for your peace of mind.
Chevrolet Corvette Piston Parts Questions & Experts Answers
- Q: What steps must be taken before removing the piston and connecting rod assemblies on Chevrolet Corvette?A:The piston and connecting rod assemblies can be removed only if the cylinder head and the oil pan are first detached. Palpate with your fingernail for any ridges at the upper limit of ring travel and be sure to use a ridge reamer to pare them down because, if not, your piston will surely break. Number each piston and draw an arrow toward the front of the engine, do not stamp or center punch. When the cylinder ridges have been milled off, turn the engine on its side so that the Crankshaft is in the upward position and check the end-float of the connecting rod with feeler blanks as follows: Locate the connecting rods as well as the caps without any difficulties; reverse the cap bolts gradually to a thread-locking stage where the cap bolts can be easily unscrewed. Upon withdrawal of the connecting rod, unbolt the cap and the bearing insert gently and then release the connecting rod and piston together through the top of the engine but with assurance that all the ridge material has been eradiated. Do the same with the other cylinders and use the caps and inserts to save from being damaged. The pistons and connecting rods thus are suitable for inspection and reconditioning. These should be measured before one can proceed to put new piston rings on, the piston ring side clearance should also be properly done. Arrange the piston/connecting rod assemblies and purchase new rings on the basis of match for installation. Place the top ring, as it aligns with cylinder walls, install the first cylinder and check the end clearance with the feeler gauge. In the event the end gaps are too large, then filing of the ring ends should be done so as to optimize the gaps. First of the three rings to be fitted are the oil control rings with the contracted side fitting against the block. Cylinder wall should be clean and the edges should be chamfered before installation of the cylinder and crankshaft should be fitted. Take out all the old bearing inserts from the connecting rod and cap and install the new bearings without engaging in the process of lubrication, to ensure that new bearing insert fits properly. Align the piston ring gaps in 90-degree intervals, apply a coat of oil on the piston and the rings and use the piston ring compressor in placing the rings. Place the piston/connecting rod assembly into the cylinder with an eye on the presence of some level of resistance. After installation, confirm that the connecting rod bearing oil clearance has been done properly using Plastigage by ascertaining the sizes as well as condition of bearing inserts. Scrape off any Plastigage material, coat the bearing faces with a thin layer of grease or assembly lube, replace the rod cap with new fasteners and torque to the proper figure. The steps are to be repeated for rest of the assemblies making sure they are also clean and aligned correctly. Last of all, turn the crankshaft and check binding and the end float of the connecting rod and adjust it if any new parts put in.
Related Chevrolet Corvette Parts
Browse by Year
2024 Piston 2023 Piston 2022 Piston 2021 Piston 2020 Piston 2019 Piston 2018 Piston 2017 Piston 2016 Piston 2015 Piston 2014 Piston 2013 Piston 2012 Piston 2011 Piston 2010 Piston 2009 Piston 2008 Piston 2007 Piston 2006 Piston 2005 Piston 2004 Piston 2003 Piston 2002 Piston 2001 Piston 2000 Piston 1999 Piston 1998 Piston 1997 Piston 1996 Piston 1995 Piston 1994 Piston 1993 Piston 1992 Piston 1991 Piston 1990 Piston 1989 Piston 1988 Piston 1987 Piston
