My Garage
My Account
Cart
Genuine GMC Transmission Assembly
Trans Assembly- Select Vehicle by Model
- Select Vehicle by VIN
Select Vehicle by Model
orMake
Model
Year
Select Vehicle by VIN
For the most accurate results, select vehicle by your VIN (Vehicle Identification Number).
767 Transmission Assemblies found
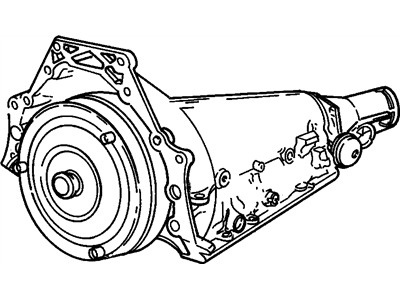
GMC Transmission Asm,Auto (Goodwrench Remanufacture)
Part Number: 17804180$2086.15 MSRP: $2961.25You Save: $875.10 (30%)Product Specifications- Other Name: TRANSMISSION, Manual(5 Speed)
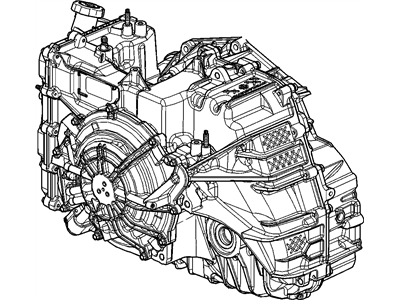
GMC Transmission Asm, Auto (Goodwrench Remanufacture) (3Kkp)
Part Number: 17804163$2217.71 MSRP: $3148.68You Save: $930.97 (30%)Product Specifications- Other Name: TRANSMISSION, Manual(5 Speed)
- Replaces: 08690957, 8690957
GMC Transmission Asm, Auto (Goodwrench Remanufacture) (5Mbp)
Part Number: 17804177$3617.39 MSRP: $4083.75You Save: $466.36 (12%)Ships in 1-3 Business DaysProduct Specifications- Other Name: TRANSMISSION, Automatic
GMC TRANSMISSION ASM,AUTO 11DDA (SERV REMAN)
Part Number: 19431759$4302.11 MSRP: $4819.13You Save: $517.02 (11%)Ships in 1-3 Business DaysProduct Specifications- Other Name: Transmission
- Replaces: 19257123, 24257175, 19329608, 19303210, 19418873
GMC TRANSMISSION ASM,AUTO 17CKA REMAN
Part Number: 19431764$4236.58 MSRP: $4745.00You Save: $508.42 (11%)Product Specifications- Other Name: Transmission
- Replaces: 19418462, 19333281, 24279064, 19419937, 24258086, 19418449, 24270749
GMC TRANSMISSION ASM,AUTO 17CLA (SERV REMAN)
Part Number: 19431766$4222.22 MSRP: $4728.75You Save: $506.53 (11%)Product Specifications- Other Name: Transmission
- Replaces: 19418455, 24279065, 24270750, 19333285, 19419938, 24265620
GMC Automatic Transmission Assembly
Part Number: 19434868$5018.39 MSRP: $5605.65You Save: $587.26 (11%)Product Specifications- Other Name: TRANSMISSION ASM,AUTO (REMAN)
- Replaces: 24279588, 19355592, 24268010, 24274275, 24283596, 19433289
GMC TRANSMISSION ASM,AUTO 17DHA (SERV REMAN)
Part Number: 19431754$4220.01 MSRP: $4726.25You Save: $506.24 (11%)Product Specifications- Other Name: Transmission
- Replaces: 19303199, 19257124, 19303207, 19418456, 19299593, 24250672, 19367387, 24250416, 19303211, 19419940, 24257203, 19367384, 24257176, 24245905, 24270752, 24279078
GMC Transaxle Asm,Auto (4Xrk 3.16 Awd Generator Ii)
Part Number: 19354268$3961.08 MSRP: $4445.22You Save: $484.14 (11%)Product Specifications- Other Name: TRANSAXLE ASM,AUTO (4XRK 3.16 AWD GEN II); Transaxle
- Replaces: 24250057, 24260831
GMC Transaxle Assembly, Auto 7Wlk
Part Number: 19417243$4233.91 MSRP: $4765.73You Save: $531.82 (12%)Ships in 1-3 Business DaysProduct Specifications- Other Name: Transaxle
- Replaces: 19354260, 24262790, 24278558, 24257285, 24260663
GMC TRANSMISSION ASM,AUTO 19CKA (SERV REMAN)
Part Number: 19431548$4200.30 MSRP: $4703.96You Save: $503.66 (11%)Ships in 1-3 Business DaysProduct Specifications- Other Name: Transmission
- Replaces: 24284620
GMC Transmission Assembly, Auto (1Xml)
Part Number: 24289597$3747.08 MSRP: $4143.75You Save: $396.67 (10%)Ships in 1-3 Business DaysProduct Specifications- Other Name: Transmission
- Replaced by: 19434554
GMC TRANSMISSION ASM,AUTO (REMAN 0BKJ)
Part Number: 19367429$6312.01 MSRP: $7021.50You Save: $709.49 (11%)Product Specifications- Replaced by: 19540602
- Replaces: 24271649, 24282946, 24294934, 24045101
GMC Automatic Transmission Assembly
Part Number: 19434874$4773.86 MSRP: $5329.03You Save: $555.17 (11%)Product Specifications- Other Name: TRANSMISSION ASM,AUTO (REMAN); Transmission
- Replaces: 19433319, 24042784, 24284197
GMC Transmission Assembly, Auto 0D8A ( Seed)
Part Number: 24284610$4121.65 MSRP: $4614.99You Save: $493.34 (11%)Ships in 1-3 Business DaysProduct Specifications- Other Name: Transmission
- Replaced by: 19433471
- Product Specifications
- Other Name: TRANSMISSION, Automatic
- Replaces: 08683987, 8683987
GMC TRANSMISSION ASM,AUTO 17DCA (SERV REMAN)
Part Number: 19431753$4225.53 MSRP: $4732.50You Save: $506.97 (11%)Product Specifications- Other Name: Transmission
- Replaces: 19418453, 24279077, 24265611, 24250414, 19303201, 19303209, 19299591, 19419939, 19367388, 24250609, 24258946, 19367385
GMC Automatic Transmission Assembly
Part Number: 19434870$5302.14 MSRP: $5926.62You Save: $624.48 (11%)Product Specifications- Other Name: TRANSMISSION ASM,AUTO (REMAN)
- Replaces: 19433315, 24279036, 24042783
GMC Automatic Transmission Assembly
Part Number: 19434869$5118.86 MSRP: $5719.31You Save: $600.45 (11%)Product Specifications- Other Name: Automatic Transmission Remanufactured; TRANSMISSION ASM AUTO (REMAN), Transmission
- Replaces: 24281108, 19433297, 19355638, 24288554, 24272942, 24281336
GMC Automatic Transmission Assembly
Part Number: 19434875$3290.13 MSRP: $3603.08You Save: $312.95 (9%)Product Specifications- Other Name: TRANSMISSION ASM,AUTO (REMAN)
- Replaced by: 19540196
- Replaces: 19433314, 24042782, 24279035
| Page 1 of 39 |Next >
1-20 of 767 Results
GMC Transmission Assembly
You're in the right place for budget-friendly OEM GMC Transmission Assemblies. Our extensive catalog features genuine GMC Transmission Assemblies, each backed by a manufacturer's warranty and guaranteeing superior quality, dependability, and longevity. Discover how shopping with us can save you both time and money when investing in our auto parts.
GMC Transmission Assembly Parts Questions & Experts Answers
- Q: How to remove and install a manual transmission assembly on GMC Canyon?A:To remove the transmission, first disconnect the negative cable from the battery. Shift the transmission into Neutral and remove the shift lever. Raise the vehicle sufficiently to provide clearance for the transmission removal, ensuring it is securely supported on jackstands. If equipped, remove the skid plate and disconnect the electrical connectors from the transmission and the oxygen sensor connectors. If the transmission will be disassembled, drain the lubricant. Remove the driveshaft, using a plastic bag to cover the end of the transmission to prevent fluid loss and contamination. For 4WD models, remove the shift cable and vent hose from the transfer case. Disconnect the clutch hydraulic line at the bellhousing, using a special tool to push back the quick-connect line, noting that the hydraulic line has check-balls inside, eliminating the need to plug it once disconnected. Support the engine from above with an engine hoist or place a jack under the engine oil pan, ensuring the engine remains supported while the transmission is out. Support the transmission with a jack, preferably one designed for this purpose, and use safety chains to steady it. Remove the mounting nuts for the fuel lines attached to the transmission, then remove the exhaust pipe and hanger from the transmission crossmember. Remove the transmission mount nuts from below the crossmember, raise the engine slightly, and remove the crossmember. Lower the jacks supporting the transmission and engine assembly, then remove the bolts attaching the transmission to the engine. Check for any remaining wiring or hoses connected to the transmission, then move the transmission and jack toward the rear of the vehicle until the input shaft clears the splined hub in the clutch disc, keeping the transmission level. Once clear, lower the transmission slightly and remove it from under the vehicle. While the transmission is out, inspect all clutch components and consider installing new ones. For installation, insert a small amount of multi-purpose grease into the pilot bearing in the crankshaft and lubricate the inner surface of the bearing, as well as applying a light film of grease on the input shaft splines, input shaft bearing retainer, and release lever/bearing contact points. Install the clutch components, then secure the transmission to the jack, raise it into position, and carefully slide it forward to engage the input shaft with the clutch plate hub, avoiding excessive force. Install and tighten the transmission-to-engine bolts, ensuring not to use them to draw the transmission to the engine. Raise the transmission into place and install the mount, then install the crossmember and lower the transmission extension housing onto the mount and crossmember, tightening all nuts and bolts securely. Remove the jacks supporting the transmission and engine, install the transfer case and shift cable for 4WD models, and reinstall the various items removed earlier. Connect all wiring that was disconnected during removal and reattach the fuel lines to the transmission brackets. Fill the transmission with the specified lubricant to the proper level, remove the jackstands, lower the vehicle, connect the negative battery cable, and conduct a road test for proper operation while checking for leakage.
Related GMC Parts
Browse by Model
Acadia Transmission Assembly C1500 Transmission Assembly C2500 Transmission Assembly C3500 Transmission Assembly Canyon Transmission Assembly Envoy Transmission Assembly G1500 Transmission Assembly G2500 Transmission Assembly G3500 Transmission Assembly Jimmy Transmission Assembly K1500 Transmission Assembly K2500 Transmission Assembly K3500 Transmission Assembly P2500 Transmission Assembly P3500 Transmission Assembly R1500 Transmission Assembly R2500 Transmission Assembly R3500 Transmission Assembly S15 Transmission Assembly Safari Transmission Assembly Savana Transmission Assembly Sierra Transmission Assembly Sonoma Transmission Assembly Suburban Transmission Assembly Syclone Transmission Assembly Terrain Transmission Assembly Typhoon Transmission Assembly V1500 Transmission Assembly V2500 Transmission Assembly V3500 Transmission Assembly Yukon Transmission Assembly


