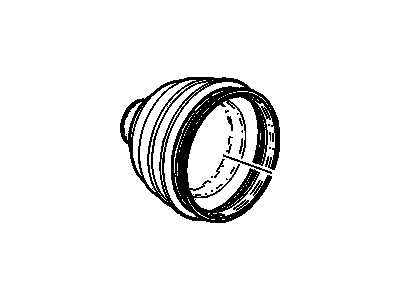
Before working on CV joint boots, look at all avenues of available options as complete rebuilt CV axles can be gotten on the exchange basis. However, before pulling the car apart you should consider what the part will cost and if they will be easily available. Start by detaching the CV axle and then clamping it between the jaws of a vise and putting a piece of rag on the jaws of the vise. Check the amount of radial endurance for the CV joint, since more than 0.04mm of play may mean that it is worn, and check how smoothly it operates throughout its arc. When a boot is torn, the joint has to be dismantled and before replacement, the components have to be cleaned to check for signs of deterioration that might have been caused by loss of lubricant or contamination. To remove the inner boot, one has to remove the boot retaining clamps, slide the spider housing off the spider assembly, and then pull the boot to the middle of the CV axle. Thereafter place each end of the stop ring away from each other and pull it towards the center of the shaft, in order to remove the retaining ring tap gently the spider off from the axleshaft with the help of a brass punch while holding the bearings in position. Remove old grease, detachment of the spider assembly, and check out the elements that are used for operation. Smear the inner bearing surfaces with CV joint grease, wind tape round the splines of the axleshaft and fit the new boot & clamps. In the case of the outer CV joint boot removal and replacement, there are metallic retaining clamps that are cut off and the boot is slid back and the CV joint is pulled off the shaft. Gently take out all the ball bearings and wash all the part and have a look for any signs of wear and tear. Replace the joint by fitting the inner race and cage together, putting in the new grease and the snap-ring. Finally, the car should be positioned and the CV joint assembly positioned on the CV axle along with the boot and fastened using retaining clamps.