Make sure this part fits

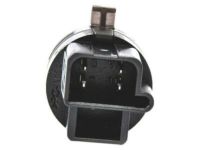
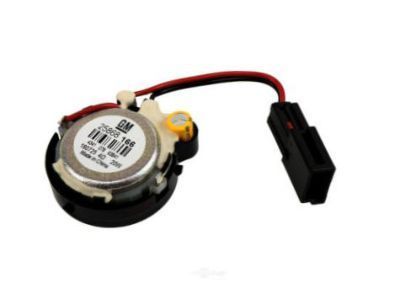
Buick 25868166 Speaker,Radio Windshield Side Garnish Molding

2010-2017 Buick

Customer Questions & Expert Answers (8)
GM 25868166 Speaker,Radio Windshield Side Garnish Molding
  • Part Description
    SPEAKER, Radio Speaker
  • Manufacturer
    General Motors
Make sure this part fits
$13.02 MSRP: $24.55
You Save: $11.53 (47%)
Ships in 1-3 Business Days
1
ADD TO CART
  • Related Parts
  • Product Specifications
  • Vehicle Fitment
  • Customer Questions & Expert Answers
  • Product Specifications

    BrandGenuine Buick
    Manufacturer Part Number25868166
    Part DescriptionSPEAKER, Radio Speaker
    Item Dimensions5.3 x 2.2 x 2.2 inches
    Item Weight0.30 Pounds
    ConditionNew
    Fitment TypeDirect Replacement
    Require Quantity2
    ManufacturerGeneral Motors
    SKU25868166
    WarrantyThis genuine GM part is guaranteed by GM's factory warranty.
    Shipping & ReturnShipping Policy Return Policy
    Warning: California's Proposition 65
  • Vehicle Fitment

    Year Make Model Engine Important vehicle option details
    2010-2015 Buick Allure4 Cyl 2.4L, 6 Cyl 3.0L, 6 Cyl 3.6LCX 4 DOOR SEDAN, CXL 4 DOOR SEDAN, CXS 4 DOOR SEDAN
    2010-2016 Buick LaCrosse4 Cyl 2.4L, 6 Cyl 3.0L, 6 Cyl 3.6LCX 4 DOOR SEDAN, CXL 4 DOOR SEDAN, CXS 4 DOOR SEDAN
    2011-2017 Buick Regal4 Cyl 2.0L, 4 Cyl 2.4LCX 4 DOOR SEDAN, CXL 4 DOOR SEDAN, CXL TURBO 4 DOOR SEDAN, CXS 4 DOOR SEDAN
    2016-2017 Buick Verano4 Cyl 2.0L, 4 Cyl 2.4LCX 4 DOOR NOTCHBACK, CXL 4 DOOR NOTCHBACK
  • Customer Questions & Expert Answers

    Q:
    I would like to confirm if this is the correct part number for my vehicle. Please advise. Thank you. Posted by GMPartsGiant Specialist
    A:
    You can Select Your Vehicle to check if 25868166 fits your vehicle.
    Posted by GMPartsGiant Specialist
    Q:
    How to remove the car speakers on Cadillac CTS? Posted by Customer
    A:
    To take out the radio in the year 2007 or earlier models, then untwist the cable from the negative terminal of the battery then remove the center vent panel trim and take off the connection to the hazard flasher switch and at last remove ashtray of the center console. Third, take off the air conditioning control panel from the instrument panel and remove the wires, after that, turn the four bolts fixing the radio to the instrument panel counterclockwise. This one however just requires the extraction of the radio and then removal of electrical connectors and the antenna cable seated at the rear of the radio with the installation process being a mirror image of the removal process. As for further information, please be advised that 2008 and later models feature the Front Radio Control Module (FRCM) hiding in the center trim panel, so the actual radio is nestled behind the FRCM. If replacement is required then it must be made by the dealer service department alone because of the imposed module configuration program. First, undo the negative terminal of the battery, and then demount the center radio and heater-air control panel. If replacing the FRCM or center trim panel, unbolt the FRCM from the center trim panel after both parts have been removed. For radio removal, unscrew the radio mounting screws and withdraw the radio unit to which the antenna cable and all electrical connectors are disconnected; while for installation, it is the reverse procedure. For door speakers whether front or rear, the door trim panel has to be removed to access the speaker; the next thing is to remove the screws holding the speakers and pulling out the speakers to disconnect the electrical connectors and to install a new one the procedures are reversed. For door tweeters, there is the repeated process of the removal of the door trim panel and sail panel as well as the disconnecting of the tweeter electrical connector and the removal of the tweeter grille from the panel and installation being the reverse of the removal. For instrument panel speakers, release the defrost panel from the instrument panel cover, unscrew the center and corner of the speakers and then raise out the speakers from the instrument panel and then detach the electrical connector and the process is just the reverse of the one mentioned above. For the rear speakers which may differ in regards to the year and model, the process begins with the removal of the package tray, followed by the removal of the speaker mounting fasteners, pulling up of the speaker and the detachment of the electrical connector. The reverse process is followed in the installation.
    Posted by GMPartsGiant Specialist
    Q:
    What does the entertainment system include and how do you remove and install the car speakers on Chevrolet Corvette? Posted by Customer
    A:
    The entertainment system includes an AM/FM stereo, disc player, remote disc stacker, satellite connections, antenna control, and a built-in theft deterrent system, with variations depending on factory equipment. To remove the radio, disconnect the negative battery terminal, access the fuse box by removing the front kick panel, and take out the #5 mini fuse marked "RDO/CD." Next, remove the center console and instrument panel trim plate, ensuring any necessary HVAC control head adjustments are made for clearance. Unscrew the radio from the support bracket, pull it out to access electrical connections and the antenna cable, disconnect everything, and then remove the radio. Installation follows the reverse order, remembering to reactivate the theft deterrent system if it was originally activated. The theft deterrent system, GM's "TheftLock," activates when the radio or battery is disconnected, displaying "LOC" to indicate power removal, requiring a secret code for reactivation, which can be personal or obtained from the dealership if lost. Some models may have an XM radio receiver, with activation procedures available through customer service. For speaker removal, start with the door speakers by taking off the trim panel and speaker mounting fasteners, handling the assembly carefully to avoid damaging connections. For rear speakers in coupe models, raise the rear window panel, pry the speaker grill to disengage clips, and remove the speaker after disconnecting electrical connections. In convertible models, raise the top partially to access the rear section, remove fasteners and quarter sections, then disconnect the speaker. For hardtop models, remove rear compartment side panels and screws securing the speaker before disconnecting it. To remove the remote CD player, disconnect the negative battery terminal, access the fuse box, remove the RDO/CD fuse, and then take out the rear center section access panel. Expose the mounting bolts, disconnect electrical connectors, and remove the screws securing the CD player before taking it out along with the brackets, with installation being the reverse of removal.
    Posted by GMPartsGiant Specialist
    Q:
    How to disconnect and install a car speakers on Chevrolet Malibu? Posted by Customer
    A:
    To disconnect the radio turn off the battery and unplug the negative cable then remove the center dash trim bezel. Fourth, take out the radio mounting screws and pull out the radio from the instrument panel together with the removal of the electrical connectors and anten the back part. Installation is done in the reverse of the removal process, and after fixing a new or a replacement factory radio, a scan tool is needed to 'marry' it to the car, a task that is best handled by a dealer service department or a properly equipped independent auto repair shop. For door speakers, first, you will have to take off the door trim panel, location the speaker mounting screws and pull the speaker from the door, and remove the electrical connector. The process of installation is just the exact opposite of the removal process. For front instrument panel speaker, the grill has to be detached along with the screws, the speaker is lifted from the dash and electrical connector is disconnected similarly to install one has to reverse the whole process. For A-pillar tweeters, it is advised to pop the A-pillar trim out by releasing retaining clips-unplug the electrical connecter-remove the tweeter connected to the trim-in case if tether is removed from top of A-pillar trim, then replace it. The process of installation, therefore, is the mirroring opposites of the process of removal. For the rear speaker, pull the parcel shelf trim panel down and then take out the screws mounting the speaker, then, you remove the speaker and disconnect the electrical connector and the installation is done in a reverse manner. The right side trunk speaker amplifier is located in the right side of the trunk area, access involves removing the luggage compartment right-side trim panel, after which six screws hold the amplifier to the rear of the wheel well, and the electrical connections must be disconnected and reconnected in reverse order.
    Posted by GMPartsGiant Specialist
    Q:
    How to remove and install various car speakers on GMC Terrain? Posted by Customer
    A:
    To work on car radios from 2010 onward, first take the negative cable away from the battery. Get rid of the middle trim charcoal that holds the radio and cooling controls, then unplug the controls to reach the radio. Unscrew the radio, then pull it out from the dashboard. Connectors and cable can now be detached from the back of the radio device. Installation goes the opposite way. To get lower door speakers, first peel off the door trim panel, then unscrew and disconnect the electrical connector after removing the speaker. Pull off the upper speaker panel for upper front door speakers, lift it up, push its lower tabs out, disconnect the electrical connector, and spin the speaker to free it. Unbolt the speaker and wiring harness in three easy steps: remove the carpet trim, trim pieces around the door and window, and cargo corner trim panel. Start by opening and removing the lid above your instrument panel center speaker. There will be two mounting screws-take them off. Then pull out the storage unit if you have it. Before dealing with the speaker itself, check for an upper center trim panel; you may need to pry it loose. After removing the speaker screws, pull out the speaker, cut the electrical connection, and return everything step by step when installing.
    Posted by GMPartsGiant Specialist
    Q:
    How do you install door speakers for the 2014 Chevrolet Camaro? Posted by Customer
    A:
    Installation of door speakers is done in the reverse order of removal.
    Posted by GMPartsGiant Specialist
    See expert answers on similar Car Speakers
    Q:
    How do you install the radio for the 2014 Chevrolet Cruze? Posted by Customer
    A:
    Installation is the reverse of removal.
    Posted by GMPartsGiant Specialist
    See expert answers on similar Car Speakers
    Q:
    What is the first step in removing the radio and air conditioning/heating control assembly for the 2011 Chevrolet Equinox? Posted by Customer
    A:
    Disconnect the cable from the negative battery terminal.
    Posted by GMPartsGiant Specialist
    See expert answers on similar Car Speakers
    If you have any questions about this product, please don't hesitate to ask us. We will be happy to help you!

Genuine GM Part 25868166, the Right Choice

To ensure reliability, purchase GM part # 25868166 Speaker,Radio Windshield Side Garnish Molding. It is sometimes referred to as Buick Car Speakers. Directly from GM, genuine parts are superb with regards to quality, longevity, and fit. Every single part passed stringent quality testing, so you can be sure that it's safe, durable, and built to perform like your original parts. This part fits specific Buick Allure, LaCrosse, Regal models.

GMPartsGiant.com is a leading supplier of genuine GM parts and accessories such as GM 25868166 Speaker,Radio Windshield Side Garnish Molding. You're certainly in the right place if you're searching for the great cost-effective OEM GM parts. Look no further than our vast inventory of genuine GM parts offered at unbeatable online prices, all of which are backed by the manufacturer's warranty. Not to forget, our hassle-free return policy and quick delivery service ensure a smooth shopping experience for you. For detailed Buick parts information, click here.

Why choose GM Parts Giant

  • Dedicated Service

    Your complete satisfaction is our #1 goal

  • Lowest Prices

    Best deals on genuine OE parts from dealerships

  • Fast Delivery

    Orders are processed and delivered promptly