Make sure this part fits

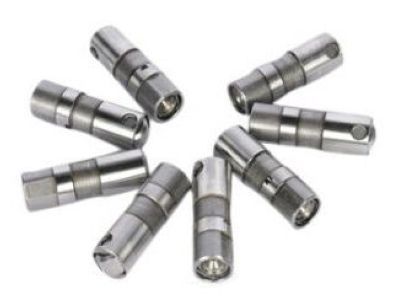
Cadillac 12698945 Lifter Assembly, Vlv (Non Afm)

2002-2024 Cadillac

Customer Questions & Expert Answers (26)
GM 12698945 Lifter Assembly, Vlv (Non Afm)
  • Part Description
    Lifter Assembly, Vlv (Non Afm)
  • Replaces
    12648846, 12576400
  • Manufacturer
    General Motors
Make sure this part fits
$30.10 MSRP: $49.82
You Save: $19.72 (40%)
Ships in 1-2 Business Days
1
ADD TO CART
  • Related Parts
  • Product Specifications
  • Vehicle Fitment
  • Customer Questions & Expert Answers
  • Product Specifications

    BrandGenuine Cadillac
    Manufacturer Part Number12698945
    Part DescriptionLifter Assembly, Vlv (Non Afm)
    Other NamesValve Lifter
    Item Dimensions4.2 x 2.2 x 2.1 inches
    Item Weight0.60 Pounds
    ConditionNew
    Fitment TypeDirect Replacement
    Replaces12648846, 12576400
    Require Quantity2
    ManufacturerGeneral Motors
    SKU12698945
    WarrantyThis genuine GM part is guaranteed by GM's factory warranty.
    Shipping & ReturnShipping Policy Return Policy
    Warning: California's Proposition 65
  • Vehicle Fitment

    Year Make Model Engine Important vehicle option details
    2022-2024 Cadillac CT58 Cyl 6.2LV-SERIES NOTCHBACK-BLACKWING
    2009-2019, 2006-2007 Cadillac CTS8 Cyl 6.0L, 8 Cyl 6.2L4 DOOR V-SERIES SEDAN, V 2 DOOR COUPE, V 4 DOOR, V 4 DOOR SEDAN, V 4 DOOR WAGON
    2023-2024, 2007-2020, 2002-2005 Cadillac Escalade8 Cyl 5.3L, 8 Cyl 6.0L, 8 Cyl 6.0L Flex, 8 Cyl 6.2L, 8 Cyl 6.2L Flex1/2 TON, 1500 4 DOOR, 1500 4 DOOR SUV, 1500 4 DOOR UTILITY, 1500 CREW CAB, 1500 CREW CAB STANDARD BOX, 4 DOOR 1/2 TON, CLASSIC 1500 CREW CAB LONG BOX, CLASSIC 1500 EXTENDED CAB STANDARD BOX, EXT 1/2 TON, EXT 3/4 TON, YUKON XL/DENALI XL/ESCALADE ESV, YUKON/DENALI/ESCALADE
  • Customer Questions & Expert Answers

    Q:
    I am wonder if this is complete and correct part for my vehicle. Posted by GMPartsGiant Specialist
    A:
    You can Select Your Vehicle to check if 12698945 fits your vehicle.
    Posted by GMPartsGiant Specialist
    Q:
    What steps should be followed when replacing a Camshaft and Lash Adjuster in 5.7L,6.0L,6.2L V8 engine on Cadillac CTS? Posted by Customer
    A:
    More to that, if replacing the camshaft, should always accompany the replacement with new Lash Adjusters since old Lash Adjusters are known to fit poorly with a new camshaft. First, you should take off the intake manifold, if your car has a supercharger, then it's time to remove valve covers, rocker arms, pushrods and timing chains, cylinder heads, the radiator, and the air conditioning condenser. For the 6.0L and 6.2L engines, and also, it is necessary to remove the Camshaft Position (CMP) sensor. If the Lash Adjusters are not to be removed immediately, place them in a box that identifies their locations in the car so that they may be replaced in like positions. Take out the Lash Adjuster retainers and Lash Adjusters carefully and remember that each of the retainers has four individual Lash Adjusters and these need to be put back in the required orientation if you are reusing them in the car. If Lash Adjusters are stuck due to gum and varnish they can be pulled out using a special tool but if not, then by a magnet or small fingers but do not pull them out with pliers as this may harm the Lash Adjusters. Finally, take off all the bolts and the camshaft retainer plate-paying attention to its position-and use three bolts of great length to be inserted into the sprocket hole and to help with the removal process. With care withdraw the camshaft and place it midway as support while pulling to avoid damaging the bearings. For installation, the journals and lobes of the camshaft must be lubricated with assembly lube and the unit has to be fitted into the engine with support near the block. With a 3 o'clock orientation of the dowel pin in place, fit the camshaft retainer plate and correctly tighten the bolts to the torque stated, cleaning mating surfaces of gasket. Fit the timing chain and sprockets, and oil splash channel, and for 6.0L and 6.2L engines, the Crankshaft Position (CMP) sensor. Also coat the Lash Adjusters with clean engine oil and place the Lash Adjusters into the respective Lash Adjuster retainers to ensure that the flat faces are aligned correctly. Place and position the retainer with the Lash Adjuster and, if used again, place the original Lash Adjuster in the original position as well and tighten the bolts for the retainer to the required torque. Last but not the least, the final process of the installation can be done by following the above removal process in the reverse order and before starting the engine of the vehicle, replace the oil and the oil filter as well.
    Posted by GMPartsGiant Specialist
    Q:
    How can you isolate a noisy valve lash adjuster and properly reinstall it in four cylinder engine on Chevrolet Astro? Posted by Customer
    A:
    To isolate a noisy valve lash adjuster, place a length of hose or tubing near each valve while listening at the other end, or remove the rocker arm cover and touch each valve spring retainer with the engine idling; a defective lash adjuster will be evident from the shock felt at the retainer. The most common cause of noise is dirt trapped between the plunger and lash adjuster body. Begin by removing the rocker arm cover, then loosen both rocker arm bolts at the cylinder with the noisy lash adjuster and rotate the rocker arms away from the pushrods. Next, remove the pushrod guides and pushrods, followed by the pushrod cover. Unscrew the locknuts on the pushrod cover studs to remove the lash adjuster guide, keeping the guides in order if multiple are removed. Lash adjuster extraction can be done with a special tool, a small magnet, or fingers on newer engines without varnish buildup; avoid using pliers unless replacing the lash adjuster. Store lash adjusters in a labeled box to ensure proper reinstallation. Clean the lash adjusters with solvent and check for wear; if the base is concave or damaged, replace the entire set. If new lash adjusters are installed, a new camshaft must also be used, and never install used lash adjusters unless the original camshaft is reused. For roller lash adjusters, check for wear and ensure they turn freely. Used roller lash adjusters can be reinstalled with a new camshaft. When installing used lash adjusters, ensure they are placed in their original positions and coat them with moly-base grease or engine assembly lube. Lubricate the bearing surfaces of the lash adjuster bores with engine oil, then install the lash adjusters with the oil orifice facing the front of the engine. Follow with the installation of the lash adjuster guides and retainers, then the pushrods, pushrod guides, rocker arms, and rocker arm retaining bolts, ensuring each pair of lash adjusters is on the base circle of the camshaft before tightening. Finally, tighten the rocker arm bolts to the specified torque and reinstall the pushrod cover and rocker arm cover.
    Posted by GMPartsGiant Specialist
    Q:
    Should new lifters always be installed when replacing the Camshaft and Lash Adjuster in V6 engine on Cadillac Escalade? Posted by Customer
    A:
    If the camshaft is being replaced, always install new Lash Adjusters as well, as old Lash Adjusters should not be used with a new camshaft. The engine should be removed for this procedure. Begin by having the air conditioning system discharged by a technician, then relieve the fuel system pressure and disconnect the negative battery terminal. Drain the cooling system and remove the radiator, followed by the air conditioning condenser and the auxiliary automatic transmission fluid cooler if equipped. Remove the valve covers, intake manifold, and valve Lash Adjuster oil manifold, then take out the valve Lash Adjuster follower guide and rocker arms with pushrods. Next, remove the oil pump, balance shaft chain, timing chain, and camshaft position actuators, followed by the cylinder heads. Store the Lash Adjusters in a clearly labeled box to ensure they are reinstalled in their original locations, and remove the Lash Adjuster retainers and Lash Adjusters, taking care not to withdraw the camshaft with the Lash Adjusters in place. Mark and inspect the Lash Adjusters after removal, and if they are stuck due to gum and varnish, use appropriate tools to extract them. Avoid using pliers unless the Lash Adjusters are to be replaced. Remove the bolts and camshaft retainer plate, noting the orientation, then thread a bolt into the camshaft sprocket bolt hole for easier removal. Carefully pull the camshaft out while supporting it near the block to prevent damage to the bearings. Measure the camshaft lobe height and base circle to determine lobe lift, and compare the results to specifications; if the lobe lift is less than specified, a new camshaft should be installed. After cleaning the camshaft, inspect the bearing journals for wear and damage, and measure them with a micrometer. Check the camshaft lobes for discoloration and wear, and if they are in good condition, the camshaft can be reused. Clean the Lash Adjusters thoroughly and check for wear, ensuring that used roller Lash Adjusters cannot be reinstalled with a new camshaft. Lubricate the camshaft bearing journals and lobes with assembly lube before sliding the camshaft into the engine, supporting it carefully. Apply a non-hardening thread-locking compound to the camshaft retainer bolts and install them after allowing the compound to cure. Install the camshaft thrust plate and tighten the bolts, ensuring the gasket surfaces are clean. Proceed to install the timing chain, balance shaft chain, and oil pump. Lubricate the Lash Adjusters with clean engine oil and install them in the retainers, aligning them properly, and tighten the retainer bolts. Complete the installation in reverse order of removal, refill the cooling system, change the oil, and install a new oil filter before having the air conditioning system evacuated, recharged, and leak tested.
    Posted by GMPartsGiant Specialist
    Q:
    How to remove the camshaft and Lash Adjuster on 4.3L V6 engine on Chevrolet Avalanche? Posted by Customer
    A:
    Begin with taking off the camshaft by unscrewing or unbolting the rocker arms, push rods, intake manifolds, timing chains, cam sprocket and balance shaft drive gear; in addition, you may have to do away with such things as fan radiator and condenser. Place the lash adjusters in a labeled box and disconnect the lash adjuster retainer. A special tool can be employed together with magnet or even your fingers to extract the lash adjusters from their bores. Remove the camshaft retainer plate and use three 6-inch long, 5/16-18 bolts as a handle to remove the camshaft from block. When inspecting clean lash adjuster & cam shaft using solvent checking for wear on both of them. The journals as well as cam lobes should be checked for wear. Measure. If its damaged then it must be replaced along with bearings. To lubricate bearing journals and cam lobes with assembly lube, the camshaft will finally slide into engine during installation. Fix other parts like this: install that thrust plate for a Cam Shaft; balance shaft drive gear plus also timing chain & sprockets. Lubricate lash adjusters using clean engine oil then fix them within block. The rest of installation is opposite to that of removing these components. Cooling system should be refilled at last because we are starting again after changing an engine oil filter. Finally start engine (run) and check there are no leaks.
    Posted by GMPartsGiant Specialist
    Q:
    How to remove and install the Camshaft and Lash Adjuster on 2.2L four cylinder engine on Chevrolet Blazer? Posted by Customer
    A:
    Before taking out the camshaft, measure the lobe lift to ascertain the extent of cam lobe wear. Put number one piston at TDC on compression stroke. Then open the rocker arm nuts by loosening up the valve cover to access pushrods. A dial indicator should be set up on the engine and a plunger placed against the top of the first pushrod. Zeroing will then follow and this can be done by turning crankshaft slowly in the normal direction of rotation until it reaches its maximum lobe lift position which shows that it has fully opened. Note down this measurement and repeat for other valves. If cam lobes have been worn down below specified limits, mount a new camshaft. To test for noisy lash adjuster, use a mechanic's stethoscope or a length of hose near each valve while listening for excessive clearance in valvetrain. Any defective lash adjuster is identified through noise produced. This requires removing cylinder head to remove lash adjusters. The removal tool used may either be magnet or scribe but lash adjuster guides help in separating them from the cylinder head. These are then washed and checked whether they have score marks, uneven wear and scuffing too. In addition, inspect rollers for damage or wear and replace them if necessary. To pull out a camshaft one should remove front cover with timing chains as well as sprockets on them; there will also need removal bolts together with oil pump drive as well as thrust plate of camshaft before you carefully withdraw it from block after which bearing journals are cleaned and examined for any destructions; size of bearing journals and camshaft lobes measured where obvious inspection of lobes revealing discoloration, score marks, chipped areas pitting, deformation etcetera indicates that they can no longer serve while some other good conditions along with correct measurements will allow further utilization thus lubricating these components such as bearing journal alongside their respective lobes through assembly lube should be done in a way that it easily slides into the engine after which thrust plate is put back with its bolts tightened while oil pump drive is reinstalled thus where lash adjusters are still intact, they may be reinstalled at their original locations and then coated using assembly lube. On the other hand, lash adjuster bores are also lubricated by engine oil prior to installing them whereby; pushrods as well as pushrod guides should be positioned while rocker arms together with rocker arm retaining nuts are tightened.
    Posted by GMPartsGiant Specialist
    Q:
    What steps should be followed when replacing a Camshaft and Lash Adjuster in V8 engine on Chevrolet Camaro? Posted by Customer
    A:
    Where a camshaft is being changed, it is recommended that new Lash Adjusters should be fitted, and the old Lash Adjusters should not be retained to work on a new camshaft. Start with the intake manifold or the supercharger, the valve covers and rocks, along with the pushrods and the timing chain, timing chain tensioner, heads, oil pan, oil pump, and oil deflector, the radiator and condenser for the air conditioning, among with the Camshaft Position sensors. When doing away with the Lash Adjusters, pack them in a separate case and clearly label it, to avoid mixing or installing from a different set. Lash Adjuster retainers as well as the Lash Adjusters have to be removed but the Lash Adjusters must be cleaned before being stored; each Lash Adjuster retainer contains four individual Lash Adjusters that must be placed back in their correct positions if they will be reused. Inasmuch as gum and varnish may hinder the Lash Adjusters and stick them in place, they can be removed by a specialized tool or, in extreme circumstances, a magnet or the bare fingers. Next, one needs to take out the bolts and the camshaft retainer plate to see which side is to face the block. Take the old camshaft position actuator solenoid valve and put it back in or put three very long bolts in the camshaft sprocket bolt holes so they can be used as a handle to remove the camshaft from the block. With the camshaft subsidence largely undamaged, gradually unwind the strength and supporting the camshaft near the block. For installations, the bearing journals and the cam lobes should be lubricated with the camshaft and the Lash Adjuster assembly lube practices putting the camshaft under the engine while still supporting it near the block. With the dowel pin at the 3 O'Clock position, fit the camshaft retainer plate and tighten the camshaft retainer plate bolts to the next torque specification, check the gasket surface is clean. Then fitting of the timing chain and sprockets as well as the CMP sensor. Use clean engine oil to lube the faced sides of the Lash Adjusters and then fit them to the Lash Adjuster retainer, ensure the flats are aligned, then fit the retainer and Lash Adjusters onto the block as a unit, where original Lash Adjusters are returned to their original position where possible. Tighten the Lash Adjuster retainer bolts to requirement torque and then proceed to reinstall the components in the vice versa manner to this process. It is suggested that before the commencement of the engine, the oil should be changed and a new oil filter fitted in the engine.
    Posted by GMPartsGiant Specialist
    Q:
    What precautions should be taken when replacing a Camshaft and Lash Adjuster in V8 engine on Chevrolet Colorado? Posted by Customer
    A:
    In any case of a camshaft replacement, it is recommended to replace the Lash Adjusters also. It is recommended that old Lash Adjusters should not be used on a new camshaft. Starting from the electricity, remove the cable, release the pressure of the fuel system as well as the removal of the radiator. If installed, then slide out the auxiliary automatic transmission fluid cooler and disconnect power steering cooler. Second it will be necessary to come to an end the removal of the air conditioning condenser, a valve, the upper head, the intake manifold with the heads of bolts, the hydraulic Lash Adjusters, the pushrods, the timing chain, the sprockets fastened to the engine bulkhead, and heads of the cylinders. When it is time to remove the Lash Adjusters provide for the reception in a marked box so that they can be placed in the right position after repair. Lash Adjuster retainers and Lash Adjusters should be removed and it is important to ensure they are clean, it should also be noted that each of the retainers contains four separate Lash Adjusters which must be replaced back in the same positions if they are to be re-used. If for some reason the Lash Adjusters got stuck due to the build up of gum and or varnish various methods of extraction can be used, such as with the aid of an L.H. tool, a small magnet or machinist's scribe. Pliers should not be used except when Lash Adjusters are to be replaced as this can cause damage to them. Unbolt the camshaft retainer plate and the camshaft, and note the direction of the plate as it faces the block; thread a bolt in the sprocket hole of the camshaft where the old bolt is removed to serve as a camshaft handle. With caution and gradual force remove the camshaft out, while holding it close to the block to avoid causing problems to the bearings. Estimate the camshaft lobe height and base circle to understand the lift of the lobe and write the figures for future use. Following the lobe lift check, check it with the specified figures; should the lobe lift be 0.02 inches below the specified figure then cam lobe wear has taken place and the car will probably require a new camshaft. It is proper to check out the bearing journals for wear and damage and then measure them across their diameter with a view of identifying excessive wear or out-of-round situations after cleaning the camshaft. Finally examine the camshaft lobes for any discoloration, for signs of score marks or uneven wear; if the lobes are healthy the camshaft can be used again. Lash Adjusters should also be cleaned and inspected for signs of wear especially on part that rotates in the form of rollers which should be without or with minimal end play. roller Lash Adjusters, once used cannot be replaced with a new camshaft and therefore when using a new camshaft, always use new Lash Adjusters. As for the installation, before that, the camshaft bearing journals and lobes should be lubricated, and then the camshaft is to be inserted into the engine with the help of a supporting block near the block. Rotate the camshaft in a way that the dowel pin is placed at the '3' mark, put the camshaft thrust plate and fasten all the bolts to the recommended torque. Replace the timing chain and sprockets and also the camshaft position sensor, new O-ring ought to be used for this installation. Lightly coat the Lash Adjusters with fresh engine oil and then fitting them again in lift retainers in a precise manner. There are usually reusable/replaceable Lash Adjusters and because of this, the retainer and the Lash Adjusters should be installed together into the engine block with the original Lash Adjusters being placed in their respective locations again. Torque the Lash Adjuster retainer bolts to the manufacturer recommended torque then to complete the procedure reverse the whole process. Ensure usage of sufficient coolant before the engine is on, replace engine oil and fit a new oil filter.
    Posted by GMPartsGiant Specialist
    Q:
    How to replace a Camshaft and Lash Adjuster on Chevrolet Corvette? Posted by Customer
    A:
    When the camshaft is being replaced it is advisable to replace the Lash Adjusters as well, because new Lash Adjusters are not supposed to be used when the camshaft is also new. The removal of the camshaft and Lash Adjuster is well illustrated by the following step by step process recommended by the factory. First, it is possible to remove the engine, but it is not obligatory; however, it will make the process easier. Second, it is the intake manifold or supercharger, the valve covers, rocker arms, pushrods, timing chain, timing chain tensioner, cylinder heads, oil pan, oil pump, and oil deflector. Lash Adjusters also should be stored in a box marked clearly before they are removed so that they can be returned to the storage locations they occupied after delivery. The Lash Adjuster retainers and Lash Adjusters can then be removed as an assembly and as much as possible bearing markings for reuse are identified. After that, the camshaft retainer plate bolts should be removed, paying attention to the positions of the plate. Long bolts or a single bolt can be turned into the camshaft sprocket bolt hole to help in extraction of the camshaft. The camshaft should be gently slid out, where it must be supported close to the block in a bid to avoid marring the bearings. Before installing the camshaft, the bearing journals as well as the lobes area should be coated with assembly lube; this ensures that the camshaft is slid into the engine while propping it to reduce of bearing damage. The camshaft should be rotated in order to align the dowel pin and then the retainer plate should be fitted and fixed in place. Timing chain and sprockets should then be fitted in its proper place. Lash Adjusters must be oiled with clean engine oil and then placed in the retainers as require while making certain that they are well aligned. Retainers and Lash Adjusters should be mounted modulo, namely, if some Lash Adjusters were returned they must be placed on the same bank. Finally, the Lash Adjuster retainer bolts should be tightened and the rest of the procedure is but the reversal of the list above. Last but not the least, before starting of the car's engine one should change the oil and also to replace the oil filter.
    Posted by GMPartsGiant Specialist
    Q:
    What steps should be taken before removing the camshaft and Lash Adjuster and during its installation in 4.8L,5.3L,6.0L V8 engine on Chevrolet Express? Posted by Customer
    A:
    Before pulling the camshaft, the lobe lift should be checked and where a new camshaft is to be fitted, new Lash Adjusters should be used. Start by having the intake manifold, valve covers, rocker arms, pushrods, timing chain, cylinder heads, radiator, air conditioning condenser, and camshaft position sensor repossessed. Put the Lash Adjusters in a container which is of a box shape in order to retain the original position of the equipments and then take off the Lash Adjuster retainers and clean the Lash Adjusters. In case of gum and varnish entrapment, employ suitable gear in removing them without causing blistering to the Lash Adjusters. Take off the camshaft retainer plate and make use of the bolts as you pull the camshaft liter by liter. With the camshaft installed, to measure the camshaft lobe lift set a dial indicator against the pushrod or Lash Adjuster whilst having the cylinder on the compression stroke at TDC. Include the maximum lift and repeat for all valves in the record. Lobe lift can also be done by measuring the camshaft lobe height and base circle using a micrometer after the lobes have been pulled out. Varying degrees of wear, slight pitting, or fracture on the bearing journals, camshaft lobe should be checked for signs of discoloration and uneven wear. Lash Adjusters-clean and inspect for damage and that they rotate freely. Before assembling put oil on camshaft and Lash Adjusters, after that try to fit the camshaft cautiously, set the position of the thrust plate and timing starter. Lastly, change the viscosity of the Lash Adjusters and fit them back in their retainers making sure that they are well aligned then follow the above steps in the reverse manner in which the parts were removed. When the engine is off, before turning it on change the oil and put in a new oil filter.
    Posted by GMPartsGiant Specialist
    Q:
    How can a noisy lash adjuster be isolated and what steps should be taken to remove and reinstall it in V6 engine on Chevrolet Impala? Posted by Customer
    A:
    A noisy lash adjuster can be located in the same manner, or, while the engine is idling, remove the valve cover and rap on each valve spring retainer to feel the shock if there's a bad adjuster for it. Rough adjusters are usually as a result of dirt accumulation in the adjuster gallery and low oil supply; the oil should therefore be tested for contaminants, quantity, cleanliness and quality before attributing a rough idle to ruinous adjusters. Adjusters must be uninstalled by first often the intake manifold and the valve cover and then by taking off the rocker arms and pushrods together with the bolts, which secure the roller adjuster guides to the block. The adjusters on most of the engines can be removed by using a special tool, small magnet or fingers, especially on the newer models but pliers should not be used if not replacing them as this causes damage. Pack the adjusters, that should be reused during assembly, into a box marked with their placement so as to guarantee correct assembly, and decontaminate them with solvent, checking if they are scratched. Given that parts for lash adjusters cannot be bought separately, the process of removing them in case cleaning does not work is more Herculean than the need to repair the part. On reassembly ensure that adjusters are put back to their original bores, new adjusters should be dipped in oil, all should be coated with moly-base grease or engine assembly lube before the pushrods and the rocker arms are fitted. The other steps of installation are done in the reverse order of teardown and after everything is put back into place start the engine and look for signs of oil leakage.
    Posted by GMPartsGiant Specialist
    Q:
    What precautions should be taken when replacing a Camshaft and Lash Adjuster in V8 engine on Chevrolet Monte Carlo? Posted by Customer
    A:
    If a camshaft is being replaced, then the Lash Adjusters should also be replaced; they are not expensive and will help in preventing future problems. In particular, expired Lash Adjusters should not be used with a new camshaft. Start by loosening the engine from the vehicle, followed by the removal of the valve covers and the intake manifold. Subsequently, the rocker arms as well as the pushrods should be removed, and after this, the timing chain and sprockets, and finally the cylinder heads. Before removing the Lash Adjusters, plan where to put them, then place them in a box marked or separated in such a way that when doing the replacement, you know where they came from. Pull off the Lash Adjuster retainers and Lash Adjusters and keep them in a clean place; each of the retainers contains 4 Lash Adjuster nozzles that must be refitted if the retainers are to be reused. Do not pull the camshaft with the Lash Adjusters in place. If the Lash Adjusters are built up with gum and varnish, they may be liable to require the use of some mechanical means for their removal, although, for example, a small magnet or the fingers of one hand may suffice in many cases. It is recommended not to use pliers on the Lash Adjusters if planning to replace them because the usage can badly affect them. Take out the bolts and the camshaft retainer plate with attention to the orientation and then insert a new bolt into the camshaft sprocket bolt hole to facilitate whenever it is to be withdrawn. Slowly instruct the camshaft to be pulled out, and while doing this, the camshaft should be supported near the block part in order to avoid carrying out excessive pressures on the bearings. Camshaft lobe height and camshaft base circle also need to be measured to calculate the lobe lift, the actual figures of which need to be recorded for future use. In the case where the lobe lift is less compared to the specified value, installation of a new camshaft is recommended. Following the cleaning of the camshaft, smooth the bearing journals that are always susceptible to wear and damage; if damaged, it will require renovating both the camshaft and bearings. Using a micrometer, measure the bearing journals to ascertain if the latter are worn out. As for the camshaft, the lobes of the camshaft must be checked for discoloration and wear; if they pass the inspection, the camshaft can be reused. Always withdraw the Lash Adjusters and clean them, and if the Lash Adjuster walls are worn, the corresponding Lash Adjuster bores will also be damaged. Check that the rollers are rotating with certain looseness if required, but not too loose. Roller Lash Adjusters, when used, cannot be returned to the engine with a new camshaft and thus should always be purchased new with the camshaft. Coat the camshaft bearing journals and lobes with assembly lube before installing the camshaft in the engine, whilst supporting it close to the block. Swivel the camshaft in order to line up the dowel pin in the intended position, place in the thrust plate, and fasten the bolts to the appropriate torque limit. I reinstall the timing chain and sprockets, adjust the camshaft position sensor employing a new O-ring. Dip the Lash Adjusters into fresh engine oil and fit them into the retainers, making sure that they are correctly positioned. Loosen the Lash Adjuster retainer bolts slightly, then use your wrench to tighten the retainer bolts to the recommended number of turns. To finish the installation, a mechanic should follow the removal instructions in reverse, and before starting the engine, the cooling system should be replenished with liquid, the oil should be changed, as well as the oil filter.
    Posted by GMPartsGiant Specialist
    Q:
    How to remove and install the Camshaft and Lash Adjuster on 2.2L four cylinder engine on Chevrolet S10? Posted by Customer
    A:
    Before taking out the camshaft, measure the lobe lift to ascertain the extent of cam lobe wear. Put number one piston at TDC on compression stroke. Then open the rocker arm nuts by loosening up the valve cover to access pushrods. A dial indicator should be set up on the engine and a plunger placed against the top of the first pushrod. Zeroing will then follow and this can be done by turning crankshaft slowly in the normal direction of rotation until it reaches its maximum lobe lift position which shows that it has fully opened. Note down this measurement and repeat for other valves. If cam lobes have been worn down below specified limits, mount a new camshaft. To test for noisy lash adjuster, use a mechanic's stethoscope or a length of hose near each valve while listening for excessive clearance in valvetrain. Any defective lash adjuster is identified through noise produced. This requires removing cylinder head to remove lash adjusters. The removal tool used may either be magnet or scribe but lash adjuster guides help in separating them from the cylinder head. These are then washed and checked whether they have score marks, uneven wear and scuffing too. In addition, inspect rollers for damage or wear and replace them if necessary. To pull out a camshaft one should remove front cover with timing chains as well as sprockets on them; there will also need removal bolts together with oil pump drive as well as thrust plate of camshaft before you carefully withdraw it from block after which bearing journals are cleaned and examined for any destructions; size of bearing journals and camshaft lobes measured where obvious inspection of lobes revealing discoloration, score marks, chipped areas pitting, deformation etcetera indicates that they can no longer serve while some other good conditions along with correct measurements will allow further utilization thus lubricating these components such as bearing journal alongside their respective lobes through assembly lube should be done in a way that it easily slides into the engine after which thrust plate is put back with its bolts tightened while oil pump drive is reinstalled thus where lash adjusters are still intact, they may be reinstalled at their original locations and then coated using assembly lube. On the other hand, lash adjuster bores are also lubricated by engine oil prior to installing them whereby; pushrods as well as pushrod guides should be positioned while rocker arms together with rocker arm retaining nuts are tightened.
    Posted by GMPartsGiant Specialist
    Q:
    What steps should be followed when replacing a Camshaft and Lash Adjuster in V8 engine on Chevrolet Trailblazer? Posted by Customer
    A:
    Bear in mind also that if the camshaft is being replaced, the Lash Adjusters should also be new ones and should not be reused on the new camshaft. First, and ideally the first thing you do before working near the top side, is to disconnect and remove the intake manifolds, valve covers, rocker arms, pushrods, valley cover or valve Lash Adjuster oil manifold, timing chain, cylinder heads, radiator, air conditioning condenser and camshaft position sensor. Before removing the Lash Adjusters, place them in a box with a label so that they will be easily found during reinstallation. Lift all the retainers and Lash Adjusters carefully and ensure that they are clean then note that a single retainer has four Lash Adjusters and if reused should be placed back in their respective positions. Newer engines, Lash Adjusters may be pulled out with small magnet or bare hands; while older engines may require a tool possibly due to resin-like deposits known as gum and varnish. Pliers should not be used for turning the Lash Adjusters unless the Lash Adjusters themselves are being replaced since such action will damage them. For 5.3L models, unscrew the mounting bolt of the camshaft sensor and take it together with the sensor from the cylinder block, then remove the camshaft retainer plate with attention to its position. Insert three 6-inch long bolts into the camshaft sprocket bolt holes and use it to pull the camshaft out supporting it close to the block area to avoid damaging the bearings. Before installing the camshaft insert a thin layer of assembly lube on the camshaft bearing journals and lobes and mate the camshaft carefully to avoid scratching the bearings. Screw the camshaft so as to align the dowel pin with the 3 o'clock, fit the camshaft thrust plate and torque the bolts to the recommended value whilst making sure the mating surfaces of the gaskets are clean. Fitting of timing chain and sprockets and camshaft position sensor with a new O ring should be installed. Coat the Lash Adjuster with clean engine oil, fit it in the Lash Adjuster retainers such that the flats line properly, and for 2005-on 5.3L the raised surface should fit in the notched area of the retainer. The retainer and Lash Adjusters must be installed as a unit, and when reusing the original Lash Adjusters return them to the same locations in the engine and torque the Lash Adjuster retainer bolts to the factory recommended specifications. The other steps involve the reversal of the above process and before an engine is started the oil should be changed and a new oil filter fitted.
    Posted by GMPartsGiant Specialist
    Q:
    How to remove and inspect Camshaft,Lash Adjuster and Rocker Arm in inline engine on GMC Canyon? Posted by Customer
    A:
    A special camshaft holding tool (GM# J-44221 or equivalent) is required for this procedure. After removing the cam sprocket, do not rotate the crankshaft to avoid incorrect timing and potential engine damage. Begin by removing the valve cover and the spark plugs to facilitate engine rotation. Rotate the engine until the sprocket alignment marks are aligned with a dark chain link, ensuring the nats at the rear of the camshafts are facing up. Remove the camshaft sprocket bolts and carefully detach the sprockets from the camshafts, taking care not to remove them from the chain and suspending them to prevent the chain from coming off the crankshaft sprocket. Check the camshaft caps for markings and mark them with paint if necessary before removal. Remove the camshaft cap bolts gradually until they can be taken out, then extract the camshafts, keeping them separated to avoid mixing them up. The rocker arms and lash adjusters can be lifted out if needed, and these parts should be laid out in order for reinstallation. After cleaning the camshafts, inspect each for scored journals, heat discoloration, score marks, chipped areas, pitting, uneven wear, damaged locator pin slots, and damaged threads. Measure the bearing journals with a micrometer to check for excessive wear or out-of-round conditions. Compare the camshaft lobe heights by measuring each lobe with a micrometer, recording the measurements for both intake and exhaust lobes separately; if the difference exceeds 0.005 inch, the camshaft should be replaced. If removed, soak the lash adjusters and rocker arms in clean engine oil before reinstalling them in their original locations. Coat the camshaft with clean engine oil and place it in the correct position in the cylinder head, then install the camshaft holding tool. Install all camshaft caps in their original locations and hand tighten them, then evenly tighten the caps to the specified torque, working from the center out. Remove the holding fixture, place the sprockets onto the camshafts, and tighten the bolts to the specified torque. Using a large breaker bar and socket on the crankshaft pulley bolt, rotate the crankshaft 720 degrees and re-check the sprocket and chain alignment, ensuring the darkened links align with the sprocket marks; if resistance is felt while turning the crankshaft, stop immediately to diagnose the issue. Finally, install the spark plugs and the valve cover.
    Posted by GMPartsGiant Specialist
    Q:
    How to remove the camshaft and Lash Adjuster on 4.3L V6 engine on Chevrolet Silverado? Posted by Customer
    A:
    Begin with taking off the camshaft by unscrewing or unbolting the rocker arms, push rods, intake manifolds, timing chains, cam sprocket and balance shaft drive gear; in addition, you may have to do away with such things as fan radiator and condenser. Place the lash adjusters in a labeled box and disconnect the lash adjuster retainer. A special tool can be employed together with magnet or even your fingers to extract the lash adjusters from their bores. Remove the camshaft retainer plate and use three 6-inch long, 5/16-18 bolts as a handle to remove the camshaft from block. When inspecting clean lash adjuster & cam shaft using solvent checking for wear on both of them. The journals as well as cam lobes should be checked for wear. Measure. If its damaged then it must be replaced along with bearings. To lubricate bearing journals and cam lobes with assembly lube, the camshaft will finally slide into engine during installation. Fix other parts like this: install that thrust plate for a Cam Shaft; balance shaft drive gear plus also timing chain & sprockets. Lubricate lash adjusters using clean engine oil then fix them within block. The rest of installation is opposite to that of removing these components. Cooling system should be refilled at last because we are starting again after changing an engine oil filter. Finally start engine (run) and check there are no leaks.
    Posted by GMPartsGiant Specialist
    Q:
    How to remove the camshaft and Lash Adjuster on 4.3L V6 engine on GMC Sierra? Posted by Customer
    A:
    Begin with taking off the camshaft by unscrewing or unbolting the rocker arms, push rods, intake manifolds, timing chains, cam sprocket and balance shaft drive gear; in addition, you may have to do away with such things as fan radiator and condenser. Place the lash adjusters in a labeled box and disconnect the lash adjuster retainer. A special tool can be employed together with magnet or even your fingers to extract the lash adjusters from their bores. Remove the camshaft retainer plate and use three 6-inch long, 5/16-18 bolts as a handle to remove the camshaft from block. When inspecting clean lash adjuster & cam shaft using solvent checking for wear on both of them. The journals as well as cam lobes should be checked for wear. Measure. If its damaged then it must be replaced along with bearings. To lubricate bearing journals and cam lobes with assembly lube, the camshaft will finally slide into engine during installation. Fix other parts like this: install that thrust plate for a Cam Shaft; balance shaft drive gear plus also timing chain & sprockets. Lubricate lash adjusters using clean engine oil then fix them within block. The rest of installation is opposite to that of removing these components. Cooling system should be refilled at last because we are starting again after changing an engine oil filter. Finally start engine (run) and check there are no leaks.
    Posted by GMPartsGiant Specialist
    Q:
    How to remove and install the Camshaft and Lash Adjuster on 2.2L four cylinder engine on GMC Jimmy? Posted by Customer
    A:
    Before taking out the camshaft, measure the lobe lift to ascertain the extent of cam lobe wear. Put number one piston at TDC on compression stroke. Then open the rocker arm nuts by loosening up the valve cover to access pushrods. A dial indicator should be set up on the engine and a plunger placed against the top of the first pushrod. Zeroing will then follow and this can be done by turning crankshaft slowly in the normal direction of rotation until it reaches its maximum lobe lift position which shows that it has fully opened. Note down this measurement and repeat for other valves. If cam lobes have been worn down below specified limits, mount a new camshaft. To test for noisy lash adjuster, use a mechanic's stethoscope or a length of hose near each valve while listening for excessive clearance in valvetrain. Any defective lash adjuster is identified through noise produced. This requires removing cylinder head to remove lash adjusters. The removal tool used may either be magnet or scribe but lash adjuster guides help in separating them from the cylinder head. These are then washed and checked whether they have score marks, uneven wear and scuffing too. In addition, inspect rollers for damage or wear and replace them if necessary. To pull out a camshaft one should remove front cover with timing chains as well as sprockets on them; there will also need removal bolts together with oil pump drive as well as thrust plate of camshaft before you carefully withdraw it from block after which bearing journals are cleaned and examined for any destructions; size of bearing journals and camshaft lobes measured where obvious inspection of lobes revealing discoloration, score marks, chipped areas pitting, deformation etcetera indicates that they can no longer serve while some other good conditions along with correct measurements will allow further utilization thus lubricating these components such as bearing journal alongside their respective lobes through assembly lube should be done in a way that it easily slides into the engine after which thrust plate is put back with its bolts tightened while oil pump drive is reinstalled thus where lash adjusters are still intact, they may be reinstalled at their original locations and then coated using assembly lube. On the other hand, lash adjuster bores are also lubricated by engine oil prior to installing them whereby; pushrods as well as pushrod guides should be positioned while rocker arms together with rocker arm retaining nuts are tightened.
    Posted by GMPartsGiant Specialist
    Q:
    How to remove the camshaft and Lash Adjuster on 4.3L V6 engine on Chevrolet Tahoe? Posted by Customer
    A:
    Begin with taking off the camshaft by unscrewing or unbolting the rocker arms, push rods, intake manifolds, timing chains, cam sprocket and balance shaft drive gear; in addition, you may have to do away with such things as fan radiator and condenser. Place the lash adjusters in a labeled box and disconnect the lash adjuster retainer. A special tool can be employed together with magnet or even your fingers to extract the lash adjusters from their bores. Remove the camshaft retainer plate and use three 6-inch long, 5/16-18 bolts as a handle to remove the camshaft from block. When inspecting clean lash adjuster & cam shaft using solvent checking for wear on both of them. The journals as well as cam lobes should be checked for wear. Measure. If its damaged then it must be replaced along with bearings. To lubricate bearing journals and cam lobes with assembly lube, the camshaft will finally slide into engine during installation. Fix other parts like this: install that thrust plate for a Cam Shaft; balance shaft drive gear plus also timing chain & sprockets. Lubricate lash adjusters using clean engine oil then fix them within block. The rest of installation is opposite to that of removing these components. Cooling system should be refilled at last because we are starting again after changing an engine oil filter. Finally start engine (run) and check there are no leaks.
    Posted by GMPartsGiant Specialist
    Q:
    How to remove the camshaft and Lash Adjuster on V8 engine on GMC Yukon? Posted by Customer
    A:
    To take off the camshaft, first disconnect the cable from the negative battery terminal and release fuel system pressure. From there on, remove; radiator, auxiliary automatic transmission fluid cooler (if equipped), power steering cooler, air conditioning condenser, valve covers, intake manifold, rocker arms, pushrods, timing chain and sprockets, and cylinder heads. Before you remove the lifters arrange to store them in a labeled container. Remove lash adjusters and camshaft retainer plate using a bolt as a handle to carefully pull out camshaft. To check out the camshaft measure lobe height and base circle for lobe lift determination; compare with specifications and replace the camshaft if necessary. Check the camshaft bearing journals for wear or damage; use a micrometer to measure them. Inspect the camshafts lobes for discoloration; score marks; chipped areas; unalike wear. Clean and inspect lash adjuster bodies for damage, wear and proper roller function. Put in place by lubricating bearing journals and lobes with assembly lube before sliding it into the engine, securing it with the Cam Thrust Plate. Install timing chain and sprockets , camshaft position sensor, lash adjusters As well as this refill cooling system, change oil, new oil filter installation precede start up-run engine process.
    Posted by GMPartsGiant Specialist
    Q:
    How to remove and install Camshaft and Lash Adjuster on 4.3L V6 engine on GMC Sonoma? Posted by Customer
    A:
    Rocker arms can be pivoted away from the pushrods by removing the valve covers and loosening the rocker arm nuts before removal to measure camshaft lobe lift. The plunger on a dial indicator is to be positioned directly above the first pushrod, which is mounted on the engine. Disconnect the engine's electrical connectors from the distributor. Rotate the engine very slowly until it comes to rest with this pushrod sitting against its lowest point (base circle of camshaft lobe) then zero dial readout. As an effect of rotating crankshaft in normal direction indicator needle reaches its highest peak and starts reversing showing maximum cam lobe lift. Write this down and make check for all lobes comparing results obtained. If cam lobe lift is 0.003 inches less than specified, there will be a need for new camshaft installation since there has been a wear out of cam lobe. Also, remove fan shrouds, fan, radiator and condenser if applicable. Carefully remove them while properly labeling and storing before lifting off Lash Adjuster retainer. One must always be careful never to try to extract a camshaft with the Lash Adjusters left inside. Lash Adjuster removal from bores can also take different directions depending on what one wants to do next or how many Lash Adjusters are being replaced at once or maybe whether one has no other option but replace all of them because they are so bad that individual replacement would not solve anything here otherwise there could be no further discussion where others may simply call for removal with every other thing remaining intact Some other methods may include using tongs or pliers etc., By holding onto this chain while forcing it outwards (meaning our efforts are aimed at removing without damaging crankcase bearings which are located near bottom part). At this juncture, note carefully how two torx screws have been used here as well as appropriate directionality provided by manufacturer themselves. Three 6-inch long, 5/16-18 bolts can be threaded into the camshaft sprocket bolt holes to serve as handles when pulling on the camshaft, thus preventing any possible damage to bearings straight out. During an examination, there are several features that indicate damage in form of wear of cam lobes and bearing journals. Obtain a micrometer and take measurements of each cam journal's diameter and also determine height of every cam lobe using these results compared against appropriate tolerances. Should any journal have a diameter less than what it ought to be, then replace the particular camshaft. The procedure for changing these bearings is normally outsourced to automotive machine shops due to difficulties involved since they use specific tools and are manned by experts in this field. Once again, lubricate both camshaft bearing journals along with the cams lobes utilizing assembly lube meant for these parts, then gently slide it into block without damaging those sensitive lower ends of crankcase bearings near mounting points near crankcase face. As soon as position (dowel pin) after pivoting cylinder head in clockwise direction has been reached (that means 3 o'clock), lock it through tightening the thrust plate. By aligning dowel pins also confirming position of balancer shaft timing marks install balance shaft drive gear accordingly. Next, install the timing chain and gears in their right place using clean engine oil on Lash Adjusters when returning them into their respective bores because old Lash Adjusters may be reused if one is not installing new cams together with new Lash Adjusters too as was mentioned above or which case always follows after changing some worn out stock ones Finally, do everything else you did back but change oil before starting engine and put another filter.
    Posted by GMPartsGiant Specialist
    Q:
    How to remove the camshaft and Lash Adjuster on 4.3L V6 engine on Chevrolet Suburban? Posted by Customer
    A:
    Begin with taking off the camshaft by unscrewing or unbolting the rocker arms, push rods, intake manifolds, timing chains, cam sprocket and balance shaft drive gear; in addition, you may have to do away with such things as fan radiator and condenser. Place the lash adjusters in a labeled box and disconnect the lash adjuster retainer. A special tool can be employed together with magnet or even your fingers to extract the lash adjusters from their bores. Remove the camshaft retainer plate and use three 6-inch long, 5/16-18 bolts as a handle to remove the camshaft from block. When inspecting clean lash adjuster & cam shaft using solvent checking for wear on both of them. The journals as well as cam lobes should be checked for wear. Measure. If its damaged then it must be replaced along with bearings. To lubricate bearing journals and cam lobes with assembly lube, the camshaft will finally slide into engine during installation. Fix other parts like this: install that thrust plate for a Cam Shaft; balance shaft drive gear plus also timing chain & sprockets. Lubricate lash adjusters using clean engine oil then fix them within block. The rest of installation is opposite to that of removing these components. Cooling system should be refilled at last because we are starting again after changing an engine oil filter. Finally start engine (run) and check there are no leaks.
    Posted by GMPartsGiant Specialist
    Q:
    How can a noisy valve lash adjuster be isolated and what are the common causes and steps for removal and installation in 2.8L, 3.1L V6 engine on Pontiac Grand Prix? Posted by Customer
    A:
    A noisy valve lash adjuster is often possible to isolate while the engine is running but the car not moving for example with a mechanic's stethoscope or a length of hose near each valve location, listening at the other end or by removing the valve cover and touching each valve spring retainer one at a time to feel for a shock, if a lash adjuster is bad. Possible reasons for noisy lash adjusters are dirt, and lack of adequate oil flow, correct viscosity, or pressure; thus, there is need to ascertain that the oil is not contaminated with fuel, it is at the right level, clean and has correct viscosity before passing a verdict on the lash adjusters. To set up the valve cover and intake manifold, therefore, it is necessary to take off the rocker arms and pushrods and for 3100 engines to unbolt the roller lash adjuster guides to the block and should be marked for reuse. Lash adjusters can be removed employing a special tool, a magnet, or a machinist scribe but using pliers is prohibited apart from when replacing the lash adjusters. It is important to reinstall the lash adjusters where they came from, so store them in a box labeled to facilitate this, and while most blocks will have standard and oversize lash adjusters marked on them. Valve lash adjuster parts cannot be purchased individually, and if the parts are worn, they must be replaced with new ones; used lash adjusters should be placed back into their original holes and new lash adjusters should be soaked in oil, greased or coated with assembly lube before installation. The remaining steps of instalment are the reversal of the removal steps, then engage the engine and look for signs of oil leakage.
    Posted by GMPartsGiant Specialist
    Q:
    How can you isolate a noisy valve lash adjuster and properly reinstall it in 2.5L four cylinder engine on Pontiac Grand Prix? Posted by Customer
    A:
    If a valve lash adjuster is noisy, one way to make it difficult for another noisy valve lash adjuster is to attach a piece of hose or tube to each valve while listening for the sound at the other end, or, remove the valve cover and place your hand on each of the valve spring retainers with the engine running to feel the shudder if the lash adjuster is bad. One frequently seen source of noise is debris that gets lodged in-between the plunger and the body of the lash adjuster. To start, begin with the valve cover and then slacken the two nuts that are sighted on the rocker arm at the cylinder harboring the louder lash adjuster and then turn the rocker arms away from the pushrods. Then you take out the pushrod guides and the pushrods, there is a cover for the pushrod that is fastened with four nuts. Loosen the locknuts on the cover studs to take off the lash adjuster guide retainer and lash adjuster guide, and retain them in order when more than one guide is to be taken off. Lash adjuster extraction can be made with a special tool, a small magnet or fingers on the newer engines that are not covered by the varnish; pliers must not be used. Lash adjusters should be kept in their proper box to avoid confusion during the time of re-establishing them in their right places. Wipe the lash adjusters with solvent and look at scuffing, score marks, or uneven wear of the rollers and be certain they rotate without hesitation. One can always re-install worn out roller lash adjusters with a new camshaft, the original camshafts on the other hand, can be reused with new roller lash adjusters. When using re-used lash adjusters place them only in their original bores, and apply moly-base grease or engine assembly lube to the lash adjusters, while the bearing surface of the lash adjusters' bores must be lubricated by engine oil. Position the aluminium lash adjusters in their respective bores with the oil orifice pointing towards the front of the engine and fit the lash adjuster guides and retaining nuts. Replace the pushrods, the pushrod guides, the rocker arms and the rocker arm retaining bolts and tighten the same to the recommended torque. Wipe the pushrod cover and draw a continuous line of the RTV sealant on the cover, then fit it along with the nuts as earlier tightened. Lastly, screw back the valve cover and it is done in a sequence but in a backward manner to removal.
    Posted by GMPartsGiant Specialist
    Q:
    What steps should be taken when reinstalling used lifters for the 1999 Pontiac Grand Prix? Posted by Customer
    A:
    When reinstalling used lifters, ensure they are placed back in their original bores, soak new lifters in oil to remove trapped air, and coat all lifters with moly-base grease or engine assembly lube before installation.
    Posted by GMPartsGiant Specialist
    See expert answers on similar Lash Adjuster
    Q:
    What is the procedure being discussed for the 1998 Pontiac Grand Prix? Posted by Customer
    A:
    The procedure is for removing lifters from an engine.
    Posted by GMPartsGiant Specialist
    See expert answers on similar Lash Adjuster
    If you have any questions about this product, please don't hesitate to ask us. We will be happy to help you!

Genuine GM Part 12698945, the Right Choice

To ensure reliability, purchase GM part # 12698945 Lifter Assembly, Vlv (Non Afm). It is sometimes referred to as Cadillac Lash Adjuster. Directly from GM, genuine parts are superb with regards to quality, longevity, and fit. Every single part passed stringent quality testing, so you can be sure that it's safe, durable, and built to perform like your original parts. This part fits specific Cadillac CT5, CTS, Escalade models.

GMPartsGiant.com is a leading supplier of genuine GM parts and accessories such as GM 12698945 Lifter Assembly, Vlv (Non Afm). You're certainly in the right place if you're searching for the great cost-effective OEM GM parts. Look no further than our vast inventory of genuine GM parts offered at unbeatable online prices, all of which are backed by the manufacturer's warranty. Not to forget, our hassle-free return policy and quick delivery service ensure a smooth shopping experience for you. For detailed Cadillac parts information, click here.

Why choose GM Parts Giant

  • Dedicated Service

    Your complete satisfaction is our #1 goal

  • Lowest Prices

    Best deals on genuine OE parts from dealerships

  • Fast Delivery

    Orders are processed and delivered promptly