Make sure this part fits

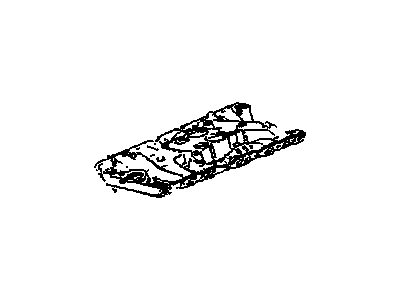
Cadillac 22542648 Manifold, Intake (Aluminum)

1986-1990 Cadillac

Customer Questions & Expert Answers (8)
GM 22542648 Manifold, Intake (Aluminum)
  • Part Description
    MANIFOLD, Engine Fuel Intake Manifold
  • Manufacturer
    General Motors
Make sure this part fits
$800.93 MSRP: $933.03
You Save: $132.10 (15%)
Ships in 1-2 Business Days
1
ADD TO CART
  • Related Parts
  • Product Specifications
  • Vehicle Fitment
  • Customer Questions & Expert Answers
  • Product Specifications

    BrandGenuine Cadillac
    Manufacturer Part Number22542648
    Part DescriptionMANIFOLD, Engine Fuel Intake Manifold
    Item Dimensions24.2 x 16.9 x 7.1 inches
    Item Weight22.30 Pounds
    ConditionNew
    Fitment TypeDirect Replacement
    ManufacturerGeneral Motors
    SKU22542648
    Shipping & ReturnShipping Policy Return Policy
    Warning: California's Proposition 65
  • Vehicle Fitment

    Year Make Model Engine Important vehicle option details
    1987-1990 Cadillac Brougham8 Cyl 5.0LBROUGHAM 4 DOOR, BROUGHAM 4 DOOR RWD
    1986 Cadillac Fleetwood8 Cyl 5.0LBROUGHAM 4 DOOR RWD
  • Customer Questions & Expert Answers

    Q:
    I would like to confirm if this is the correct part number for my vehicle. Please advise. Thank you. Posted by GMPartsGiant Specialist
    A:
    You can Select Your Vehicle to check if 22542648 fits your vehicle.
    Posted by GMPartsGiant Specialist
    Q:
    What are the specific steps and precautions for removing and installing intake manifolds on Buick Regal? Posted by Customer
    A:
    Specific steps and precautions must be followed for the removal and installation of intake manifolds on various engine types. For 196, 231, 252, and 350 Buick Engines, disconnect the negative battery cable. Drain the radiator. Remove air cleaner. Disconnect the upper radiator hose and heater hose at manifold. Disconnect other linkages and brackets like accelerator linkage and bracket, cruise control chain (if applicable), fuel line, booster vacuum pipe etc.On 1976 models, remove choke pipe from choke housing; label wire, hoses and bracket as necessary; On six-cylinder models, distributor cap and wires may need to be removed to access a Torx® head bolt. Also remove throttle linkage springs as necessary ,then remove manifold itself. This entails using a new gasket with sealer on the rubber gasket seals ,ensure proper alignment,and tightening bolts in specified order for installation purposes. For 305 and 350 Chevrolet Engines: Drain cooling system. Take off air cleaner assembly. Rmove battery ground,Then Upper radiator hose and heater hose from manifold , Then disconnect all linkages such as hoses associated with carburetor/manifold assembly,and then distributor after marking rotor position,.remove any other brackets or springs,Before unbolting it and removing it from the vehicle or engine so you can comprehend this better.,To install it back use old gaskets in opposite order while ensuring proper torque sequence is followed by bolts of the manifold will secure it tightly enough in place again . For 350 And 403 Oldsmobile Gasoline Engines: take off carburetor air cleaner first then drain radiator right away to prevent overheating,. Remove connecting upper radiator hose/bypass hose/heater hose To do this you might want to consider removing throttle linkage,vacuum & gas lines that are connected to carburetor , generator related brackets ,as well as some air conditioning parts . Then disconnect temperature gauge wire; EGR solenoid assembly, Idle Load Compensator unit and similar components. Also remove the EGR valve before taking off the intake manifold itself. Finally, clean gaskets surfaces, apply sealer, place gaskets,and secure manifold bolts in a certain sequence. For 307 Oldsmobile Gasoline Engines: take off carburetor air cleaner first then drain radiator right away to prevent overheating,. Disconnect all hoses such as upper radiator hose/bypass hose/heater hose Then, you should disconnected other things like throttle linkage,vacuum lines and gas lines. Besides, brackets related to generator/air conditioning could have been removed if necessary. As for electrical leads , they are disconnected after which components like the EGR solenoid assembly and Idle Load Compensator (ILC) are taken out . Take off the EGR valve then unfasten and take out the intake manifold bolts . In conclusion, clean gasket surfaces well using a suitable sealer. After that install all these manifolds' gaskets again properly into position while tightening their bolts in specific order only. For 265 And 301 Pontiac Engines: It is not necessary to follow a specific torque sequence during this process. Remove EGA valves except in 301 Remove intake manifold bolts after removing distributor, Drain radiator/block and remove various hoses plus brackets etc,Then you can pull out the intake manifold fast enough after unbolting it from an engine block. After that lay down new gaskets accordingly on both its sides, followed by applying sealer on them and finally fix up such with their corresponding bolts tightly. For 263 And 350 Oldsmobile Diesel Engines: take out air cleaner as well as draining radiator immediately Do so by simply undoing some hoses , brackets or even components like fuel injection pump along with its lines, vacuum pump or oil pump drive assembly ,Remove also any other hardware including intake manifold bolts which when undone will lead to it coming out of the engine. Apply sealer, place gaskets and secure the manifold bolts ensuring that as well as reinstalling all removed components in reverse order.
    Posted by GMPartsGiant Specialist
    Q:
    What steps should be followed when removing and replacing the intake manifold in V8 engine on Chevrolet El Camino? Posted by Customer
    A:
    If the engine has been removed from the car, disregard the following steps which do not apply. For vehicles equipped with air conditioning, carefully examine the routing of the A/C hoses and the mounting of the compressor; you may be able to remove the intake manifold without disconnecting the A/C system, but if in doubt, consult a certified dealer or refrigeration specialist to have the system depressurized, and do not disconnect the A/C hoses while under pressure. Begin by disconnecting the negative battery cable, then drain the coolant from the radiator. Remove the air cleaner assembly, disconnect the upper radiator hose and the heater hose from the intake manifold, and disconnect the accelerator linkage at the carburetor, ensuring any supporting bracket is also removed. With a container handy to catch any spillage, disconnect the fuel inlet hose at the carburetor, plugging the end to prevent dirt entry and excessive fuel seepage. Disconnect all other hoses connected to the carburetor, identifying each hose with numbered tape to avoid confusion during reassembly. Remove the distributor, securing the distributor cap with spark plug wires against the firewall. If equipped with an external coil, disconnect and mark the wiring at the top of the coil. Disconnect the vacuum hose leading to the power brake booster if applicable, then remove the upper bracket for the alternator and the air conditioning compressor bracket at the intake manifold. Remove the intake manifold-to-cylinder head attaching bolts, counting them to ensure all have been removed, then lift the manifold, complete with carburetor, free from the engine without prying on the mating surfaces. If replacing the intake manifold, transfer applicable accessories such as the carburetor, temperature or oil pressure sending unit, water outlet and thermostat, heater hose and water pump hose adapter fittings, EGR valve, emission system TVS switches, carburetor choke assembly, and ignition coil and bracket. Before installing the manifold, place clean lint-free rags in the engine cavity and thoroughly clean the engine block, cylinder heads, and manifold gasket surfaces, removing all extra gasket material and sealing compound. Install new front and rear seals to the engine block using RTV or an equivalent sealant, extending the bead of sealant about ½-inch up the sides of each cylinder head to seal and retain the side gaskets. Place new manifold side gaskets into position on each cylinder head, using sealant around the water passages, ensuring proper mating with the front and rear seals. Lower the intake manifold into position carefully to avoid disturbing the gaskets, torque the attaching bolts to specifications in the correct order, and install the remaining components in reverse order of removal. Finally, fill the radiator with coolant, start the engine, check for leaks, and adjust the ignition timing and carburetor idle speed as necessary.
    Posted by GMPartsGiant Specialist
    Q:
    What hoses need to be disconnected from the intake manifold for the 1986 Chevrolet Caprice? Posted by Customer
    A:
    Disconnect the upper radiator hose and the heater hose from the intake manifold.
    Posted by GMPartsGiant Specialist
    See expert answers on similar Intake Manifold
    Q:
    What is the first step to take when working with a 229 cubic inch V6 engine for the 1986 Chevrolet Caprice? Posted by Customer
    A:
    Begin by disconnecting the battery ground cable, draining the radiator, and removing the air cleaner.
    Posted by GMPartsGiant Specialist
    See expert answers on similar Intake Manifold
    Q:
    How do you remove the six-lobed socket bolt for the 1986 Chevrolet El Camino? Posted by Customer
    A:
    Remove the six-lobed socket bolt with GM tool J-24394 or equivalent, then remove the accelerator linkage springs and compressor top bracket if applicable, followed by the remaining intake manifold bolts (there are 10).
    Posted by GMPartsGiant Specialist
    See expert answers on similar Intake Manifold
    Q:
    What should be done with the hoses connected to the carburetor for the 1983 Oldsmobile Cutlass? Posted by Customer
    A:
    Disconnect all other hoses connected to the carburetor, identifying each with numbered tape to avoid confusion during reassembly.
    Posted by GMPartsGiant Specialist
    See expert answers on similar Intake Manifold
    Q:
    What sealants should be applied before installing the manifold for the 1985 Oldsmobile Cutlass? Posted by Customer
    A:
    Apply ATV or equivalent sealant to the ends of the seals and Copper-coat gasket sealant to the intake manifold gasket.
    Posted by GMPartsGiant Specialist
    See expert answers on similar Intake Manifold
    If you have any questions about this product, please don't hesitate to ask us. We will be happy to help you!

Genuine GM Part 22542648, the Right Choice

To ensure reliability, purchase GM part # 22542648 Manifold, Intake (Aluminum). It is sometimes referred to as Cadillac Intake Manifold. Directly from GM, genuine parts are superb with regards to quality, longevity, and fit. Every single part passed stringent quality testing, so you can be sure that it's safe, durable, and built to perform like your original parts. This part fits specific Cadillac Brougham, Fleetwood models.

GMPartsGiant.com is a leading supplier of genuine GM parts and accessories such as GM 22542648 Manifold, Intake (Aluminum). You're certainly in the right place if you're searching for the great cost-effective OEM GM parts. Look no further than our vast inventory of genuine GM parts offered at unbeatable online prices, all of which are backed by the manufacturer's warranty. Not to forget, our hassle-free return policy and quick delivery service ensure a smooth shopping experience for you. For detailed Cadillac parts information, click here.

Why choose GM Parts Giant

  • Dedicated Service

    Your complete satisfaction is our #1 goal

  • Lowest Prices

    Best deals on genuine OE parts from dealerships

  • Fast Delivery

    Orders are processed and delivered promptly