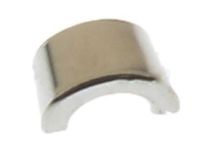
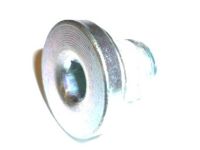
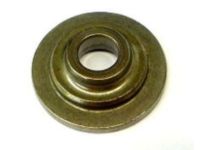
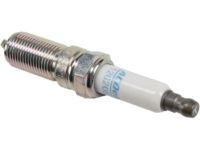
Make sure this part fits

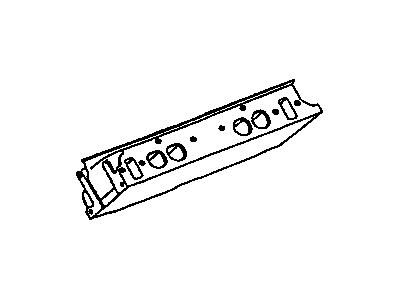
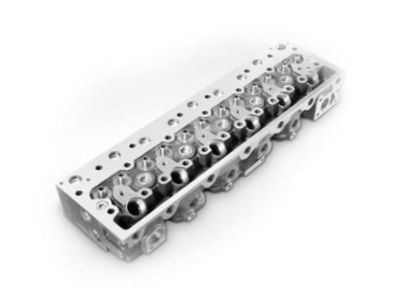
Chevrolet 12641701 Cylinder Head Kit

2013-2015 Chevrolet

Customer Questions & Expert Answers (6)
GM 12641701 Cylinder Head Kit
  • Part Description
    Head Kit, Cyl
  • Manufacturer
    General Motors
Make sure this part fits
$444.88 MSRP: $703.82
You Save: $258.94 (37%)
Core Charge: $75.00
Currently Unavailable

Due to manufacturer supply shortage, this item isn't currently available for ordering.

  • Related Parts
  • Product Specifications
  • Vehicle Fitment
  • Customer Questions & Expert Answers
  • Product Specifications

    BrandGenuine Chevrolet
    Manufacturer Part Number12641701
    Part DescriptionHead Kit, Cyl
    Other NamesCylinder Head
    Item Dimensions24.8 x 17.1 x 9.9 inches
    Item Weight43.60 Pounds
    ConditionNew
    Fitment TypeDirect Replacement
    ManufacturerGeneral Motors
    SKU12641701
    WarrantyThis genuine GM part is guaranteed by GM's factory warranty.
    Shipping & ReturnShipping Policy Return Policy
    Warning: California's Proposition 65
  • Vehicle Fitment

    Year Make Model Engine Important vehicle option details
    2013-2015 Chevrolet Equinox4 Cyl 2.4LLS SUV, LT SUV, LTZ SUV
    2014 Chevrolet Impala4 Cyl 2.4LLS 4 DOOR NOTCHBACK, LT 4 DOOR NOTCHBACK
    2014 Chevrolet Malibu4 Cyl 2.4LLT 4 DOOR NOTCHBACK
  • Customer Questions & Expert Answers

    Q:
    I am wonder if this is complete and correct part for my vehicle. Posted by GMPartsGiant Specialist
    A:
    You can Select Your Vehicle to check if 12641701 fits your vehicle.
    Posted by GMPartsGiant Specialist
    Q:
    What precautions should be taken when removing the engine head to prevent warpage and ensure proper installation in 2.4L four Cylinder Head engine on Chevrolet Equinox? Posted by Customer
    A:
    The head should not be removed until the engine is cold since this can cause the head to warp and new head bolts should be acquired beforehand. Let begin by reducing the pressure of fuel system and then removing the connection of the cable from the terminal of battery negative. It is preferable to do it when the engine is cold but should you wish to do it while running, wait for it to cool and drain the cooling system. This is done by uninstalling the coolant recovery tank and upper radiator hose, the drivebelt and the drivebelt tensioner. Then take out the exhaust manifold, and intake manifold and finally the valve cover before taking out the timing chain. You can run the cylinder head with the timing chain cover and timer chain still in place with the aid of some tools but it is advisable to take it off. Identify and remove connect the electrical connectors that may hinder removal procedures by applying a tag on the correct position of each connector to assist in proper reconnection. To do this, one has to take out and then discard the cylinder head bolts which have to be loosened at a ¼ turn starting intervals. Where the gasket seal separates the head and block, pry at corners of the head-to-block mating surface do not pry in gasket sealing zone. Raise the cylinder head off the engine: if there is some sort of resistance felt, the application of a wood block and hammer should be used and the position of the cylinder head should be on wood blocks so as not to develop some sort of crack. Also, it is necessary to unscrew the old cylinder head gasket, paying attention to the method of further assembly-its top side should be installed up. Use gasket scraper before installing the cylinder head block to make sure each surface of both cylinder head and block to be perfectly clean and then apply brake system cleaner. Open spaces of the engine should be covered with shop rags to prevent particles from falling, and the way should then be vacuum cleaned to clear the cylinders. Also look for cracks where the engine block and cylinder head join, the holes should also be cleaned with a nylon bristle brush. Put the new gasket on the dowels in the block, place the cylinder head on the engine block in such manner that it does not shift the gasket, and fit new cylinder head bolts and turn them to the right torque, in the correct order. The main Cylinder head bolts tightening is done in the first and second steps and the four small bolts in front are tightened in the third step. Place a tick sign on each of the main cylinder head bolts to identify those tightened a further by an angle of fifteen five degrees. The head bolt tightening procedure comes in with a torque angle sequence and a torque angle gauge can be used in the process. Later put the timing chain, exhaust manifold and Intake Manifold respectively once you finished put the components in the reverse order that you removed them.. Connect the battery, replace the oil and the oil filter, add more coolant to the system, turn on the engine and observe it closely for any oil and water flicker.
    Posted by GMPartsGiant Specialist
    Q:
    What steps are necessary to replace the cylinder head bolts and reinstall the cylinder heads in 3.0L and 3.6L V6 engine on Chevrolet Equinox? Posted by Customer
    A:
    It will be necessary to purchase a new set of 11 mm cylinder head bolts. Begin by relieving the fuel system pressure and disconnecting the cable from the negative battery terminal. Drain the cooling system. For 3.0L models and 2013 and later 3.6L models, remove the power brake booster pump and secure it out of the way. Remove the intake manifold(s), valve covers, and upper timing chains. Disconnect the ground wires from the heads; for the left cylinder head, remove the dipstick tube and disconnect the electrical connector from the Engine Coolant Temperature sensor, and for the right head, detach the power steering hose clip and disconnect the oxygen sensor electrical connector. On 2009 and earlier 3.6L engines, disconnect the catalytic converters from the exhaust manifolds, as the heads can be removed with the exhaust manifolds attached. Remove the camshaft position actuator solenoid valves. For 2013 and later 3.6L models, when removing the left side cylinder head, remove the high-pressure fuel pump and then the oil dipstick tube fastener and tube. Loosen the head bolts in 1/4-turn increments in the reverse order of the tightening sequence until they can be removed by hand, noting that there will be different lengths and sizes of bolts in different locations. Carefully lift the heads off the engine block, using a prybar cautiously if resistance is felt, and store the heads on wooden blocks to prevent damage. The mating surfaces of the cylinder heads and block must be perfectly clean when reinstalling the heads, using gasket removal solvents and a gasket scraper to remove all traces of carbon and old gasket material, followed by wiping with a cloth saturated with brake system cleaner. Check the block and head mating surfaces for nicks and scratches, using emery cloth for slight damage, while excessive damage may require machining. Use a tap of the correct size to chase the threads in the head bolt holes or spray brake cleaner and use compressed air to remove debris. Position the new gaskets over the dowels in the block and carefully position the heads on the block without disturbing the gaskets. Always replace 8 mm or 11 mm head bolts. Before installing the new 8 mm head bolts, coat the threads with a medium-strength thread locking compound and install them finger tight. Install new 11 mm head bolts and tighten them finger tight, then follow the recommended sequence to tighten the bolts to the specified torque and angle of rotation. Tighten the 8 mm bolts to the specified torque and angle of rotation. The remainder of the installation is the reverse of removal. Finally, change the engine oil and filter, refill the cooling system, start the engine, and check for proper operation and any coolant or oil leaks.
    Posted by GMPartsGiant Specialist
    Q:
    What precautions should be taken when removing the engine head to prevent warpage and ensure proper installation in four Cylinder Head engine on Chevrolet Malibu? Posted by Customer
    A:
    Head has to be removed on a cooler engine to avoid warpage of the head. Head bolts are also necessary to install; thus, it is necessary to buy new ones in advance. The process commences with the removal of pressure from the fuel system to ensure that no accident occurs and the cable is disconnected from the Negate battery terminal. Suction the cooling system and the oil sump; then unplug the Powertrain Control Module. Remove hose clamps and hoses from the coolant outlet housing, undo the housing bolts and then remove the housing. B, eremove valve cover, turbocharger assembly and intake manifold. For the 2.0L and 2.5L engines, take off the exhaust manifold, timing chain cover and timing chain: support the engine at the lower end of the engine mount. Take out the high pressure fuel pump, and, if you're working on the 2.0 L and 2.5 L engines, you should also remove the camshaft position actuators, and cams. Identify and disarm the electrical connectors from the cylinder head that could be possibly cumbersome in removal, note down each connector for easy reconnection. Loosen the cylinder head bolts in the specified order turning it in small amounts. Drive a pry bar along the wide flat area all around the head-to-block mating surface but you should not pry in the gasket sealing area. Place an engine hoist lifting bracket and chains at the cylinder head, then use the hoist to lift the cylinder head up off the engine, if it is hard to lift use a wood block and hammer to apply leverage. Place the cylinder head on wooden pillows so as not to scratch the gasket sealing surfaces as you remove the old cylinder head gasket having in mind its positioning as when being fitted. Before installation of the cylinder head and block, the mating surfaces need to be immaculately clean; therefore, using gasket scraper and brake system cleaner. Ensure that the mating surfaces are free from any form of damages like nicks, deep scratches and others. Wash the threads in the cylinder head bolt holes with a tap since this practice may including dirt and corrosion that might alter the torque value read. Align the new gasket with the dowels in the block, locate the cylinder head over the engine block with out shifting the gasket and fit new cylinder head bolts then tighten these bolts to the standard torque level in the correct sequence. Fit the timing chain, turb charger or exhaust manifold and intake manifold. The other steps that are needed to be taken for installation is the exact opposite of the removal process. Connect the battery, drain the engine oil and replace it with a new one, refill the cooling system, then crank the car and look out for the leakage of oil and antifreeze mixture.
    Posted by GMPartsGiant Specialist
    Q:
    How to remove and install cylinder heads in 3.4L V6 engine on GMC Terrain? Posted by Customer
    A:
    Before taking off the cylinder heads, unbend the cable from the negative terminal of the battery, lift the vehicle on safety jack stands but first drain the cooling system and engine oil. Relieve the exhaust pressure by removing the exhaust pipe or pipes from the manifold or manifolds and lower the car. Playing it part by part, start by doffing the rocker arms and pushrods, the lower intake manifold, and the exhaust manifold. Should one remove the front head, then the dipstick tube must also be pulled out by the removing bolt on the front cylinder head. The removal of the rear cylinder head involves the removal of the heater outlet hose as well as the heater core outlet hose attached to the heater outlet tube; thereafter you have to remove the tube by naked force by the mere use of a nut. Take out the engine coolant temperature sensor, and the engine hoist bracket. Make sure all those elements that keep interfering with the cylinder head are removed, then follow by the removal of the spark plug. When it is time to remove the cylinder heads, undo each cylinder head bolt a quarter of a turn in the reverse order of the sequence that was used in the tightening process until they can be fully undone by hand: discard the bolts because new ones are needed for reassembly. Pull the head(s) up and away from the engine gently, ensuring therefore to look for nuts/bolts that one might have missed, and may use sledge hammer and bar of wood in breaking the gasket so that one can pull the head(s) off. Upon, removal position the head on wooden blocks to protect the gasket surfaces. For installation, it is required for the two surfaces of each cylinder head and block to be free from contaminants; use of a gasket scraper to remove gasket debris accompanied by brake system cleaner. The lifter valley should be covered with shop rags to prevent any debris from getting in and all areas where block and head interface should be inspected, and any damage repaired. Wash the threads in the head bolt holes with a tap Then put the new gasket on over the dowel pins on the block make certain that the gap is on the right side up. Safely position the head on the block over the existing gasket, new cylinder head bolts should be inserted and tightened according to sequence in the recommended torque then each bolt should be turned to the prescribed angle. Reverse the process of removal and charge the cooling system, while on the same process change the engine oil and filter.
    Posted by GMPartsGiant Specialist
    Q:
    Does it come with the valves and the camshaft? Posted by Customer: 2015 Chevrolet Equinox
    A:
    no it does not
    Posted by GMPartsGiant Specialist 23/3/2022
    If you have any questions about this product, please don't hesitate to ask us. We will be happy to help you!

Genuine GM Part 12641701, the Right Choice

To ensure reliability, purchase GM part # 12641701 Cylinder Head Kit. It is sometimes referred to as Chevrolet Cylinder Head. Directly from GM, genuine parts are superb with regards to quality, longevity, and fit. Every single part passed stringent quality testing, so you can be sure that it's safe, durable, and built to perform like your original parts. This part fits specific Chevrolet Equinox, Impala, Malibu models.

GMPartsGiant.com is a leading supplier of genuine GM parts and accessories such as GM 12641701 Cylinder Head Kit. You're certainly in the right place if you're searching for the great cost-effective OEM GM parts. Look no further than our vast inventory of genuine GM parts offered at unbeatable online prices, all of which are backed by the manufacturer's warranty. Not to forget, our hassle-free return policy and quick delivery service ensure a smooth shopping experience for you. For detailed Chevrolet parts information, click here.

Why choose GM Parts Giant

  • Dedicated Service

    Your complete satisfaction is our #1 goal

  • Lowest Prices

    Best deals on genuine OE parts from dealerships

  • Fast Delivery

    Orders are processed and delivered promptly