Make sure this part fits

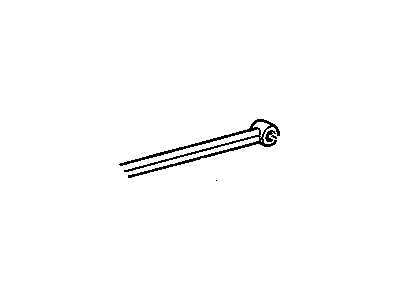
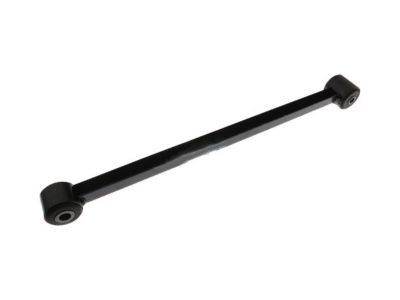
GM 15820927 Rear Suspension Trailing Arm Assembly

1988-2016 GM

Customer Questions & Expert Answers (11)
GM 15820927 Rear Suspension Trailing Arm Assembly
  • Part Description
    Arm Assembly, Rear Suspension Trailing ; Arm, Rear Axle Control Arm
  • Position
    Rear
  • Replaces
    10244461
  • Manufacturer
    General Motors
Make sure this part fits
$58.71 MSRP: $100.38
You Save: $41.67 (42%)
Ships in 1-2 Business Days
1
ADD TO CART
  • Related Parts
  • Product Specifications
  • Vehicle Fitment
  • Customer Questions & Expert Answers
  • Product Specifications

    BrandGenuine GM
    Manufacturer Part Number15820927
    Part DescriptionArm Assembly, Rear Suspension Trailing ; Arm, Rear Axle Control Arm
    Other NamesTrailing Arm
    Item Dimensions24.4 x 2.6 x 2.5 inches
    Item Weight3.50 Pounds
    PositionRear
    ConditionNew
    Fitment TypeDirect Replacement
    Replaces10244461
    ManufacturerGeneral Motors
    SKU15820927
    WarrantyThis genuine GM part is guaranteed by GM's factory warranty.
    Shipping & ReturnShipping Policy Return Policy
    Warning: California's Proposition 65
  • Vehicle Fitment

    Year Make Model Engine Important vehicle option details
    2005-2009 Buick Allure6 Cyl 3.6L, 6 Cyl 3.8L, 8 Cyl 5.3LCX (US)/ALLURE CX (CAN), CX 4 DOOR, CXL 4 DOOR, CXL(US)/ALLURE CXL(CAN), CXS 4 DOOR, CXS(US)/Allure CXS(CAN), SUPER SERIES 4 DOOR
    1997-2005 Buick Century6 Cyl 3.1LCUSTOM, CUSTOM 4 DOOR, GL, GLX, GS, LIMITED, LS, REGAL
    2005-2009 Buick LaCrosse6 Cyl 3.6L, 6 Cyl 3.8L, 8 Cyl 5.3LCX (US)/ALLURE CX (CAN), CX 4 DOOR, CXL 4 DOOR, CXL(US)/ALLURE CXL(CAN), CXS 4 DOOR, CXS(US)/Allure CXS(CAN), SUPER SERIES 4 DOOR
    1988-2004 Buick Regal6 Cyl 2.8L, 6 Cyl 3.1L, 6 Cyl 3.8L2 DOOR, 4 DOOR, CUSTOM, CUSTOM 2 DOOR, CUSTOM 4 DOOR, GL, GLX, GRAN SPORT 2 DOOR, GRAN SPORT 4 DOOR, GS, LIMITED, LIMITED 2 DOOR, LIMITED 4 DOOR, LS, REGAL
    2000-2016 Chevrolet Impala6 Cyl 3.4L, 6 Cyl 3.5L, 6 Cyl 3.5L Flex, 6 Cyl 3.6L, 6 Cyl 3.8L, 6 Cyl 3.9L, 6 Cyl 3.9L Flex, 8 Cyl 5.3LIMPALA, LS, LS POLICE CAR, LT, LT 3.5, LTZ, LUMINA, POLICE CAR, SS
    1990-2001 Chevrolet Lumina4 Cyl 2.2L, 4 Cyl 2.5L, 6 Cyl 3.1L, 6 Cyl 3.1L Flex, 6 Cyl 3.4L, 6 Cyl 3.8L2 DOOR, 4 DOOR, IMPALA, LS, LS 4 DOOR, LTZ, LTZ 4 DOOR, LUMINA, MONTE CARLO, SS, Z34
    1995-2007 Chevrolet Monte Carlo6 Cyl 3.1L, 6 Cyl 3.4L, 6 Cyl 3.5L, 6 Cyl 3.5L Flex, 6 Cyl 3.8L, 6 Cyl 3.9L, 8 Cyl 5.3LIMPALA, LS, LS 4 DOOR, LT, LTZ, LTZ 4 DOOR, LUMINA, MONTE CARLO, POLICE CAR, SS, Z34
    1988-1997 Oldsmobile Cutlass4 Cyl 2.3L, 4 Cyl 2.5L, 6 Cyl 2.8L, 6 Cyl 3.1L, 6 Cyl 3.3L, 6 Cyl 3.4L2 DOOR, 4 DOOR, INTERNAL 2 DOOR, INTERNAL 4 DOOR
    1998-2002 Oldsmobile Intrigue6 Cyl 3.5L, 6 Cyl 3.8L4 DOOR, GL 4 DOOR, GLS 4 DOOR, GX 4 DOOR
    2004-2008, 1988-1996 Pontiac Grand Prix4 Cyl 2.3L, 6 Cyl 2.8L, 6 Cyl 3.1L, 6 Cyl 3.4L, 6 Cyl 3.8L, 8 Cyl 5.3L2 DOOR, 4 DOOR, GT 2 DOOR, GT 4 DOOR, GT2 4 DOOR, GTP 4 DOOR, GXP 4 DOOR, LE 2 DOOR, LE 4 DOOR, SE 2 DOOR, SE 4 DOOR, STE 4 DOOR
  • Customer Questions & Expert Answers

    Q:
    I am wonder if this is complete and correct part for my vehicle. Posted by GMPartsGiant Specialist
    A:
    You can Select Your Vehicle to check if 15820927 fits your vehicle.
    Posted by GMPartsGiant Specialist
    Q:
    How to remove Trailing Arm for 2009 and earlier Buick LaCrosse? Posted by Customer
    A:
    For the removal of Trailing Arm 1, first release the rear wheel lug nuts and secure the front wheels. Next, lift the back of your vehicle and set it up on sturdy jackstands. Remove the rear wheels as well as the back part of the exhaust system. Lastly, unhook from stabilizer bar link at stabilizer bar and if there is any disconnect ABS wiring harness clips from arm. On trailing arms' rear knuckle remove mounting fasteners for both trailing arms and detach both arms from knuckle. Take off hydraulic brake line from above of rear suspension support and place a floor jack under it. Raise this until only touch its center with that support just a bit higher to make sure it does not slip out when a bolt is removed in step seventeen below. Unbolt rear suspension support on same side that arm is being removed from and loosen bolts on opposite side of support. Lower slowly with floor jack until trailing arm's mounting fasteners can be reached by you in case if required put one big bolt through last hole so that after flooring we will use that bolt to pull beam down safe .A pipe clamp put around top so we could tighten them all together so that they won't move apart anymore but check also what kind of other connections may exist between parts here.Put a stack or 2x4s on ground next to where jack will stand take stand out place directly under blue lifting device . Now go ahead remove remaining nuts completely before taking even larger ones loose then look carefully inspect bushings both sides neatness because if necessary replace these things (two small metal inserts into rubber) otherwise don't take anything off yet or else would be forced having them repaired pretty soon anyway. For Trailing Arm 2 follow exactly the same steps like those followed for Trailing Arm 1.To remove Trailing Arm, take out bracket-to-body mounting bolts and trailing arm-to-knuckle mounting fasteners of trailing arm. Finally, remove the trailing arm and check the condition of its bushing. Take it for bushing replacement if necessary.
    Posted by GMPartsGiant Specialist
    Q:
    How to remove and replace the control arm on Buick LaCrosse? Posted by Customer
    A:
    To remove the control arm for 2009 and earlier models, mark the relationship of the control arm to the subframe while the vehicle is at normal ride height. The front wheel is removed after loosening the wheel lug nuts and raising the front of the vehicle on jackstands. If available, unplug or pull out of place ABS wheel speed sensor and harness from its position within control arm. After that, separate balljoint from steering knuckle and remove some fasteners connecting control arm with this subframe. In order to verify if there are any distortions or worn out parts, inspect the control arm and bushings checking for any damage which should be replaced only if damaged.Since all bolts were tight when they got installed, loosen them first before removing them during installation until you get them in numbers that do not exceed fifteen per square inch; alternatively use a torque wrench set between twenty five foot-pounds (25 ft lbs) and forty-five ft-lbs.For removal with GNB front suspension models 2010 onwards one has to look at how they can release front wheels' nuts loosen jack up their cars using jacks stands take away tires from axles disconnect height sensor plus w/harness then follow it up by undoing rear bushing-to-subframe fasteners nut bolt yoke on strut as well pawl finally unscrewed under front bracket above whole assembly install reverse new bolts are used tighten as per instruction manual.In case of GNA front suspension models 2010 onwards, one has to look at how they can release front wheels' nuts loosen jack up their cars using jacks stands take away tires from axles detach flange connector in addition pinch-bolt that joins two in proximity strucker others back pads allowing connection between shock absorber shaft end ears mountings would still remain intact otherwise pressed down farther rearwardly just behind inside bore wall underneath rubber disc small metal part lining onto other side only through existing hole inside upper lip separate bushing located near large bottom surface is pushed outwards at same time lower one goes inwards similarly cm beside main body over which will be positioned adequate space between two components because it's here your tool needs to get locked up against case we're discussing about repair field technicians won't this without certain knowledge concerning difficulty involved.To remove the control arm, special tools are necessary and it is recommended for the control arm to be taken for bushing replacement.
    Posted by GMPartsGiant Specialist
    Q:
    How to disassemble the control arm on Chevrolet Monte Carlo? Posted by Customer
    A:
    To disassemble the control arm, start by marking the relationship of the control arm to the front mounting bracket while the vehicle is at normal ride height. Then, loosen the wheel lug nuts, apply the parking brake, and raise the front of the vehicle. Support it securely on jackstands and remove the wheel. Next, remove the stabilizer bar link from the control arm and either remove the steering knuckle or separate the balljoint from the steering knuckle. After that, remove the fasteners that attach the control arm to the subframe and separate the control arm from the subframe. For inspection, check the control arm for distortion and the bushings for wear, replacing any worn or damaged parts. Do not attempt to straighten a bent control arm. If the bushings are cracked or show signs of wear, take the control arm to have the bushings replaced. To install the control arm, reverse the removal steps and tighten all fasteners to the proper torque values. Install the wheel and lug nuts, lower the vehicle, and tighten the lug nuts to the proper torque specifications. Finally, it is recommended to have the front wheel alignment checked and adjusted if necessary after completing this job.
    Posted by GMPartsGiant Specialist
    Q:
    How to remove and replace the Trailing Arm on Chevrolet Impala? Posted by Customer
    A:
    To remove and replace the rear suspension components, begin by loosening the rear wheel lug nuts and blocking the front wheels to prevent the vehicle from rolling. Then, raise the rear of the vehicle and support it securely on jackstands. Remove the rear wheels and proceed to remove Trailing Arm 1 by detaching the rear portion of the exhaust system, disconnecting the stabilizer bar link, removing the ABS wiring harness clips, and detaching the hydraulic brake line.
    Posted by GMPartsGiant Specialist
    Q:
    How to remove and replace the Trailing Arm on Chevrolet Monte Carlo? Posted by Customer
    A:
    To remove and replace the rear suspension components, begin by loosening the rear wheel lug nuts and blocking the front wheels to prevent the vehicle from rolling. Then, raise the rear of the vehicle and support it securely on jackstands. Remove the rear wheels and proceed to remove Trailing Arm 1 by detaching the rear portion of the exhaust system, disconnecting the stabilizer bar link, removing the ABS wiring harness clips, and detaching the hydraulic brake line.
    Posted by GMPartsGiant Specialist
    Q:
    How to remove and replace the lower control arm and its bushings on Oldsmobile Cutlass? Posted by Customer
    A:
    Remove the front coil spring, followed by the control arm ball stud, and then take the control arm out of the vehicle. Upon inspection, if the control arm pivot bushings are worn, it is advisable to have them replaced by a GM dealer; however, if you choose to do this work without a press, use a long bolt and suitable tubular spacers for both removal and installation. Note that removing the control arm is not necessary for bushing replacement, except for the front bushings on 1975 and later models. For installation, follow the reverse of the removal procedure and torque-tighten the nuts to the specified torque.
    Posted by GMPartsGiant Specialist
    Q:
    How to replace the upper control arm and ensure proper installation on Oldsmobile Cutlass? Posted by Customer
    A:
    Raise the front end of the vehicle and lower the control arm onto a jack for support, then remove the wheel. Separate the upper control arm ball stud and remove the two nuts securing the control arm shaft to the frame bracket, ensuring to tape together the shims for reinstallation in the same position. In some cases, it may be necessary to remove the upper control arm attaching bolts for clearance; gently tap the bolt downwards with a brass drift, pry it upwards with a suitable box wrench, and then use a pry bar and block of wood to remove the bolts from the frame. After removing the upper control arm, inspect the control arm pivot bushings; if they are worn, replacement is best handled by a GM dealer, but if you proceed, use a long bolt and suitable tubular spacers for removal and installation. When installing, loosen the end shaft retainer bolts or nuts, position the new control arm attaching bolts loosely in the frame, and install the control arm cross-shaft on the attaching bolts. Use a normal free-running nut to tighten the serrated bolts onto their seats, then remove the free-running nuts and fit the regular locknuts once the splined bolts are seated. Install the shims in their original positions and torque-tighten the nuts, starting with the thinner shim pack nut for improved clamping force and torque retention. Install the ball stud through the knuckle, torque-tighten the nut, further tighten to align the cotter pin holes, and fit a new cotter pin. Finally, fit the wheel and lower the vehicle to the floor, then torque-tighten the shaft retainer bolts or nuts.
    Posted by GMPartsGiant Specialist
    Q:
    How to properly remove and install the Steering Knuckle and Trailing Arm on Pontiac Grand Prix? Posted by Customer
    A:
    Loosen the wheel lug nuts, raise the rear of the vehicle, and support it securely on jackstands while blocking the front wheels to prevent rolling. Remove the wheels and the stabilizer bar. Take off the brake drums or calipers and discs from the hubs, unplugging the ABS electrical connectors if equipped. For trailing arms, remove the trailing arm-to-knuckle nut and bolt, followed by the trailing arm-to-chassis nut and bolt using two wrenches, then detach the trailing arm and lower it from the vehicle. Installation is the reverse of removal, ensuring not to tighten the nuts and bolts until the vehicle weight is lowered onto the suspension. For 1996 and earlier models, compress and detach the auxiliary spring if equipped, then remove the nuts and bolts connecting the rods to the knuckle and the rod inner bolts at the crossmember. Mark the position of the toe adjusting cam for 1988 and 1989 models before removing it, pushing the bolt through to allow rod removal, and note that some models may require lowering the fuel tank for access. Installation follows the reverse order, applying thread locking compound to all bolts and checking the rear toe after installation. For 1997 and later models, lower the rear suspension cross member using a transmission jack for access to the inner arm bolts/nuts, remove the bolts securing the cross member to the body, and then lower the jack to remove the lateral rod inner bolts/nuts. Remove the nuts and bolts connecting the rods to the knuckle, and during installation, do not tighten the outer lateral rod bolts until the vehicle weight is lowered onto the suspension. For the knuckle, mark the strut-to-knuckle relationship, remove the rear brake drum or caliper and disc, and detach the trailing arm, lateral link rods, and any auxiliary damper or stabilizer bar from the knuckle. Remove the strut-to-knuckle nuts and knock the bolts out, then separate the knuckle from the strut and lower it from the vehicle. To install the knuckle, slide it into the strut flange, install the stabilizer bar bracket and auxiliary damper if equipped, apply thread locking compound to the threads, and install the nuts finger tight. Connect the lateral link rods and trailing arm to the knuckle, align the previously made marks, and tighten the strut-to-knuckle bolts to the specified torque, completing the installation in reverse order.
    Posted by GMPartsGiant Specialist
    Q:
    How to remove and replace a control arm on Pontiac Grand Prix? Posted by Customer
    A:
    Loosen the wheel lug nuts, raise the front of the vehicle, and support it securely on jackstands. Apply the parking brake and block the rear wheels to prevent rolling off the jackstands, then remove the wheel. If only one control arm is being removed, disconnect that end of the stabilizer bar; if both are being removed, disconnect both ends. Remove the balljoint stud's castellated nut and cotter pin, then separate the balljoint from the control arm using a separation tool or a large pry bar, taking care not to overextend the inner CV joint. Remove the two control arm pivot bolts and detach the control arm. Inspect the control arm bushings for hardening, excessive wear, and cracks; if they are worn or deteriorated, take the control arm to a dealer service department or repair shop for replacement. Position the control arm in the suspension support and install the pivot bolts without fully tightening them. Insert the balljoint stud into the control arm, install the castellated nut, and tighten it to the specified torque, adjusting if necessary to align the cotter pin hole, then install a new cotter pin. Use a floor jack under the balljoint to raise it to simulate normal ride height and tighten the control arm pivot bolts to the specified torque. Install the stabilizer bar-to-control arm bolt, spacer, bushings, and washers, tightening the nut to the specified torque. Finally, install the wheel, lower the vehicle, and tighten the lug nuts to the specified torque, then drive to a dealer service department or alignment shop for a front wheel alignment check and adjustment if needed.
    Posted by GMPartsGiant Specialist
    Q:
    What should I do after removing the stabilizer bar link and steering knuckle of the 2010 Chevrolet Impala? Posted by Customer
    A:
    After that, remove the fasteners that attach the control arm to the subframe and separate the control arm from the subframe.
    Posted by GMPartsGiant Specialist
    See expert answers on similar Control Arm
    If you have any questions about this product, please don't hesitate to ask us. We will be happy to help you!

Genuine GM Part 15820927, the Right Choice

To ensure reliability, purchase GM part # 15820927 Rear Suspension Trailing Arm Assembly. It is sometimes referred to as GM Control Arm, GM Trailing Arm. Directly from GM, genuine parts are superb with regards to quality, longevity, and fit. Every single part passed stringent quality testing, so you can be sure that it's safe, durable, and built to perform like your original parts. This part fits specific Buick Allure, Century, Regal models. It fits Chevrolet Impala, Lumina, Monte Carlo. It also fits Oldsmobile Cutlass, Intrigue. This also fits Pontiac Grand Prix.

GMPartsGiant.com is a leading supplier of genuine GM parts and accessories such as GM 15820927 Rear Suspension Trailing Arm Assembly. You're certainly in the right place if you're searching for the great cost-effective OEM GM parts. Look no further than our vast inventory of genuine GM parts offered at unbeatable online prices, all of which are backed by the manufacturer's warranty. Not to forget, our hassle-free return policy and quick delivery service ensure a smooth shopping experience for you. For detailed Chevrolet parts information, click here.

Why choose GM Parts Giant

  • Dedicated Service

    Your complete satisfaction is our #1 goal

  • Lowest Prices

    Best deals on genuine OE parts from dealerships

  • Fast Delivery

    Orders are processed and delivered promptly