
My Garage
My Account
Cart
Additional information needed to check if this part fits
2024 Chevrolet Corvette
Check another vehicle- The location this part fits: Passenger Side
- Fitting Vehicle Options: YC(JL9,J6A)
GM 84733228 Front Brake Caliper Assembly Without Brake Pads
2020-2024 Chevrolet Corvette
Customer Questions & Expert Answers (2)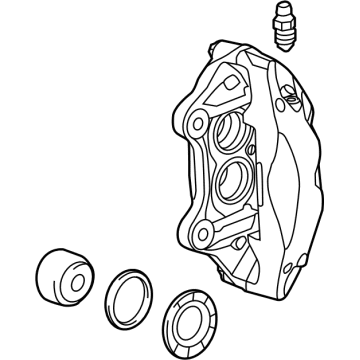
- Part DescriptionCaliper Assembly, Front Brk (W/O Brk Pads & Brkt)
- PositionFront
- ManufacturerGeneral Motors
Additional information needed to check if this part fits
2024 Chevrolet Corvette
Check another vehicle- The location this part fits: Passenger Side
- Fitting Vehicle Options: YC(JL9,J6A)
$505.22 MSRP: $951.66
You Save: $446.44 (47%)
Core Charge: $40.00
Ships in 1-3 Business Days
1
- Related Parts
- Specifications
- Q&A
Product Specifications
Brand Genuine GM Manufacturer Part Number 84733228 Part Description Caliper Assembly, Front Brk (W/O Brk Pads & Brkt) Other Names Caliper Position Front Condition New Fitment Type Direct Replacement Manufacturer General Motors SKU 84733228 Warranty This genuine GM part is guaranteed by GM's factory warranty. Shipping & Return Shipping Policy Return Policy Warning: California's Proposition 65Customer Questions & Expert Answers
- Q:Do these parts fit my vehicle? Posted by GMPartsGiant Specialist
- A:You can Select Your Vehicle to check if 84733228 fits your vehicle.Posted by GMPartsGiant Specialist
- Installation and Repair Tips by AI Expert
- Removal steps 1. Park on a level surface, set the parking brake, chock remaining wheels and wear eye and hand protection. 2. Disconnect the negative battery terminal and wait several minutes for electrical systems to discharge. 3. Break wheel lug nuts while the vehicle is on the ground. 4. Raise the vehicle and support it securely on jack stands; remove the wheel. 5. Inspect the caliper area and clean dirt to avoid contamination when opening the hydraulic system. 6. Remove the caliper mounting hardware (design and access vary by vehicle) and free the caliper from the rotor or carrier. 7. Support the caliper with a hanger or wire so the brake hose is not stressed. 8. If the caliper will be separated from the brake hose, loosen the hose connection at the caliper, catch brake fluid, and immediately cap or plug both the hose and caliper ports to keep contaminants out. 9. Remove brake pads and any anti-rattle hardware or clips, noting their orientation for reassembly. 10. Inspect mating surfaces, brake hose condition, and nearby components for damage or excessive wear. 11. Repair tip: mark pad/shim orientation and any sensor wiring routing before full disassembly to simplify reinstallation. Installation steps 1. Prepare the replacement caliper: transfer any required hardware, install new seals or hardware supplied with the caliper, and bench-bleed if the part or manufacturer recommends it (procedures vary). 2. Position pads and clips correctly in the bracket or caliper according to their original orientation. 3. Mount the caliper onto the rotor or carrier and install the mounting hardware; tighten to manufacturer torque values (refer to the service manual). 4. Reconnect the brake hose to the caliper using new sealing washers or hardware if required; ensure connections are clean and properly seated. 5. Remove plugs from the caliper and hose, allow fluid to enter the caliper while preventing contamination and catching any spills; top off the master cylinder reservoir with the correct fluid as needed. 6. Reinstall the wheel, lower the vehicle, and torque the wheel lug nuts to the manufacturer specification. 7. Reconnect the negative battery terminal. 8. Bleed the brake system using an appropriate method until the pedal is firm and free of air; if the vehicle has an ABS or electronic parking brake, follow the manufacturer's bleed/initialization procedure or use a scan tool if required. 9. Check all fittings and hose connections for leaks with the system pressurized (engine on if required by vehicle) and confirm brake warning lights are extinguished. 10. Perform a cautious low-speed road test to verify brake function, then recheck fluid level and inspect for leaks after the initial operation. 11. Repair tip: recheck wheel nut torque after the first short drive and inspect the caliper area again for signs of leakage or unusual noise.
- Q:
Why choose GM Parts Giant
- Dedicated Service
Your complete satisfaction is our #1 goal
- Lowest Prices
Best deals on genuine OE parts from dealerships
- Fast Delivery
Orders are processed and delivered promptly