Make sure this part fits

GM 12637743 Chain Assembly, Cm/Shf Inter Drv

2007-2024 GM

Customer Questions & Expert Answers (10)
GM 12637743 Chain Assembly, Cm/Shf Inter Drv
  • Part Description
    Chain Assembly, Cm/Shf Inter Drv
  • Replaces
    12633452, 12683547, 12616608
  • Manufacturer
    General Motors
Make sure this part fits
$48.50 MSRP: $82.93
You Save: $34.43 (42%)
Ships in 1-2 Business Days
1
ADD TO CART
  • Related Parts
  • Product Specifications
  • Vehicle Fitment
  • Customer Questions & Expert Answers
  • Product Specifications

    BrandGenuine GM
    Manufacturer Part Number12637743
    Part DescriptionChain Assembly, Cm/Shf Inter Drv
    Other NamesChain Guide, Secondary Chain, Timing Chain
    Item Dimensions2.5 x 0.5 x 0.3 inches
    Item Weight1.30 Pounds
    ConditionNew
    Fitment TypeDirect Replacement
    Replaces12633452, 12683547, 12616608
    ManufacturerGeneral Motors
    SKU12637743
    WarrantyThis genuine GM part is guaranteed by GM's factory warranty.
    Shipping & ReturnShipping Policy Return Policy
    Warning: California's Proposition 65
  • Vehicle Fitment

    Year Make Model Engine Important vehicle option details
    2010-2015, 2007-2008 Buick Allure6 Cyl 3.0L, 6 Cyl 3.6LCX 4 DOOR SEDAN, CXL 4 DOOR SEDAN, CXS 4 DOOR SEDAN, CXS(US)/Allure CXS(CAN), SPS 4 DOOR SEDAN
    2008-2024 Buick Enclave6 Cyl 3.6LBASE EXTENDED 4 DOOR SUV, PREMIUM 1 EXTENDED 4 DOOR SUV, PREMIUM 2 EXTENDED 4 DOOR SUV, SPORT UTILITY VEHICLE 2WD, SPORT UTILITY VEHICLE 4WD, SPORT UTILITY VEHICLE AWD
    2010-2016, 2007-2008 Buick LaCrosse6 Cyl 3.0L, 6 Cyl 3.6LCX 4 DOOR SEDAN, CXL 4 DOOR SEDAN, CXS 4 DOOR SEDAN, CXS(US)/Allure CXS(CAN), SPS 4 DOOR SEDAN
    2013-2019 Cadillac ATS6 Cyl 3.6L2 DOOR LUXURY COUPE, 2 DOOR PERFORMANCE COUPE, 3 DOOR PREMIUM COUPE, 4 DOOR LUXURY SEDAN, 4 DOOR PERFORMANCE SEDAN, 4 DOOR PREMIUM SEDAN, 4 DOOR SEDAN, V-SERIES 2 DOOR COUPE, V-SERIES 4 DOOR SEDAN
    2022-2024 Cadillac CT46 Cyl 3.6LV-SERIES NOTCHBACK-BLACKWING
    2007-2019 Cadillac CTS6 Cyl 2.8L, 6 Cyl 3.0L, 6 Cyl 3.6L2 DOOR COUPE, 4 DOOR, 4 DOOR (RHD), 4 DOOR PERFORMANCE SEDAN, 4 DOOR PREMIUM SEDAN, 4 DOOR RHD, 4 DOOR SEDAN, 4 DOOR SEDAN(RHD), 4 DOOR STATION WAGON, 4 DOOR STATION WAGON(RHD), 4 DOOR WAGON, 4 DOOR WAGON(RHD), V 4 DOOR
    2007-2016 Cadillac SRX6 Cyl 2.8L, 6 Cyl 3.0L, 6 Cyl 3.6L4 DOOR, 4 DOOR(RHD), CROSSOVER 4 DOOR, V8 4 DOOR
    2007-2011 Cadillac STS6 Cyl 3.6L4 DOOR, 4 DOOR(RHD), V 4 DOOR
    2014-2019 Cadillac XTS6 Cyl 3.6LPLATINUM 4 DOOR NOTCHBACK, PREMIUM 4 DOOR NOTCHBACK
    2010-2015 Chevrolet Camaro6 Cyl 3.6L2 DOOR CONVERTIBLE, 2 DOOR COUPE, LS 2 DOOR COUPE, LT 2 DOOR CONVERTIBLE, LT 2 DOOR COUPE
    View More
  • Customer Questions & Expert Answers

    Q:
    I am wonder if this is complete and correct part for my vehicle. Posted by GMPartsGiant Specialist
    A:
    You can Select Your Vehicle to check if 12637743 fits your vehicle.
    Posted by GMPartsGiant Specialist
    Q:
    How to remove and install a Timing Chain and Variable Timing Sprocket in 3.6L V6 engine on Buick Enclave? Posted by Customer
    A:
    Caution! This is a complex process with an possibility of causing serious engine damage if not done correctly. Without significant experience in this kind of repair, do not try to replace the timing chain; unless you are sure about it, consult a specialist. Before attempting to start the engine, ensure accuracy through double-checking all work. Make sure that all sprockets have timing marks before removing the timing chain(s) from their sprockets. These tools required for this procedure (EN 48383-1, 48383-2, and EN 48383-3) can be obtained from SPX Tools. The following steps outlined below must assume that we have already got rid of the engine, subframe and transaxle assembly,Begin by disconnecting the battery ground cable negative terminal, drain oil out of the car and remove oil filter. Remove spark plugs for easier engine rotation; drivebelt and tensioner; intake manifold; valve covers; water pump; power steering components without disconnecting lines; alternator; crankshaft pulley; Camshaft Position (CMP) sensors; camshaft position actuator valves; engine mount bracket; drivebelt idler pulley thermostat housing. Disconnect each corner bolt with a bolt close to the water pump to release cover from block at bottom end of engine cover and carefully separate from block tapping gently with soft mallet. Turn the crankshaft till primary timing chain sprocket mark aligns with oil pump housing mark at five o'clock position. Engage special tools onto camshafts remove rear cylinder head timing chain tensioner bolts and cautiously take off tensioner. Release special holding tools off cams (camshafts). Repeat this process for lower or primary timing chain on front cylinder head. Clean components replacing as necessary and reset tensioners. Installation with crankshaft sprocket aligned with woodruff key ensuring timing marks are aligned as well as special tools on the camshafts. Mount timing chains, guides and tensioners ensuring accurate positioning of all timing marks, remove camshaft retaining tools. Rotate crankshaft till sprocket mark align with oil pump housing mark at 9 o'clock position; use special locking tools to lock up the cams (camshafts) and proceed to install the rear cylinder head timing chain. Insert inner and outer guides, a new tensioner gasket as well as the tensioner itself. Repeat this process for front cylinder head primary timing chain. Clean timing chain cover carefully, apply RTV sealant then slide over crankshaft using aligning studs before tightening cover bolts. Reinstall everything in reverse but only check proper engine rotation before starting it.
    Posted by GMPartsGiant Specialist
    Q:
    How to remove and install the timing chain cover and timing chain in 5.7L,6.0L,6.2L V8 engine on Cadillac CTS? Posted by Customer
    A:
    Loosen the cable from the negative terminal of the battery Fuse, then, Front engine cover bolts and the cover, the rear cover bolts, and the rear cover. Drop the cooling system and the engine oil, and also to remove the drivebelt. Remove the air filter and air intake resonator from the engine compartment, then the upper and lower radiator hoses, cooling fans and water pump. For 6 0L and 6 2L engines remove the crankshaft balancer and the Camshaft Position (CMP) sensor. Following this, take out the oil pan, alternator and the bolts of the alternator bracket together with the bracket itself. The timing chain cover bolts were then removed and the timing chain cover was pulled off the block with a putty knife to break the old gasket seal, the aluminum cover can easily be scratched. Cause the oil pick-up tube and oil pump to be taken off and the gears, chain, and dampener of the R&P should be checked for signs of wear, cracks, or deep grooves and replace them if there is any sign of damage. Relax camshaft sprocket bolts, install crankshaft balancer bolt at the end of the crankshaft and turn until timing marks are matched and the number one piston is on TDC. The bolts should be withdrawn from the end of the camshaft; the camshaft sprocket and the chain come out as a unit; the state of the camshaft and crankshaft sprockets should be assessed. Should a replacement of the timing chain be required, gently take off the sprocket on the crankshaft with a two or three-jaw puller. Smooth the two surfaces of the cylinder head cover with gasket scraper to remove all the old gasket and sealant, then line the crankshaft sprocket with the woodruff key and fit into the crankshaft. Start the new chain over the camshaft sprocket, rotate the sprocket so that the timing mark is facing down, engagement the chain with the crankshaft sprocket and align the camshaft sprocket on the end of the camshaft. Dip the camshaft sprocket bolt threads with a thread locking compound and tighten the bolts and lubricant the chain with clean Engine Oil. Also fit the oil pump and the oil pick-up tube on the engine and loosely fit the timing chain cover along with a new gasket. If a front cover alignment tool is not available then fit the crankshaft balancer, measure the distance from the oil pan rail to the timing chain cover on both sides and align the cover in such away that both measurements are equal before and after tightening the cover bolts. Rotate front timing cover as required in order to be able to take equal measurements on both sides of the timing chain cover and then tighten the cover bolts. Rubberized the joint where the timing chain cover rubs against the cylinder block and fit the oil pan. Then pour some coolant and oil to the engine and start the engine and inspect of oil and coolant dripping on the ground.
    Posted by GMPartsGiant Specialist
    Q:
    How to remove and install the timing chain in V8 engine on Chevrolet Camaro? Posted by Customer
    A:
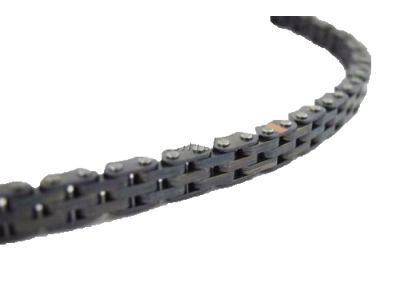
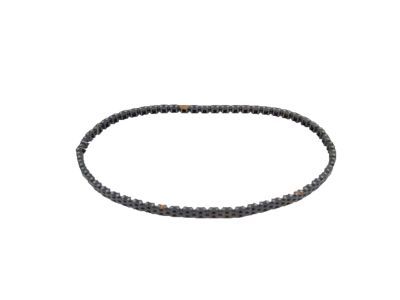
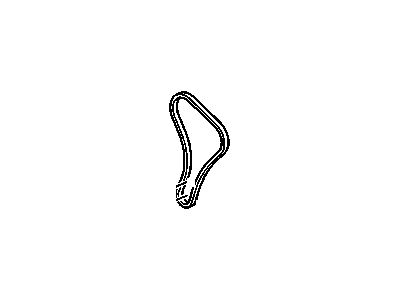
    Pull the connector off the negative terminal with the battery then undo all the front engine cover bolts and the front engine cover, next are the rear cover bolts and the rear cover. You have to remove the lower radiator and expansion tank bolt, the drive belt, the coolant, and oil sump drains. It is necessary to remove air filler housing and intake duct, upper and lower hoses of the radiator, fans and water pump. For L99 engine models, if has the front cover to be removed, then the CMP actuator magnet retaining bolts, magnet and gasket of the timing chain cover should also be removed. Take off the oil pan and the alternator together with the bracket and the mounting bolts. Remove the timing chain cover mounting bolts and remove the timing cover from the block using a pry bar if needed to break the gasket loose with out damage the aluminum timing cover. Pull out the oil pick-up tube and oil pump, and check the state of gears, or chain and the dampener. For L99 engines, the camshaft position actuator solenoid valve should be loosened and for LS3 as well as LSA the actuator bolt holding the sprocket and for LS3/LSA model the crankshaft should be turned until the timing marks face up and the number one piston gets TDC. Take off the camshaft position actuator solenoid valve and the camshaft/actuator sprocket, then immobilise the actuator and reluctor wheel with a plastic strap. For LS3 and LSA engines, if supplied as a single assembly, remove the bolts of the end of the camshaft and camshaft sprocket, chain. If replacing the tensioner install it on the engine. Check for the conditions of the camshaft and crankshaft sprockets meanwhile if you have to remove the crankshaft sprocket, you should do so gently. Timing chains are to be changed as a set with the camshaft and crankshaft sprockets. Applying some gasket scraping, the cover and the engine block can be cleaned, placing the crankshaft sprocket over the Woodruff key, and finally pressing the latter onto crankshaft. Compact the timing chain tensioner to the compression scale, while installed, and lock it into the compressed position before tightening the tensioner bolt. Incase of positioning, adjust the timing marks if required, engage the chain on the crankshaft sprocket and then place the camshaft actuator/sprocket on the camshaft. It is very important to ensure that the marks made on the timing chain guide are properly aligned with the chain when fitting it. On L99 engines, replace a camshaft position actuator solenoid valve and inspect its installation. Take out the timing chain tensioner retaining pin and tighten the solenoid valve as required. Coat the chain with clean engine oil, get the oil pump and the oil pick-up tube in place. Place a new timing chain cover gasket onto the block and loosely bolt the cover into place, being certain to align the dowels first. Lacking the front cover alignment tool, level a straightedge and measure the distance from the oil pan rail to the timing chain cover and space them evenly if required. Upon proper positioning of the cover, give the bolts torque, apply RTV sealant on the area where the timing chain cover and the cylinder block rubs and fit the oil pan. Perform the following procedures as a reverse of the removal procedures, add coolants and oil the engine and conduct leakage test whilst running the engine.
    Posted by GMPartsGiant Specialist
    Q:
    How to Remove and Replace the Cam Gear and Timing Chain in 3.0L and 3.6L V6 engine on Chevrolet Equinox? Posted by Customer
    A:
    While performing the timing system, care should be taken since an error can result to the severe damage of the engines; this procedure should be performed by an expert, and if a question arise, one should seek advice. Ensure that all the sprockets contain the timing marks and in that case ensure that the engine is turned to the correct positions for the removal of the timing chain(s). This operation needs three special tools to immobilise the camshafts and these tools should be procured in advance. Start with removing the negative terminal of the battery, draining the oil, and the oil filter and spark plugs to help with turning of the engine. Move on to the Discover more removal of drive belt, intake manifold, valve covers, water pump, power steering reservoir bracket, alternator, crankshaft pulley, CMP sensor bolts, electrical connectors for the camshaft position actuator valves, engine mount bracket, drive belt idler pulley, and thermostat housing. All the bolts to be pulled out of the timing chain cover; a bolt should be employed to lever on so as to remove the bolt holding the cover. Adjust the crankshaft to set the primary timing chain sprocket with the mark on the oil pump housing also make sure that flat segments on camshaft are set. That means the timing chain tensioner bolts and guides must be removed and once again you need to be careful because the tensioner is under spring tension. Do the same for the lower timing chain; check the conditions of each component for wear or damages, and then wash them. During installation stage make sure that on the crankshaft sprocket, the special retaining tool is fitted on the camshaft and that all the timing chains, guides and tensioners are well fitted with correct alignment marks. Once all these are lined and aligned well, the sealing surfaces should then be cleaned, a new seal fitted on the timing cover, some RTV sealant applied and then placing the cover well before tightening the bolts properly and in the sequence that is equally recommended. The rest of the installation is done in the reverse order that is used in the removal process.
    Posted by GMPartsGiant Specialist
    Q:
    What are the steps and precautions involved in performing a Timing Chain and Variable Timing Sprocket replacement procedure in four cylinder engine on Pontiac G6? Posted by Customer
    A:
    The time is challenging, and significant powertrain damage may result from mistakes, thus the procedure should be handled by experienced personnel; if not sure, professional advice is recommended. Start with the removal of the negative cabled from the battery, and then position the engine to, TDC compression as per cylinder number 1. Siphon out the engine oil and have the drivebelt and its tensioner pulled off, not forgetting removal of the timing chain cover and the valve cover. Take out the timing tensioner, upper timing chain, exhaust camshaft sprocket bolt, and the timing chain guide, adjustable timing guide, fixed timing guide bolts, intake gearbolt, and the chain itself. Visually check and clean all accessible parts and visually and physically check the chain tensioner, timing chain guides, the timing chain and the sprockets for signs of wear or damage replacing any suspect parts. You have to manually turn the crankshaft at least two times before engaging the starter to look for tightness-signs that seize has set in. Check that the number 1 piston is at Top Dead Centre (T.D.C.), engage the camshaft notches and bolt the intake camshaft sprocket in place using a new bolt. Place the timing chain in position with the camshaft sprocket mark aligning to the unique colored link next to the crankshaft sprocket and cover the crankshaft sprocket with the timing chain. Bolt the adjustable timing chain guide; exhaust camshaft sprocket; fixed timing chain guide; and the upper timing chain guide; then tighten all bolts to the prescribed torque. Closely turn clockwise the intake and exhaust camshaft bolts while using the wrench to hold the camshafts. Apply on the installation position of the timing chain tensioner in compressed position with a dimensional of 2.83 inch length. Bolt the timing chain oiling nozzle securely in place, wet the access plug with RTV sealant and, once again, rotate the crankshaft to feel the drag. Last but not the least, fit the valve cover and the timing chain cover and then connect the battery again, put oil in the crankcase, replace the oil filter and then start the engine and check for oil leaks.
    Posted by GMPartsGiant Specialist
    Q:
    How to remove and install a Timing Chain and Variable Timing Sprocket in 3.6L V6 engine on GMC Acadia? Posted by Customer
    A:
    Caution! This is a complex process with an possibility of causing serious engine damage if not done correctly. Without significant experience in this kind of repair, do not try to replace the timing chain; unless you are sure about it, consult a specialist. Before attempting to start the engine, ensure accuracy through double-checking all work. Make sure that all sprockets have timing marks before removing the timing chain(s) from their sprockets. These tools required for this procedure (EN 48383-1, 48383-2, and EN 48383-3) can be obtained from SPX Tools. The following steps outlined below must assume that we have already got rid of the engine, subframe and transaxle assembly,Begin by disconnecting the battery ground cable negative terminal, drain oil out of the car and remove oil filter. Remove spark plugs for easier engine rotation; drivebelt and tensioner; intake manifold; valve covers; water pump; power steering components without disconnecting lines; alternator; crankshaft pulley; Camshaft Position (CMP) sensors; camshaft position actuator valves; engine mount bracket; drivebelt idler pulley thermostat housing. Disconnect each corner bolt with a bolt close to the water pump to release cover from block at bottom end of engine cover and carefully separate from block tapping gently with soft mallet. Turn the crankshaft till primary timing chain sprocket mark aligns with oil pump housing mark at five o'clock position. Engage special tools onto camshafts remove rear cylinder head timing chain tensioner bolts and cautiously take off tensioner. Release special holding tools off cams (camshafts). Repeat this process for lower or primary timing chain on front cylinder head. Clean components replacing as necessary and reset tensioners. Installation with crankshaft sprocket aligned with woodruff key ensuring timing marks are aligned as well as special tools on the camshafts. Mount timing chains, guides and tensioners ensuring accurate positioning of all timing marks, remove camshaft retaining tools. Rotate crankshaft till sprocket mark align with oil pump housing mark at 9 o'clock position; use special locking tools to lock up the cams (camshafts) and proceed to install the rear cylinder head timing chain. Insert inner and outer guides, a new tensioner gasket as well as the tensioner itself. Repeat this process for front cylinder head primary timing chain. Clean timing chain cover carefully, apply RTV sealant then slide over crankshaft using aligning studs before tightening cover bolts. Reinstall everything in reverse but only check proper engine rotation before starting it.
    Posted by GMPartsGiant Specialist
    Q:
    What is the procedure for installation after repairs for the 2012 Cadillac CTS? Posted by Customer
    A:
    During installation, align the crankshaft sprocket with the woodruff key, ensuring timing marks are visible and aligned. Then install the timing chains and guides, tightening bolts to the specified torque.
    Posted by GMPartsGiant Specialist
    See expert answers on similar Timing Chain
    Q:
    What are the next steps after installing the timing chain for the 2015 GMC Terrain? Posted by Customer
    A:
    After installing the timing chain, install the adjustable and fixed timing chain guides, followed by the upper timing chain guide. Tighten the camshaft bolts while holding the camshafts to prevent turning, then install the timing chain tensioner in its compressed state, ensuring it is properly assembled.
    Posted by GMPartsGiant Specialist
    See expert answers on similar Timing Chain
    Q:
    How should you proceed with installing the timing chains, guides, and tensioners for the 2012 Chevrolet Traverse? Posted by Customer
    A:
    Install timing chains, guides, and tensioners, making sure all timing marks are correct, and remove camshaft retaining tools.
    Posted by GMPartsGiant Specialist
    See expert answers on similar Timing Chain
    If you have any questions about this product, please don't hesitate to ask us. We will be happy to help you!

Genuine GM Part 12637743, the Right Choice

To ensure reliability, purchase GM part # 12637743 Chain Assembly, Cm/Shf Inter Drv. It is sometimes referred to as GM Timing Chain. Directly from GM, genuine parts are superb with regards to quality, longevity, and fit. Every single part passed stringent quality testing, so you can be sure that it's safe, durable, and built to perform like your original parts. This part fits specific Cadillac ATS, CTS, SRX models. It fits Chevrolet Camaro, Equinox, Impala. It also fits GMC Acadia, Canyon, Terrain. This also fits Saturn Aura, Outlook, Vue.

GMPartsGiant.com is a leading supplier of genuine GM parts and accessories such as GM 12637743 Chain Assembly, Cm/Shf Inter Drv. You're certainly in the right place if you're searching for the great cost-effective OEM GM parts. Look no further than our vast inventory of genuine GM parts offered at unbeatable online prices, all of which are backed by the manufacturer's warranty. Not to forget, our hassle-free return policy and quick delivery service ensure a smooth shopping experience for you. For detailed GMC parts information, click here.

Why choose GM Parts Giant

  • Dedicated Service

    Your complete satisfaction is our #1 goal

  • Lowest Prices

    Best deals on genuine OE parts from dealerships

  • Fast Delivery

    Orders are processed and delivered promptly