Make sure this part fits

GM 90537283 Engine Crankshaft FLYWHEEL

2000-2011 GM

Customer Questions & Expert Answers (8)
GM 90537283 Engine Crankshaft FLYWHEEL
  • Part Description
    Flywheel Asm ; Flywheel, Engine Crankshaft
  • Manufacturer
    General Motors
Make sure this part fits
$113.34 MSRP: $179.16
You Save: $65.82 (37%)
Ships in 1-3 Business Days
1
ADD TO CART
  • Related Parts
  • Product Specifications
  • Vehicle Fitment
  • Customer Questions & Expert Answers
  • Product Specifications

    BrandGenuine GM
    Manufacturer Part Number90537283
    Part DescriptionFlywheel Asm ; Flywheel, Engine Crankshaft
    Other NamesFlywheel
    Item Dimensions13.3 x 12.9 x 3.8 inches
    Item Weight22.40 Pounds
    ConditionNew
    Fitment TypeDirect Replacement
    ManufacturerGeneral Motors
    SKU90537283
    WarrantyThis genuine GM part is guaranteed by GM's factory warranty.
    Shipping & ReturnShipping Policy Return Policy
    Warning: California's Proposition 65
  • Vehicle Fitment

    Year Make Model Engine Important vehicle option details
    2002-2005 Chevrolet Cavalier4 Cyl 2.2L2 DOOR, 4 DOOR
    2005-2010 Chevrolet Cobalt4 Cyl 2.2L, 4 Cyl 2.4L2 DOOR, 4 DOOR, LEVEL 4 PERFORMANCE (SS) 2 DOOR, LEVEL 4 PERFORMANCE/SC (SS) 2 DOOR, LEVEL 4 PERFORMANCE/SC (SS) 4 DOOR, LEVEL ONE (LS) 2 DOOR, LEVEL ONE (LS) 4 DOOR, LEVEL THREE (SS) 2 DOOR, LEVEL THREE (SS) 4 DOOR, LEVEL TWO (LT) 2 DOOR, LEVEL TWO (LT) 4 DOOR
    2006-2011 Chevrolet HHR4 Cyl 2.2L, 4 Cyl 2.2L Flex, 4 Cyl 2.4L5 DOOR HIGH ROOF HATCHBACK, 5 DOOR HIGH ROOF HATCHBACK SS, 5 DOOR HIGH ROOF PANEL, 5 DOOR HIGH ROOF PANEL SS, 5 DOOR UPLEVEL HIGH ROOF HATCHBACK, 5 DOOR UPLEVEL HIGH ROOF PANEL
    2002-2004 Oldsmobile Alero4 Cyl 2.2LGLS 2 DOOR, GLS SEDAN 4 DOOR, LEVEL I 2 DOOR, LEVEL I 4 DOOR, LEVEL II COUPE 2 DOOR, LEVEL II SEDAN 4 DOOR
    2007-2010 Pontiac G54 Cyl 2.2L, 4 Cyl 2.4L2 DOOR, 4 DOOR, GT 2 DOOR, GT 4 DOOR, LS 2 DOOR, LS 4 DOOR, SE 2 DOOR, SE 4 DOOR, SPORT 2 DOOR, SPORT 4 DOOR
    2002-2004 Pontiac Grand Am4 Cyl 2.2LGT 2 DOOR, GT 4 DOOR, GT1 2 DOOR, GT1 4 DOOR, SE 2 DOOR, SE 4 DOOR, SE1 2 DOOR, SE1 4 DOOR
    2005-2006 Pontiac Pursuit4 Cyl 2.2L, 4 Cyl 2.4L2 DOOR, 4 DOOR, LEVEL 4 PERFORMANCE (SS) 2 DOOR, LEVEL 4 PERFORMANCE/SC (SS) 2 DOOR, LEVEL ONE (LS) 2 DOOR, LEVEL ONE (LS) 4 DOOR, LEVEL THREE (SS) 2 DOOR, LEVEL THREE (SS) 4 DOOR, LEVEL TWO (LT) 2 DOOR, LEVEL TWO (LT) 4 DOOR
    2006-2010 Pontiac Solstice4 Cyl 2.4L2 DOOR CONVERTIBLE, 2 DOOR COUPE(TARGA), TURBO 2 DOOR CONVERTIBLE
    2002-2005 Pontiac Sunfire4 Cyl 2.2L2 DOOR, 4 DOOR, GT 2 DOOR
    2003-2007 Saturn Ion4 Cyl 2.0L, 4 Cyl 2.2L, 4 Cyl 2.4L2 DOOR, 4 DOOR, REDLINE 2 DOOR
    View More
  • Customer Questions & Expert Answers

    Q:
    I am wonder if this is complete and correct part for my vehicle. Posted by GMPartsGiant Specialist
    A:
    You can Select Your Vehicle to check if 90537283 fits your vehicle.
    Posted by GMPartsGiant Specialist
    Q:
    How to remove and reinstall a flywheel/driveplate on Chevrolet HHR? Posted by Customer
    A:
    Raise the vehicle and support it securely on jackstands, then remove the transaxle. If it's leaking, now would be a very good time to replace the front pump seal/O-ring (automatic transaxle only). If you're working on a manual transaxle equipped vehicle, remove the pressure plate and clutch disc. Now is a good time to check/replace the clutch components. Use a center punch or paint to make alignment marks on the flywheel/driveplate and crankshaft to ensure correct alignment during installation. Remove the bolts that secure the flywheel/driveplate to the crankshaft. If the crankshaft turns, wedge a screwdriver in the ring gear teeth to jam the flywheel. Remove the flywheel/driveplate from the crankshaft. Since the flywheel is fairly heavy, be sure to support it while removing the last bolt. If an automatic transaxle-equipped vehicle has a spacer between the crankshaft and the driveplate, note which way it was installed. Clean the flywheel to remove grease and oil. Inspect the surface for cracks, rivet grooves, burned areas and score marks. Light scoring can be removed with emery cloth. Check for cracked and broken ring gear teeth. Lay the flywheel on a flat surface and use a straightedge to check for warpage. Clean and inspect the mating surfaces of the flywheel/driveplate and the crankshaft. If the crankshaft rear seal is leaking, replace it before reinstalling the flywheel/driveplate. Position the flywheel/driveplate against the crankshaft, installing the spacer if one was present originally. Be sure to align the mating marks made during removal. Note that some engines have an alignment dowel or staggered bolt holes to ensure correct installation. Before installing the bolls, apply thread locking compound to the threads. Wedge a screwdriver in the ring gear teeth to keep the flywheel/driveplate from turning and tighten the bolts to the torque. Work up to the final torque. The remainder of installation is the reverse of the removal procedure.
    Posted by GMPartsGiant Specialist
    Q:
    How to remove and reinstall a flywheel/driveplate on Saturn ION? Posted by Customer
    A:
    Raise the vehicle and support it securely on jackstands, then remove the transaxle. If it's leaking, now would be a very good time to replace the front pump seal/O-ring (automatic transaxle only). If you're working on a manual transaxle equipped vehicle, remove the pressure plate and clutch disc. Now is a good time to check/replace the clutch components. Use a center punch or paint to make alignment marks on the flywheel/driveplate and crankshaft to ensure correct alignment during installation. Remove the bolts that secure the flywheel/driveplate to the crankshaft. If the crankshaft turns, wedge a screwdriver in the ring gear teeth to jam the flywheel. Remove the flywheel/driveplate from the crankshaft. Since the flywheel is fairly heavy, be sure to support it while removing the last bolt. If an automatic transaxle-equipped vehicle has a spacer between the crankshaft and the driveplate, note which way it was installed. Clean the flywheel to remove grease and oil. Inspect the surface for cracks, rivet grooves, burned areas and score marks. Light scoring can be removed with emery cloth. Check for cracked and broken ring gear teeth. Lay the flywheel on a flat surface and use a straightedge to check for warpage. Clean and inspect the mating surfaces of the flywheel/driveplate and the crankshaft. If the crankshaft rear seal is leaking, replace it before reinstalling the flywheel/driveplate. Position the flywheel/driveplate against the crankshaft, installing the spacer if one was present originally. Be sure to align the mating marks made during removal. Note that some engines have an alignment dowel or staggered bolt holes to ensure correct installation. Before installing the bolls, apply thread locking compound to the threads. Wedge a screwdriver in the ring gear teeth to keep the flywheel/driveplate from turning and tighten the bolts to the torque. Work up to the final torque. The remainder of installation is the reverse of the removal procedure.
    Posted by GMPartsGiant Specialist
    Q:
    How to remove and reinstall the flywheel in 3.5L V6 engine on Saturn Vue? Posted by Customer
    A:
    Remove the transaxle, then take out the bolts securing the driveplate to the crankshaft. Clean the driveplate and inspect its surface for cracks, as well as check for worn, cracked, or broken ring-gear teeth. Lay the driveplate on a flat surface and use a straightedge to check for warpage. Clean and inspect the mating surfaces of the driveplate and crankshaft, and if the crankshaft oil seal is leaking, replace it before reinstalling the driveplate. Position the driveplate against the crankshaft and install the washer plate. Tighten the bolts in a criss-cross pattern in several stages to the specified torque. The remainder of the installation follows the reverse of the removal procedure.
    Posted by GMPartsGiant Specialist
    Q:
    How to remove and replace the flywheel/driveplate in four cylinder engine on Saturn LS1? Posted by Customer
    A:
    Raise the vehicle and support it securely on jackstands, then remove the transaxle. If it's leaking, now would be a very good time to replace the front pump seal/0-ring (automatic transaxle only). If you're working on a manual transaxle equipped vehicles, remove the pressure plate and clutch disc. Now is a good time to check/replace the clutch components. Use a center punch or paint to make alignment marks on the fly-wheel/driveplate and crankshaft to ensure correct alignment during reinstallation. Remove the bolts that secure the flywheel/driveplate to the crankshaft. If the crankshaft turns, wedge a screwdriver in the ring gear teeth to jam the flywheel. Remove the flywheel/driveplate from the crankshaft. Since the flywheel is fairly heavy, be sure to support it while removing the last bolt. Automatic transmission equipped vehicles have a spacer between the crankshaft and the driveplate. Clean the flywheel to remove grease and oil. Inspect the surface for cracks, rivet grooves, burned areas and score marks. Light scoring can be removed with emery cloth. Check for cracked and broken ring gear teeth. Lay the flywheel on a flat surface and use a straightedge to check for warpage. Clean and inspect the mating surfaces of the flywheel/driveplate and the crankshaft. If the crankshaft rear seal is leaking, replace it before reinstalling the flywheel/driveplate. Position the flywheel/driveplate against the crankshaft. Be sure to align the marks made during removal. Note that some engines have an alignment dowel or staggered bolt holes to ensure correct installation. Before installing the bolts, apply thread locking compound to the threads. Wedge a screwdriver in the ring gear teeth to keep the flywheel/driveplate from turning and tighten the bolts to the specific torque. Work up to the final torque in three or four steps. The remainder of installation is the reverse of the removal procedure.
    Posted by GMPartsGiant Specialist
    Q:
    How to remove and replace the flywheel/driveplate in four cylinder engine on Saturn LS? Posted by Customer
    A:
    Raise the vehicle and support it securely on jackstands, then remove the transaxle. If it's leaking, now would be a very good time to replace the front pump seal/0-ring (automatic transaxle only). If you're working on a manual transaxle equipped vehicles, remove the pressure plate and clutch disc. Now is a good time to check/replace the clutch components. Use a center punch or paint to make alignment marks on the fly-wheel/driveplate and crankshaft to ensure correct alignment during reinstallation. Remove the bolts that secure the flywheel/driveplate to the crankshaft. If the crankshaft turns, wedge a screwdriver in the ring gear teeth to jam the flywheel. Remove the flywheel/driveplate from the crankshaft. Since the flywheel is fairly heavy, be sure to support it while removing the last bolt. Automatic transmission equipped vehicles have a spacer between the crankshaft and the driveplate. Clean the flywheel to remove grease and oil. Inspect the surface for cracks, rivet grooves, burned areas and score marks. Light scoring can be removed with emery cloth. Check for cracked and broken ring gear teeth. Lay the flywheel on a flat surface and use a straightedge to check for warpage. Clean and inspect the mating surfaces of the flywheel/driveplate and the crankshaft. If the crankshaft rear seal is leaking, replace it before reinstalling the flywheel/driveplate. Position the flywheel/driveplate against the crankshaft. Be sure to align the marks made during removal. Note that some engines have an alignment dowel or staggered bolt holes to ensure correct installation. Before installing the bolts, apply thread locking compound to the threads. Wedge a screwdriver in the ring gear teeth to keep the flywheel/driveplate from turning and tighten the bolts to the specific torque. Work up to the final torque in three or four steps. The remainder of installation is the reverse of the removal procedure.
    Posted by GMPartsGiant Specialist
    Q:
    How to remove and reinstall a Flywheel in four cylinder engine on Saturn Vue? Posted by Customer
    A:
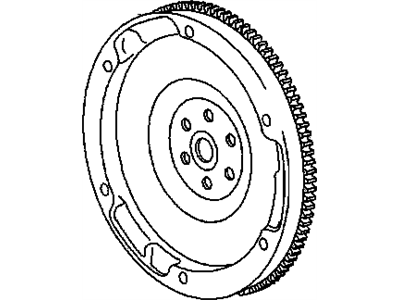
    In case of removal of transaxle the vehicle should first be lifted and supported on jackstands and then the removal should be done as given below. If there is any leak, it may be useful to replace the front pump seal or O-ring of automatic transaxles at this time. For the manual transaxle vehicles, remove the pressure plate together with the clutch disc; it is advisable to inspect or replace the clutch parts. Place visible alignment spots on the flywheel or driveplate and the crankshaft to ease alignment during the reassembly process and this could be done by marking with a center punch or painting. Then, take out the bolts of the flywheel or driveplate to the crankshaft; if the crankshaft continues to turn, wedge it with a flat screwdriver into the flywheel between the teeth of the ring gear. Remove the old bolts and then use new ones during the process of installing them. While doing this, one must be very slow especially when mortising the last bolt as you support the flywheel or drive plate, also if there is a spacer, one should note the direction of the spacer to be fitted. In order to examine the flywheel for crack, Rivet groves, burnt area and score marks, the flywheel should be cleaned to remove grease and oil, light score marked can be smoothed by use of emery cloth. Ensure that the ring gear teeth are not cracked or broken and the flywheel is flat that can be done by placing a straight edge on it. Check and, if necessary clean the mating faces of flywheel or drive plate and crankshaft, also, replacing the crankshaft rear seal , if it was found to be leaking. Align the crankshaft and flywheel or driveplate to meet the marks taken before removing the unit, and put back any spacer that may have been removed. It may be possible to assist the alignment of some engine types through the use of alignment dowels or staggered bolt holes. To those threads that do not already have a layer of thread locking compound, apply some now before wedging a screwdriver into the ring gear teeth of the sprocket with just enough pressure to prevent the bolts following tightening from moving back out again, and tighten the bolts to the specified torque value, increasing gradually over about three or four turns. The rest of the installation steps will take place in the reverse order to that of the removal steps listed above.
    Posted by GMPartsGiant Specialist
    Q:
    What should be done to the flywheel before reinstalling it for the 2006 Chevrolet Cobalt? Posted by Customer
    A:
    Clean it to remove grease and oil.
    Posted by GMPartsGiant Specialist
    See expert answers on similar Flywheel
    If you have any questions about this product, please don't hesitate to ask us. We will be happy to help you!

Genuine GM Part 90537283, the Right Choice

To ensure reliability, purchase GM part # 90537283 Engine Crankshaft FLYWHEEL. It is sometimes referred to as GM Flywheel. Directly from GM, genuine parts are superb with regards to quality, longevity, and fit. Every single part passed stringent quality testing, so you can be sure that it's safe, durable, and built to perform like your original parts. This part fits specific Chevrolet Cavalier, Cobalt, HHR models. It fits Oldsmobile Alero. It also fits Pontiac G5, Grand Am, Pursuit. This also fits Saturn L300, LW200, LW300.

GMPartsGiant.com is a leading supplier of genuine GM parts and accessories such as GM 90537283 Engine Crankshaft FLYWHEEL. You're certainly in the right place if you're searching for the great cost-effective OEM GM parts. Look no further than our vast inventory of genuine GM parts offered at unbeatable online prices, all of which are backed by the manufacturer's warranty. Not to forget, our hassle-free return policy and quick delivery service ensure a smooth shopping experience for you. For detailed Chevrolet parts information, click here.

Why choose GM Parts Giant

  • Dedicated Service

    Your complete satisfaction is our #1 goal

  • Lowest Prices

    Best deals on genuine OE parts from dealerships

  • Fast Delivery

    Orders are processed and delivered promptly