Make sure this part fits

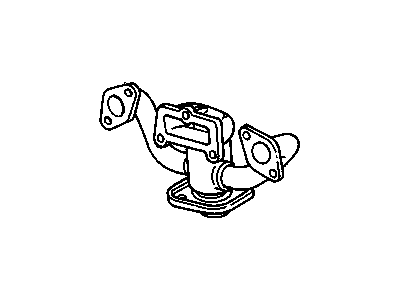
GM 10066673 Exhaust Manifold Assembly

1987-1992 GM

Customer Questions & Expert Answers (3)
GM 10066673 Exhaust Manifold Assembly
  • Part Description
    Manifold Assembly, Exhaust
  • Manufacturer
    General Motors
  • Manufacturer's Notes
    This part is discontinued.
Make sure this part fits
  • Related Parts
  • Product Specifications
  • Vehicle Fitment
  • Customer Questions & Expert Answers
  • Product Specifications

    BrandGenuine GM
    Manufacturer Part Number10066673
    Part DescriptionManifold Assembly, Exhaust
    Other NamesExhaust Manifold, Manifold
    Item Dimensions13.8 x 8.4 x 4.5 inches
    Item Weight4.10 Pounds
    ConditionNew
    Fitment TypeDirect Replacement
    ManufacturerGeneral Motors
    SKU10066673
    WarrantyThis genuine GM part is guaranteed by GM's factory warranty.
    Shipping & ReturnShipping Policy Return Policy
    Warning: California's Proposition 65
  • Vehicle Fitment

    Year Make Model Engine Important vehicle option details
    1990-1992 Chevrolet Lumina4 Cyl 2.5L2 DOOR, 4 DOOR
    1987-1988 Pontiac Fiero4 Cyl 2.5L2 DOOR, GT 2 DOOR, SE 2 DOOR, SPORT 2 DOOR
  • Customer Questions & Expert Answers

    Q:
    I am wonder if this is complete and correct part for my vehicle. Posted by GMPartsGiant Specialist
    A:
    You can Select Your Vehicle to check if 10066673 fits your vehicle.
    Posted by GMPartsGiant Specialist
    Q:
    How to work on the front and rear exhaust manifold, including the steps for disconnecting components and reassembling them in V6 engine on Pontiac Fiero? Posted by Customer
    A:
    To start with, demate the clamp on any of the negative terminal of the battery, then, and as well remove the rear compartment lid and demate the brake vacuum hose. Subsequent to that, you should lose the bolts to pull off the exhaust manifold and heat shield and the crossover bolts. Put the car on jackstands then unbolt the front converter heat shield and the heat shield. Lower the vehicle and remove the lower manifold bolts then the upper manifold bolts to from the exhaust manifold. Wash the surfaces to be mated between the exhaust manifold and cylinder head well, align the exhaust manifold and gasket to the top bolts and again lift the vehicle. Forgo the remainder of the exhaust work, but use the hoist to lift the vehicle and install the lower manifold bolts to the torque specifications, the torque converter heat shield, and then torque all the bolts securely before lowering the vehicle. Tighter the upper manifold bolts and install the crossover bolts and tighten it to the torque value of the particular. The manifold heat shield should then be installed with the bolts being tightened and the brake vacuum hose connected, the rear compartment lid should then be replaced and the negative battery cable reconnected while checking for exhaust and vacuum leaks. For the rear manifold remove the manifold to crossover bolts and un-clamp the exhaust manifold from the crossover while cleaning the surfaces that will come in contact with each other before placing the exhaust manifold and the gasket in such a way that the bolts of the manifold are tight and then tighten all the bolts to the required torque. Torque the manifold to crossover bolts and ensure that there is no exhaust or vacuum leak. What we know is that for the crossover pipe, one needs to take out the rear compartment left side panel and the intake flex duct and the EGR hose and the shift cable at the transaxle. Take off the EGR tube and front/rear crossover shields, disconnect the oxygen sensor connector. Take out bolts at the front and rear exhaust manifold, lift the car and take out the bolts at the catalytic converter and then lower the car and take out the crossover pipe. Unbolt the oxygen sensor and the EGR valve by using the clip at the pipe; thereafter positioned the oxygen sensor, EGR valve and the adapter at the crossover pipe. The crossover pipe should be fitted and the front and rear crossover-to-manifold bolts should be tightened to the specified torque; the vehicle needs lifting to fit the catalytic converter bolts properly; then the vehicle should be lowered again and the oxygen sensor connector mated; finally the front and rear crossover shields should be fitted. And at last connect the EGR tube and shift cables, connect the hoses again and fit the intake flex hose and finally connect the rear compartment left side panel.
    Posted by GMPartsGiant Specialist
    Q:
    How to remove and reinstall the exhaust manifold and related components in four cylinder engine on Pontiac Fiero? Posted by Customer
    A:
    Remove the air cleaner assembly and the preheat ducting between the exhaust manifold and the air cleaner. Take out the EFI throttle cable bracket bolt, the dipstick tube bracket bolt, and the ground strap bolt. Raise the vehicle and support it securely on jackstands, then remove the catalytic converter splash shield. Disconnect the exhaust pipe-to-exhaust manifold flange bolts, applying penetrating oil if they are corroded. If necessary, support the exhaust system with a piece of wire; if all mounting springs are intact, additional support may not be needed. Disconnect the oxygen sensor connector wire from its retaining clip and the electrical connector from the wire harness, noting that removal of the sensor from the manifold is only necessary if replacing the manifold. Label and disconnect the four spark plug wires, setting them aside. Loosen and remove the exhaust manifold retaining bolts and washers, starting with the end ones and then the middle ones, using penetrating oil if needed. Remove the exhaust manifold and gasket from the engine, ensuring the oil dipstick tube is pushed back into the block before reinstalling the manifold. Clean the gasket mating surfaces on the cylinder head and the exhaust manifold with a wire brush to remove all leftover gasket material and carbon deposits. Place a new exhaust manifold gasket on the cylinder head, position the manifold, and install the mounting bolts finger tight. The exhaust bolts are numbered from 1 to 7; tighten them gradually in the sequence 3-5-6-2-1-7-4 to the specified torque. Reattach the four spark plug wires and reconnect the oxygen sensor lead wire to the wire harness. Install a new exhaust manifold flange gasket between the exhaust manifold and the exhaust pipe, then tighten the exhaust manifold-to-exhaust pipe flange bolts. Reinstall the catalytic converter splash shield and tighten it securely, followed by the EFI throttle cable bracket. Finally, install the preheat ducting between the exhaust manifold and the air cleaner, then reinstall the air cleaner assembly. Start the engine and check for exhaust leaks between the exhaust manifold and cylinder head as well as between the exhaust manifold and the exhaust pipe.
    Posted by GMPartsGiant Specialist
    If you have any questions about this product, please don't hesitate to ask us. We will be happy to help you!

Genuine GM Part 10066673, the Right Choice

To ensure reliability, purchase GM part # 10066673 Exhaust Manifold Assembly. It is sometimes referred to as GM Exhaust Manifold. Directly from GM, genuine parts are superb with regards to quality, longevity, and fit. Every single part passed stringent quality testing, so you can be sure that it's safe, durable, and built to perform like your original parts. This part fits specific Chevrolet Lumina models. It fits Pontiac Fiero.

GMPartsGiant.com is a leading supplier of genuine GM parts and accessories such as GM 10066673 Exhaust Manifold Assembly. You're certainly in the right place if you're searching for the great cost-effective OEM GM parts. Look no further than our vast inventory of genuine GM parts offered at unbeatable online prices, all of which are backed by the manufacturer's warranty. Not to forget, our hassle-free return policy and quick delivery service ensure a smooth shopping experience for you. For detailed Chevrolet parts information, click here.

Why choose GM Parts Giant

  • Dedicated Service

    Your complete satisfaction is our #1 goal

  • Lowest Prices

    Best deals on genuine OE parts from dealerships

  • Fast Delivery

    Orders are processed and delivered promptly