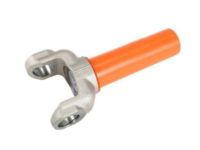
Make sure this part fits

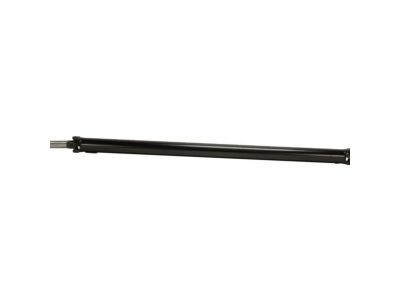
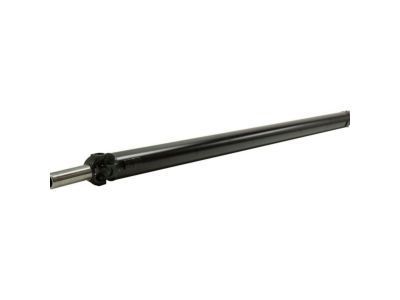
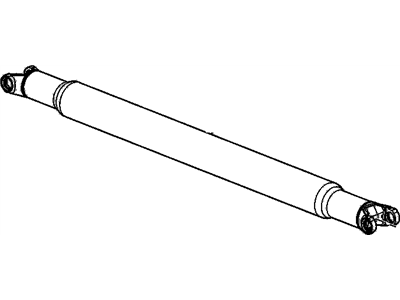
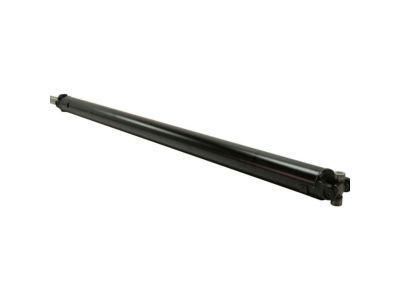
GM 20912697 Propeller Shaft Assembly

2007-2013 GM

Customer Questions & Expert Answers (9)
GM 20912697 Propeller Shaft Assembly
  • Part Description
    Shaft Assembly, Propeller
  • Replaces
    15794277
  • Manufacturer
    General Motors
Make sure this part fits
$1070.59 MSRP: $1442.85
You Save: $372.26 (26%)
Ships in 1-2 Business Days
1
ADD TO CART
  • Related Parts
  • Product Specifications
  • Vehicle Fitment
  • Customer Questions & Expert Answers
  • Product Specifications

    BrandGenuine GM
    Manufacturer Part Number20912697
    Part DescriptionShaft Assembly, Propeller
    Other NamesDrive Shaft
    Item Dimensions80.4 x 4.3 x 4.3 inches
    Item Weight17.10 Pounds
    ConditionNew
    Fitment TypeDirect Replacement
    Replaces15794277
    ManufacturerGeneral Motors
    SKU20912697
    WarrantyThis genuine GM part is guaranteed by GM's factory warranty.
    Shipping & ReturnShipping Policy Return Policy
    Warning: California's Proposition 65
  • Vehicle Fitment

    Year Make Model Engine Important vehicle option details
    2011 Chevrolet Avalanche8 Cyl 5.3L Flex1/2 TON
    2007-2013 Chevrolet Silverado6 Cyl 4.3L, 8 Cyl 4.8L, 8 Cyl 4.8L Flex, 8 Cyl 5.3L, 8 Cyl 5.3L Flex, 8 Cyl 6.0L, 8 Cyl 6.0L Flex, 8 Cyl 6.2L FlexCREW CAB 1/2 TON, EXTENDED CAB 6'6" BOX 1/2 TON, REGULAR CAB 6'6" BOX 1/2 TON, REGULAR CAB 8' BOX 1/2 TON
    2011 Chevrolet Suburban8 Cyl 5.3L Flex1/2 TON
    2007-2013 GMC Sierra6 Cyl 4.3L, 8 Cyl 4.8L, 8 Cyl 4.8L Flex, 8 Cyl 5.3L, 8 Cyl 5.3L Flex, 8 Cyl 6.0L, 8 Cyl 6.0L Flex, 8 Cyl 6.2L, 8 Cyl 6.2L FlexCREW CAB 1/2 TON, EXTENDED CAB 6'6" BOX 1/2 TON, REGULAR CAB 6'6" BOX 1/2 TON, REGULAR CAB 8' BOX 1/2 TON
    2011 GMC Yukon8 Cyl 5.3L FlexYUKON XL/DENALI XL/ESCALADE ESV
  • Customer Questions & Expert Answers

    Q:
    I would like to confirm if this is the correct part number for my vehicle. Please advise. Thank you. Posted by GMPartsGiant Specialist
    A:
    You can Select Your Vehicle to check if 20912697 fits your vehicle.
    Posted by GMPartsGiant Specialist
    Q:
    How to remove and install the drive shaft on Chevrolet Avalanche? Posted by Customer
    A:
    Raising the vehicle and supporting it on jackstands, with the front wheels blocked, would remove the rear driveshaft. In order to reinstall in the same position reference marks should be made on the driveshaft and pinion flange and ensure that the transmission is in Neutral with the parking brake off. The drive shaft should be lowered by removing its back u-joint bolts and retainers then slid out of transfer case or transmission. When installing, slide front end into transmission or transfer case then raise rear into position with marks aligned. Afterward, all bolts must be tightened to their proper torque specifications and clamps used to secure bearing caps. For 4WD models' front drive shaft, raise vehicle using jack stands after removal of differential carrier splash shield if any. The boot at the transfer case output shaft should be disengaged and relationship between driveshaft and companion flange marked for future reference. Thereafter disconnect bolts as well as clamps from differential flange while pushing driveshaft toward rear so that it can be separated from this flange before lowering it down to pull out of transfer case. To install, insert a sliding shaft that has splines at its rear through transfer case's output ends while aligning marks attached to them with those found on companion flange's front end. Install clamps together with bolts tightly according to specified torque values whereas push up boot over groove of transfer case output shaft where new clip will have been crimped into place subsequently using clamp-crimping pliers for reinforcement purposes. Lastly, splash shield of front differential carrier should be installed back there again.
    Posted by GMPartsGiant Specialist
    Q:
    How to remove and install the drive shaft on GMC Sierra? Posted by Customer
    A:
    Raising the vehicle and supporting it on jackstands, with the front wheels blocked, would remove the rear driveshaft. In order to reinstall in the same position reference marks should be made on the driveshaft and pinion flange and ensure that the transmission is in Neutral with the parking brake off. The drive shaft should be lowered by removing its back u-joint bolts and retainers then slid out of transfer case or transmission. When installing, slide front end into transmission or transfer case then raise rear into position with marks aligned. Afterward, all bolts must be tightened to their proper torque specifications and clamps used to secure bearing caps. For 4WD models' front drive shaft, raise vehicle using jack stands after removal of differential carrier splash shield if any. The boot at the transfer case output shaft should be disengaged and relationship between driveshaft and companion flange marked for future reference. Thereafter disconnect bolts as well as clamps from differential flange while pushing driveshaft toward rear so that it can be separated from this flange before lowering it down to pull out of transfer case. To install, insert a sliding shaft that has splines at its rear through transfer case's output ends while aligning marks attached to them with those found on companion flange's front end. Install clamps together with bolts tightly according to specified torque values whereas push up boot over groove of transfer case output shaft where new clip will have been crimped into place subsequently using clamp-crimping pliers for reinforcement purposes. Lastly, splash shield of front differential carrier should be installed back there again.
    Posted by GMPartsGiant Specialist
    Q:
    How to remove and install the drive shaft on Chevrolet Silverado? Posted by Customer
    A:
    Raising the vehicle and supporting it on jackstands, with the front wheels blocked, would remove the rear driveshaft. In order to reinstall in the same position reference marks should be made on the driveshaft and pinion flange and ensure that the transmission is in Neutral with the parking brake off. The drive shaft should be lowered by removing its back u-joint bolts and retainers then slid out of transfer case or transmission. When installing, slide front end into transmission or transfer case then raise rear into position with marks aligned. Afterward, all bolts must be tightened to their proper torque specifications and clamps used to secure bearing caps. For 4WD models' front drive shaft, raise vehicle using jack stands after removal of differential carrier splash shield if any. The boot at the transfer case output shaft should be disengaged and relationship between driveshaft and companion flange marked for future reference. Thereafter disconnect bolts as well as clamps from differential flange while pushing driveshaft toward rear so that it can be separated from this flange before lowering it down to pull out of transfer case. To install, insert a sliding shaft that has splines at its rear through transfer case's output ends while aligning marks attached to them with those found on companion flange's front end. Install clamps together with bolts tightly according to specified torque values whereas push up boot over groove of transfer case output shaft where new clip will have been crimped into place subsequently using clamp-crimping pliers for reinforcement purposes. Lastly, splash shield of front differential carrier should be installed back there again.
    Posted by GMPartsGiant Specialist
    Q:
    How to remove and install the drive shaft on Chevrolet Suburban? Posted by Customer
    A:
    Raising the vehicle and supporting it on jackstands, with the front wheels blocked, would remove the rear driveshaft. In order to reinstall in the same position reference marks should be made on the driveshaft and pinion flange and ensure that the transmission is in Neutral with the parking brake off. The drive shaft should be lowered by removing its back u-joint bolts and retainers then slid out of transfer case or transmission. When installing, slide front end into transmission or transfer case then raise rear into position with marks aligned. Afterward, all bolts must be tightened to their proper torque specifications and clamps used to secure bearing caps. For 4WD models' front drive shaft, raise vehicle using jack stands after removal of differential carrier splash shield if any. The boot at the transfer case output shaft should be disengaged and relationship between driveshaft and companion flange marked for future reference. Thereafter disconnect bolts as well as clamps from differential flange while pushing driveshaft toward rear so that it can be separated from this flange before lowering it down to pull out of transfer case. To install, insert a sliding shaft that has splines at its rear through transfer case's output ends while aligning marks attached to them with those found on companion flange's front end. Install clamps together with bolts tightly according to specified torque values whereas push up boot over groove of transfer case output shaft where new clip will have been crimped into place subsequently using clamp-crimping pliers for reinforcement purposes. Lastly, splash shield of front differential carrier should be installed back there again.
    Posted by GMPartsGiant Specialist
    Q:
    What should be checked in terms of bolts during a driveshaft inspection of the 2011 Chevrolet Suburban? Posted by Customer
    A:
    Driveshaft mounting bolts should be checked for tightness.
    Posted by GMPartsGiant Specialist
    See expert answers on similar Drive Shaft
    Q:
    What is a driveshaft for the 2011 GMC Yukon? Posted by Customer
    A:
    A driveshaft is a tube or pair of tubes that transmits power between the transmission and differential.
    Posted by GMPartsGiant Specialist
    See expert answers on similar Drive Shaft
    Q:
    What must be done before removing the rear driveshaft for the 2011 GMC Yukon? Posted by Customer
    A:
    The vehicle must be raised and supported on jackstands, with the front wheels blocked. The transmission should be in Neutral with the parking brake off, and reference marks made on the driveshaft and pinion flange to ensure reinstallation in the same position.
    Posted by GMPartsGiant Specialist
    See expert answers on similar Drive Shaft
    Q:
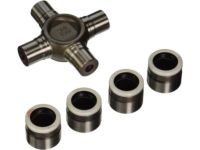
    Does this include front yoke and universal joints. Posted by Customer: 2009 Light Truck Silverado / Sierra / Cheyenne - 03, 43, 53 Bodystyle (4WD / AWD)
    A:
    YES IT DOES
    Posted by GMPartsGiant Specialist 16/3/2022
    If you have any questions about this product, please don't hesitate to ask us. We will be happy to help you!

Genuine GM Part 20912697, the Right Choice

To ensure reliability, purchase GM part # 20912697 Propeller Shaft Assembly. It is sometimes referred to as GM Drive Shaft. Directly from GM, genuine parts are superb with regards to quality, longevity, and fit. Every single part passed stringent quality testing, so you can be sure that it's safe, durable, and built to perform like your original parts. This part fits specific Chevrolet Avalanche, Silverado, Suburban models. It fits GMC Sierra, Yukon.

GMPartsGiant.com is a leading supplier of genuine GM parts and accessories such as GM 20912697 Propeller Shaft Assembly. You're certainly in the right place if you're searching for the great cost-effective OEM GM parts. Look no further than our vast inventory of genuine GM parts offered at unbeatable online prices, all of which are backed by the manufacturer's warranty. Not to forget, our hassle-free return policy and quick delivery service ensure a smooth shopping experience for you. For detailed GMC parts information, click here.

Why choose GM Parts Giant

  • Dedicated Service

    Your complete satisfaction is our #1 goal

  • Lowest Prices

    Best deals on genuine OE parts from dealerships

  • Fast Delivery

    Orders are processed and delivered promptly