
My Garage
My Account
Cart
This part fits
2012 Chevrolet Volt 4 Cyl 1.4L Flexible Fuel; Plug In Electronic Ratio Select Auto Trans; Volt (N. America) 4 Door Hatchback
Check another vehicle- The location this part fits: Driver Side
- Fitting Vehicle Options: RC(LUU)
GM 22816826 Front Wheel Drive Shaft Assembly
2011-2015 Chevrolet Volt
Customer Questions & Expert Answers (2)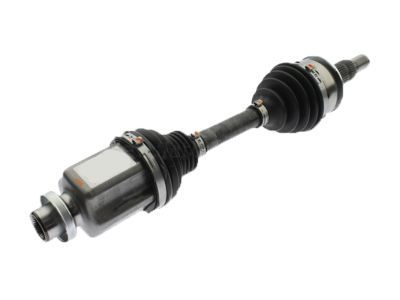
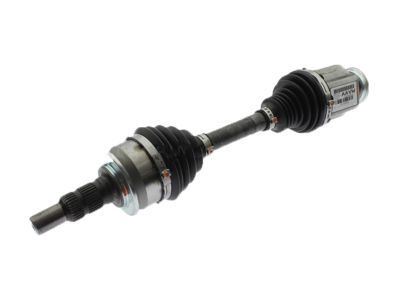
- Part DescriptionShaft Assembly, Front Wheel Drive ; Shaft, Front Wheel Drive Axle
- PositionFront
- Replaces
- ManufacturerGeneral Motors
This part fits
2012 Chevrolet Volt 4 Cyl 1.4L Flexible Fuel; Plug In Electronic Ratio Select Auto Trans; Volt (N. America) 4 Door Hatchback
Check another vehicle- The location this part fits: Driver Side
- Fitting Vehicle Options: RC(LUU)
$245.90 MSRP: $387.60
You Save: $141.70 (37%)
Currently UnavailableDue to manufacturer supply shortage, this item isn't currently available for ordering.
- Related Parts
- Specifications
- Q&A
Product Specifications
Brand Genuine GM Manufacturer Part Number 22816826 Part Description Shaft Assembly, Front Wheel Drive ; Shaft, Front Wheel Drive Axle Other Names Axle Assembly Item Dimensions 8.9 x 6.3 x 21.4 inches Item Weight 12.10 Pounds Position Front Condition New Fitment Type Direct Replacement Replaces 20997646 Manufacturer General Motors SKU 22816826 Warranty This genuine GM part is guaranteed by GM's factory warranty. Shipping & Return Shipping Policy Return Policy Warning: California's Proposition 65Customer Questions & Expert Answers
- Q:I would like to confirm if this is the correct part number for my vehicle. Please advise. Thank you. Posted by GMPartsGiant Specialist
- A:You can Select Your Vehicle to check if 22816826 fits your vehicle.Posted by GMPartsGiant Specialist
- Installation and Repair Tips by AI Expert
- Removal steps 1. Park on a level surface, chock opposite wheels, engage the parking brake, and put on safety glasses and gloves. 2. Raise and support the vehicle securely on jack stands and remove the wheel for access. 3. Disable the high-voltage system per manufacturer instructions (use the service disconnect or interlock procedure if equipped) and disconnect the 12V negative battery cable. 4. Clean the work area around the axle to prevent contamination of joints and seals. 5. Remove or move aside components that block access to the axle shaft (for example brake caliper/rotor assemblies or suspension links), supporting any components you free. 6. Loosen and remove any hub or retaining fastener that holds the axle to the wheel hub (designs vary). 7. Separate the axle from the hub assembly using the appropriate method or puller, supporting the hub and bearing to avoid damage. 8. Carefully disengage the inner end of the axle from the transaxle/differential, being prepared for possible small fluid seepage and avoiding prying on seals. 9. Remove the axle shaft from the vehicle and place it on a clean surface; inspect boots, splines, and retaining clips as you go. 10. Tip: keep removed fasteners and small parts organized and label orientation of the old axle if it will aid reassembly. Installation steps 1. Compare the replacement axle to the removed unit for correct length, spline count, and boot type before installation. 2. Clean the hub and transaxle seal areas and ensure mating surfaces are free of debris and old grease. 3. If applicable, lightly coat splines with the correct grease or lubricant recommended for the drive components (follow component manufacturer guidance). 4. Insert the inner end of the axle into the transaxle/differential straight and seat it until any retention feature engages, noting that engagement methods vary by design. 5. Guide the outer axle spline into the hub assembly and slide it into position without forcing or misalignment. 6. Reinstall hub retaining hardware and snug fasteners; reinstall any suspension, brake, and removed components in the reverse order of removal. 7. Torque all fasteners to the vehicle manufacturer's specifications and restore any locking devices (cotter pins, locking nuts) where required. 8. Reconnect the 12V negative battery and restore the high-voltage system following the manufacturer's prescribed procedure. 9. Lower the vehicle, torque wheel lug nuts to specification, and perform a road test to check for noises, vibration, and leaks. 10. Tip: recheck critical fasteners (axle/hub) after a short test drive and again after a few miles to confirm retention.
- Q:
Why choose GM Parts Giant
- Dedicated Service
Your complete satisfaction is our #1 goal
- Lowest Prices
Best deals on genuine OE parts from dealerships
- Fast Delivery
Orders are processed and delivered promptly