Make sure this part fits your vehicle

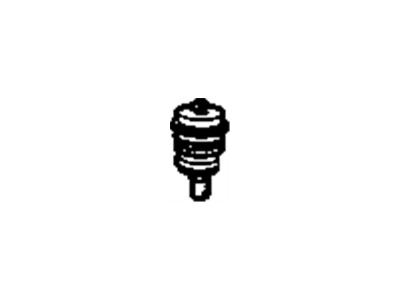
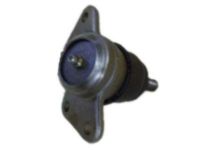
GM 19416896 STUD KIT,FRT LWR CONT ARM BALL

1988-2011 GM

GM 19416896 STUD KIT,FRT LWR CONT ARM BALL
  • Part Description
    STUD KIT,FRT LWR CONT ARM BALL
  • Position
    Lower
  • Replaces
    15659724, 12480852
  • Manufacturer
    General Motors
Customer Questions & Answers
$84.18 MSRP: $134.25
You Save: $50.07 (38%)
1
ADD TO CART
Ships in 1-2 Business Days
  • Product Specifications

    BrandGenuine GM
    Manufacturer Part Number19416896
    Part DescriptionSTUD KIT,FRT LWR CONT ARM BALL
    Other NamesLower Ball Joint
    Item Dimensions6.8 x 4.5 x 4.3 inches
    Item Weight2.10 Pounds
    PositionLower
    ConditionNew
    Fitment TypeDirect Replacement
    Replaces15659724, 12480852
    Require Quantity2
    ManufacturerGeneral Motors
    SKU19416896
    WarrantyThis genuine GM part is guaranteed by GM's factory warranty.
    Shipping & ReturnShipping Policy Return Policy
    Warning: California’s Proposition 65
  • Vehicle Fitment

    Year Make Model Engine Important vehicle option details
    2006-2011 Cadillac DTS8 Cyl 4.6L4 DOOR
    1998-2005 Cadillac Deville8 Cyl 4.6L4 DOOR, DEVILLE
    1998-2004 Cadillac Seville8 Cyl 4.6L4 DOOR, DEVILLE
    1988-1999 Chevrolet C15006 Cyl 4.3L, 8 Cyl 5.0L, 8 Cyl 5.7L, 8 Cyl 6.2L Diesel, 8 Cyl 6.5L Diesel, 8 Cyl 7.4LC1500 EXTENDED CAB LONG BOX, C1500 EXTENDED CAB STANDARD BOX, C1500 REGULAR CAB LONG BOX, C1500 REGULAR CAB STANDARD BOX
    1988-1999 Chevrolet C25006 Cyl 4.3L, 8 Cyl 5.0L, 8 Cyl 5.7L, 8 Cyl 6.2L Diesel, 8 Cyl 6.5L Diesel, 8 Cyl 7.4LC2500 CREW CAB, C2500 EXTENDED CAB LONG BOX, C2500 EXTENDED CAB STANDARD BOX, C2500 REGULAR CAB
    1988-2000 Chevrolet C35008 Cyl 5.7L, 8 Cyl 6.2L Diesel, 8 Cyl 6.5L Diesel, 8 Cyl 7.4LC3500 CAB CHASSIS 135.5, C3500 CAB CHASSIS 159.9, C3500 CREW CAB LONG WHEELBASE, C3500 CREW CAB SHORT WHEELBASE, C3500 EXTENDED CAB, C3500 REGULAR CAB
    1996-2002 Chevrolet Express6 Cyl 4.3L, 8 Cyl 5.0L, 8 Cyl 5.7L, 8 Cyl 6.5L Diesel, 8 Cyl 7.4L, 8 Cyl 8.1L1 TON CARGO EXPRESS, 1 TON COMMERCIAL/RECREATIONAL VEHICLE EXPRESS, 1 TON PASSENGER, 1/2 TON CARGO EXPRESS, 1/2 TON PASSENGER EXPRESS, 3/4 TON CARGO EXPRESS, 3/4 TON PASSENGER EXPRESS
    1992-1999 Chevrolet Suburban8 Cyl 5.7L, 8 Cyl 6.5L Diesel, 8 Cyl 7.4L1/2 TON, 3/4 TON
    1995-2000 Chevrolet Tahoe8 Cyl 4.8L, 8 Cyl 5.3L, 8 Cyl 5.7L, 8 Cyl 6.5L DieselCLASSIC 4 DOOR 1/2 TON
    1988-1999 GMC C15006 Cyl 4.3L, 8 Cyl 5.0L, 8 Cyl 5.7L, 8 Cyl 6.2L Diesel, 8 Cyl 6.5L DieselC1500 EXTENDED CAB LONG BOX, C1500 EXTENDED CAB STANDARD BOX, C1500 REGULAR CAB LONG BOX, C1500 REGULAR CAB STANDARD BOX
    View More

Customer Questions & Answers

Q:
I am wonder if this is complete and correct part for my vehicle. Posted by GMPartsGiant Specialist
A:
You can Select Your Vehicle to check if 19416896 fits your vehicle.
Posted by GMPartsGiant Specialist
Q:
How can you check for movement in the balljoint for the 2004 Cadillac DeVille? Posted by Customer
A:
Use a large prybar to check for any movement in the balljoint by attempting to push it up and prying it down between the steering knuckle and control arm.
Posted by GMPartsGiant Specialist
See expert answers on similar Ball Joint
Q:
How can you inspect and potentially replace a balljoint on Cadillac DeVille and DTS? Posted by Customer
A:
To inspect and potentially replace a balljoint, start by applying the parking brake and blocking the rear wheels to prevent the vehicle from rolling. Then, raise the front of the vehicle and securely support it on jackstands. Visually inspect the rubber seal of the balljoint for any damage, deterioration, or leaking grease. If any of these issues are present, the balljoint should be replaced. Next, use a large prybar to check for any movement in the balljoint by attempting to push it up and prying it down between the steering knuckle and control arm. If any movement is felt or seen during these checks, it indicates a worn-out balljoint. Additionally, have an assistant grasp the tire at the top and bottom and move the top of the tire in and out while touching the balljoint stud nut. If any looseness is felt, suspect a worn-out balljoint stud or a widened hole in the steering knuckle boss. In the case of a widened hole, both the balljoint and the steering knuckle should be replaced. Finally, separate the control arm from the steering knuckle and try to twist the stud in the socket using your fingers. If the stud turns, it is necessary to replace the balljoint.
Posted by GMPartsGiant Specialist
Q:
How do you check the upper and lower balljoints on a Chevrolet C1500 and K1500? Posted by Customer
A:
To check the upper balljoint, loosen the wheel lug nuts, raise the front of the vehicle, and support it securely on jackstands. Apply the parking brake and remove the wheel. Place a floor jack under the lower control arm and raise it slightly. Using a large screwdriver or pry bar, pry up on the upper control arm and watch for movement at the balljoint. Any movement indicates a worn balljoint. Grasp the steering knuckle and attempt to move the top of it in-and-out. If any play is felt, the balljoint will have to be replaced. For the lower balljoint, raise the vehicle, support it securely on jackstands, and remove the wheels. Support the weight of the suspension with a jack. Measure the distance between the tip of the balljoint stud and the tip of the grease fitting below the balljoint or between the lower surface of the control arm and the top of the balljoint. Lower the jack to allow the suspension to hang free and repeat the measurement. If the difference between the two measurements exceeds 3/32-inch, the balljoint is worn and must be replaced. To replace, raise the vehicle, support it securely on jackstands, and remove the front wheel. For 2WD models, remove the brake caliper and hang it out of the way. Remove the cotter key from the ball joint and back off the nut two turns. Place a jack or jackstand under the lower control arm. The jack or jackstand must remain under the control arm during removal and installation of the ball joint to hold the spring and control arm in position. Separate the balljoint from the steering knuckle using a balljoint separator. The use of a "picklefork" type balljoint separator may tear the balljoint boot. To remove the upper balljoint from the control arm, drill out the rivets, remove the balljoint, and clean the control arm. Install the new upper balljoint against the mating surface of the control arm and secure it with the supplied nuts and bolts. For the lower balljoint on 2WD models, remove the control arm and take it to an automotive machine shop to have the balljoint pressed out and a new one pressed in. Inspect the tapered holes in the steering knuckle, removing any accumulated dirt. If out-of-roundness, deformation, or other damage is noted, the knuckle must be replaced. Reconnect the balljoints to the steering knuckle and tighten the nuts to the specified torque. If the cotter key does not lineup with the opening in the castellated nut, tighten the nut just enough to allow installation of the cotter pin. Install the grease fittings and lubricate the new balljoints. Install the wheels and lower the vehicle. The front end alignment should be checked by a dealer or alignment shop. The procedure for replacing an upper balljoint on a 4WD model is similar to that described for 2WD models. The procedure for replacing a lower balljoint on 4WD models includes raising the vehicle and supporting it securely on jackstands, removing the wheel, and removing the front splash shield bolts. Pivot the shield out of the way to gain access to the tie-rod end. Disconnect the tie-rod from the relay rod. Remove the drive axle and center punch the bottom of each rivet. Using a 1/8-inch drill bit, drill a guide hole 1/2-inch deep into the rivet heads. Using a 5/16-inch drill bit, drill the rivet heads off. Knock the rivets out with a hammer and punch. Remove the balljoint stud cotter pin. Support the lower control arm with a floor jack. Loosen the balljoint nut a couple of turns. Back off the torsion bar adjusting arm bolt to reduce the tension on the bar. Don't remove the bolt completely. Separate the knuckle from the balljoint with a two-jaw puller or a "picklefork". Remove the nut and separate the balljoint from the lower control arm. Install the new balljoint to the control arm. Install the nuts and bolts and tighten them to the specified torque. Raise the lower control arm with a floor jack and insert the balljoint stud into the steering knuckle. Lower the jack until the balljoint stud seats in the hole, then install the nut and tighten it to the specified torque. Install a new cotter pin and bend the ends of the pin against the nut. Load the torsion bar, install the drive axle assembly, and connect the inner tie-rod end to the relay rod. Install the tie-rod end nut and tighten it to the specified torque. Install the front splash shield and tighten the splash shield bolts securely. Install the wheel and lug nuts. Lower the vehicle and tighten the wheel lug nuts to the specified torque.
Posted by GMPartsGiant Specialist
If you have any questions about this product, please don't hesitate to ask us. We will be happy to help you!

Genuine GM Part 19416896, the Right Choice

Your vehicle deserves only genuine OEM GM parts and accessories. To ensure reliability, purchase GM part # 19416896 STUD KIT,FRT LWR CONT ARM BALL. It is sometimes referred to as GM Ball Joint. Our GM parts and accessories are expedited directly from authorized GM dealers strategically located all across the U.S. and are backed by the manufacturer's 12 month, 12,000 mile warranty. OEM GM parts are the best for restoring your vehicle to factory condition performance. This part fits specific Cadillac DTS, Deville, Seville models. It fits Chevrolet C1500, Express, Tahoe. It also fits GMC C2500, Suburban, Yukon.

Affordable, reliable and built to last, GM part # 19416896 STUD KIT,FRT LWR CONT ARM BALL stands out as the smart option. GMPartsGiant.com is your prime online source with the biggest and best selection of genuine GM parts and accessories at giant discounted prices. We have the OEM GM parts and accessories you need at the wholesale prices. GMPartsGiant.com has you covered no matter what type of GM vehicle you drive. For detailed GMC parts information, click here.

Why choose GM Parts Giant

  • Dedicated Service

    Your complete satisfaction is our #1 goal

  • Lowest Prices

    Best deals on genuine OE parts from dealerships

  • Fast Delivery

    Orders are processed and delivered promptly