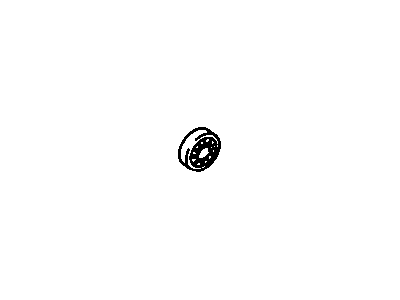
In most cases, the front wheel bearings will not need servicing until the brake pads are changed, but they should be checked whenever the front wheels are raised for any reason. With the vehicle securely supported on jack stands, spin the wheel and check for noise, rolling resistance, or free play. If the tire moves more than 0.005 inches when pushed in and out, the bearings should be checked, then repacked with grease or replaced if necessary. To remove the bearings for replacing or repacking, begin by removing the hub cap and wheel. Use an Allen wrench to remove the two bolts securing the disc brake caliper to its support. Fabricate a wood block (17/16 inch by 17/16 inch by 2 inches in length) to keep the brake pads separated, then carefully slide the caliper off the disc and insert the wood block between the pads, using wire to hang the caliper assembly out of the way without damaging the brake hose. Pry the hub grease cap off the hub using a screwdriver, then use needle-nose pliers to straighten the bent ends of the cotter pin and pull it out of the locking nut, discarding it for a new one during reassembly. Remove the spindle nut and its washer from the end of the spindle, then pull the hub assembly outward slightly and push it back into its original position to force the outer bearing off the spindle enough for removal. The hub assembly can then be pulled off the spindle. On the rear side of the hub, pry out the inner bearing lip seal with a screwdriver, noting the direction of installation, and remove the inner bearing from the hub, again noting its installation. Use clean parts solvent to remove all traces of old grease from the bearings, hub, and spindle, allowing the parts to air dry. Inspect the bearings for cracks, heat discoloration, or bent rollers, and check the bearing races inside the hub for any damage; if replacement is needed, it is best left to a repair shop. Pack the bearings with approved high-temperature front wheel bearing grease, ensuring it is fully worked into the bearings. Apply a thin coat of grease to the spindle at the outer and inner bearing seats, as well as the shoulder and seal seat. Place a small quantity of grease inboard of each bearing race inside the hub, forming a dam with your finger to provide extra grease availability. Insert the grease-packed inner bearing into the rear of the hub, adding more grease outboard of the bearing, then place a new seal over the inner bearing and tap it until flush with the hub. Carefully place the hub assembly onto the spindle and push the grease-packed outer bearing into position, then install the washer and spindle nut, tightening it slightly to 12 ft-lbs of torque. Spin the hub in a forward direction to seat the bearings and remove any excess grease or burrs. Add a little grease outboard of the outer bearing for extra availability, then check that the spindle nut is still tight at 12 ft-lbs. Loosen the spindle nut until it is just loose, then using your hand, tighten it until snug. Install a new cotter pin through the hole in the spindle and spindle nut, adjusting the nut slightly if necessary to align the slots. Bend the ends of the new cotter pin flat against the nut and cut off any excess length. Install the dust cap by tapping it into place with a rubber mallet. Place the brake caliper near the rotor and carefully remove the wood block spacers, sliding the caliper over the rotor and tightening the caliper mounting bolts to 35 ft-lbs. Install the tire/wheel assembly to the hub and tighten the mounting nuts. Finally, check the bearings again by grabbing the top and bottom of the tire, lower the vehicle to the ground, fully tighten the wheel nuts, and install the hub cap, using a rubber mallet to seat it completely.