Make sure this part fits

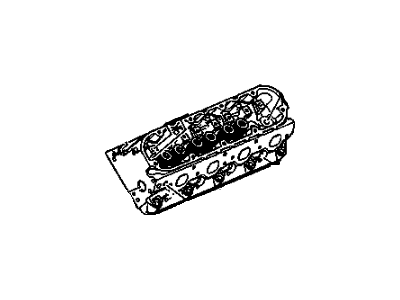
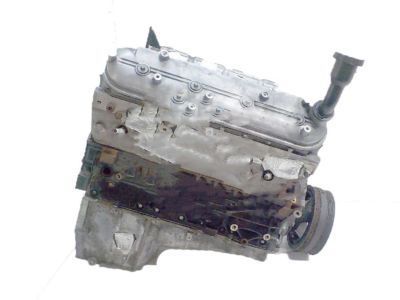
Hummer 12629058 Head Assembly, Cyl (W/ Valve)

2008-2010 Hummer

Customer Questions & Expert Answers (18)
GM 12629058 Head Assembly, Cyl (W/ Valve)
  • Part Description
    HEAD, Engine Cylinder
  • Manufacturer
    General Motors
Make sure this part fits
$671.65 MSRP: $1063.87
You Save: $392.22 (37%)
Core Charge: $75.00
Ships in 1-2 Business Days
1
ADD TO CART
  • Related Parts
  • Product Specifications
  • Vehicle Fitment
  • Customer Questions & Expert Answers
  • Product Specifications

    BrandGenuine Hummer
    Manufacturer Part Number12629058
    Part DescriptionHEAD, Engine Cylinder
    Other NamesCylinder Head
    Item Dimensions9.3 x 24.2 x 11.7 inches
    Item Weight24.30 Pounds
    ConditionNew
    Fitment TypeDirect Replacement
    Require Quantity2
    ManufacturerGeneral Motors
    SKU12629058
    WarrantyThis genuine GM part is guaranteed by GM's factory warranty.
    Shipping & ReturnShipping Policy Return Policy
    Warning: California's Proposition 65
  • Vehicle Fitment

    Year Make Model Engine Important vehicle option details
    2008-2010 Hummer H38 Cyl 5.3LCREW CAB, SUV
    2009-2010 Hummer H3T8 Cyl 5.3LCREW CAB, SUV
  • Customer Questions & Expert Answers

    Q:
    I am wonder if this is complete and correct part for my vehicle. Posted by GMPartsGiant Specialist
    A:
    You can Select Your Vehicle to check if 12629058 fits your vehicle.
    Posted by GMPartsGiant Specialist
    Q:
    What steps are necessary to remove and install cylinder heads, including the required tools and procedures in 2.8L,3.0L,3.6L V6 engine on Cadillac CTS? Posted by Customer
    A:
    One has to get hold of a new set of MB (8 mm) and M11 (11 mm) head bolts to implement this procedure. We master this procedure under the following steps ; Start by removing the clamp that is connected to the negative terminal of the battery. Take out the plenum, intake manifold, valve covers, timing cover and the timing chains and tighten screws and retainers; record the location of the timing chain sprocket on the crankshaft. For 2.8L and 3.6L engines remove the oil dipstick tube mounting bolt and tube, disconnect all electrical connectors and ground straps from the cylinder heads and disconnect the exhaust pipe from the exhaust manifolds which will come with the cylinder heads. If left side cylinder head is to be removed then please remove P/S pump. It is removed the upper bolt in the oil filter adapter and the oil filter housing bolt at the left side cylinder head; no other oil filter housing bolts are necessary to be removed. Now for 3.0L engines take off the fuel pump, the bolts of the oil filter adapter and the adapter itself. In case of removing the left side cylinder head, then also withdraw the power steering pump and its bracket, followed by the removal of fasteners of the coolant pipe and setting aside of the pipe. Remove both exhaust manifolds from the cylinder heads, undo all electrical connection and all grounding straps from the cylinder heads. Turn the head bolts in 1/4 turn back to the sequence opposite to the lightening one to be finally removed by hand; it is also possible to compare the length and size of the bolts, which fit to be replaced by new ones. If there is resistance felt while lifting the heads off the engine, then use pry bar or long screw driver to lift it up carefully and keep the heads on blocks of wood so as to avoid damaging the gasket sealing surfaces. The machined surfaces of cylinder head and block must be free from dirt before further application, especially gasket removal solvents and gasket scraper used for removing all carbon and old gasket material from the block and cylinder head and finally clean with cloth with lacquer thinner or acetone. It also checks its block and head mating surfaces for nicks and scratches then using emery cloth slightly damaged surface then heavily damaged may have to be machined. Put the new gaskets over the dowels fitted in the block and then fit the heads of the block gently without displacing the gaskets. Apply a medium strength thread sealing compound on the threads of new 8 mm head bolts and engage the threads into the holes, tighten just enough to allow you to get your fingers between the bolt head and the metal surface, a similar operation must be done with the new 11 mm head bolts. After following the sequence as advised below tighten the bolts in four stages to the required torque and number of rotations. The rest of the process is done in the reverse of the removal ones, explained as follows. Last of all put coolant, replace oil and filter, switch on the engine and look for the engine operation, and other leaks if any, of coolant and oil.
    Posted by GMPartsGiant Specialist
    Q:
    How to remove and install a cylinder head in 3.2L V6 engine on Cadillac CTS? Posted by Customer
    A:
    Before the removal of the cylinder head it is recommended to relieve fuel pressure, disconnect the negative terminal of the battery, and drain the cooling system. Then, after that, the valve cover(s) need to be taken off, the intake plenum and intake manifolds also need to be removed, as well as the electrical connector to the Engine Coolant Temperature sensor, needs to be disconnected. Disconnect the hose clamps for the throttle body heater and bypass hoses and disengage the hooks or clips of the hoses connected to the engine crossover pipe; dismantle the coolant crossover pipe banjo bolts and the upper elastomer seals. Remove the engine wiring harness from the brackets at the back of the cylinder head, and then remove the timing belt cover, the timing belt and if the cylinder head is not being replaced, the exhaust camshaft and exhaust manifold. Pull the radiator hose clamp and hose off the coolant outlet pipe and then take off the coolant outlet pipe but do remember to put on the new O-ring at the coolant outlet pipe end. Turn the eight cylinder head bolts equally and uniformly a quarter of their usual turn and then lift the cylinder head from the engine compartment without endangering it. Once the head has been taken off you are to have the gasket thrown and look for locating dowels. Scrape the mating faces of the cylinder head and block free of carbon and do not allow any of it to enter into the oil and water holes and look for any damage on the faces. For installation, first, one needs to clean the mating surfaces while for those units equipped with alignment dowels, one has to insert them, position a new gasket in a way that its 'TOP' mark faces up and using guide studs, place the heavy cylinder head properly. New cylinder head bolts must be fitted without applying oil on the threads unless spoken to, then tightened in the correct cycle to the required magnitude, and other components can be removed in the reversed order. Last, and perhaps most importantly, change the engine oil and filter and, in the process, consider refilling the cooling system.
    Posted by GMPartsGiant Specialist
    Q:
    How to remove the cylinder head on 4.3L V6 engine on Chevrolet Avalanche? Posted by Customer
    A:
    For the right cylinder head to be removed one should first drain the cooling system, remove the intake manifold, valve covers, pushrods, and exhaust manifold(s). Thereafter, one should proceed with removing alternator bracket and its mounting stud as well as spark plugs and spark plug wire support brackets. To loosen the cylinder head bolts in a specific pattern and lift the cylinder head(s) off the engine using a block of wood and a hammer. Store the cylinder heads on wood blocks to prevent damage. To remove left side cylinder head follows a similar process but also remove electrical junction block bracket, power steering pump bracket; disconnect ground wire, coolant temperature sensor and more spark plug wire support brackets. When installing the cylinder heads make sure that mating surfaces are clean and free from dirt. Look for any damages and use tap to chase threads inside bolt holes. Position new gaskets over dowel pins then carefully place cylinder heads onto block. Only tighten these nuts following recommended sequence, torque, angle of rotation specifications; thus coat threads of new cylinder head bolts with non-hardening sealant then tighten accordingly. Finally change engine oil and filter (leaks may occur upon starting engine).
    Posted by GMPartsGiant Specialist
    Q:
    What steps are necessary to replace the cylinder heads on Chevrolet Corvette? Posted by Customer
    A:
    This will require buying a new set of head bolts to complete this procedure and enable study of the causes of failure. This process should be started by removing the cable of the negative terminal of the battery, and, further, by draining the engine coolant, as well as the charge air cooler in the supercharged version. When using a hoist to remove the supercharger you will need to remove the hood for LS9 engines. Thirdly, take out the drivebelt and spark plugs when necessary. For LS1, LS6, LS2, LS7 and LS3 (non-supercharged) engines, remove the intake manifold and the coolant bleed pipin g mounting bolts and pipe. On LS9 engines, take off the supercharger, supercharger belt tensioner, and PS pump and bracket. Move on to disconnect the air bleed pipe and the valve covers and going on to the exhaust manifold(s) and the rocker arms and the pushrods should be removed while ensuring that all theparts are saved for reuse. Unfasten the head bolts in a criss-cross manner and a quarter turn at a time in reverse of the sequence routinely used until they can be unscrewed manually; discard these used up bolts for new ones needed for tightening during reassembly. The head bolts also come in different lengths and sizes and used in different part of the vehicle hence do well to note their positions. Unbolt the heads gently and lift the heads off the engine if there is some amount of friction with a pry bar or long screwdriver inserted in the intake port , the heads should be placed on wooden blocks so that it will not be damaged. When setting the new cylinder head it's very important that the mating surfaces of cylinder heads and block are free from any contaminants, it advisable to use a scraper but make sure you don't dig into the aluminum. Ensure that the faces that are to make contact have no nicks, deep scratches, or other potential sources of trouble; for slight manifestations of this, use a file; for severe manifestations, call a machine shop. In case one believes there is some warpage, one should use a straight edge to check for distortions. Cleam all surface with mating and head bolt holes especially the upper portion of the block, or the metal surface that will face the cylinder head. Located the new gaskets over the dowels in the block in such a manner that the mark on the gasket is in front of the vehicle, very carefully put the heads on the block in such a manner that they do not affect the gaskets' positions. The new head bolts should be fitted in the conduits and tightened to be just finger-tight and the same should always be replaced with new ones. After tightening the bolts according to the recommended sequence, turn them to the necessary torque and the number of turns. Bolt the coolant bleed pipe with new O-rings onto the cylinder heads then tighten the bolts of the new coolant bleed pipe. The rest of the installation is the mirror image of the removal. Last, put coolant, replace the engine oil and filter, engage the engine, and examine for optimal working and signs of leakage.
    Posted by GMPartsGiant Specialist
    Q:
    How Should You Replace the Cylinder Head Bolts and Reinstall the Cylinder Heads in V8 engine on Chevrolet Colorado? Posted by Customer
    A:
    For this process it will be necessary to procure a new set of 11 mm cylinder head bolts. This should be followed by reducing the pressure on the fuel system, pulling the cable connection on the negative terminal of the battery and for final drains, draining the cooling system. Disconnect the intake manifold gasket, make necessary modifications in the coolant pipe and unbolt the exhaust manifold from the cylinder head but don't take it off from the exhaust pipe. Secondly, take off the valve cover(s), further, depending on the model, the rocker arms and the pushrods will be removed; it is pivotal to preserve all of the separate components for the assembly process. Firstly, un-bolt the coolant air bleed pipe, secondly, go towards the left cylinder head and to get there, do away with the alternator and the bracket holding it; this entire piece can be shifted forward; the ground strap on the other side of the head can now be detached. For the right cylinder head, if any, then take off the dipstick tube and the heater hose bracket from the front side of the cylinder head. Remove the head bolts in reverse order by rotating them counterclockwise in 1/4 turns as required until they are easily accessible and can be unscrewed by hand with attention made to the different lengths and sizes of the bolts so as to adopt the correct size and length in replacement. Carefully remove the head(s) from the engine if there is some sort of resistance then use prybar or a long screw driver on the intake port. always keep the heads on wooden blocks to avoid damaging the gasket ports. During assembling there must be no particles of carbon and the old gasket remaining on the mating surfaces of the cylinder heads and block, to remove them, use gasket removal solvents as well as gasket scraper, and do not forget to clean them with the brake system cleaner moistened cloth. Inspect the block and head mating surfaces for any imperfection, this will require light emery cloth for the minor imperfections and excess may require a machining. Clean the threads in the head bolt holes by either running a tap of the right size over the holes, or using brake cleaner and blowing off with compressed air. Align the new gaskets on the dowels in the block, fit heads onto the block in a manner which will not disturb the gaskets, and, before tightening the 8 mm head bolts, apply a medium strength, thread locking compound to the threads. Replace the former 10 mm head bolts with new ones of 11 mm which should be tightened by hand before using the recommended sequence to tighten the bolts to four quantities not less than the recommended torque. Screw the coolant pipe with new gasket to the cylinder heads and tighten the bolt to the torque. Replace all components in the reverse of the removal procedure, fill coolant, replace the oil and filter, start the engine and test for effectiveness and leakage of coolant or oil.
    Posted by GMPartsGiant Specialist
    Q:
    How to Remove and Install Cylinder Heads in 4.8L,5.3L,6.0L V8 engine on Chevrolet Express? Posted by Customer
    A:
    It will be required to buy the new set of the head bolts for this operation. Start with the separation of the cable to the negative post of the battery and the draining of the cooling system. Take off the valve covers and the intake manifold as well as the bolts and coolant air bleed pipes of the cylinder heads; it is necessary to bare in mind that the coolant bleed pipe is fastened at the front and rear of the cylinder heads with two bolts each. Next, take off the knock sensors and the engine valley cover from the middle of the engine, also, disengage both of the exhaust manifolds from the cylinder heads. Take out the rocker arms together with the pushrods: before that, it is wise to separate all the components so that you can easily put each of them in its rightful place. The wiring connected at the back of the alternator is disconnected; the power steering pump/alternator mounting bracket bolt is removed from the engine and placed aside with the components connected but not with the lines from the steering pump disconnected. undo the head bolts in reverse order by which it was tightened by rotating it in 1/4 turn till it can be turned by hand, it's important to note different sizes and lengths for correct fitting of new bolts. If there is any resistance in lifting the heads then use pry bar or long screw driver to lift the heads from the engine while heads should be stored on blocks of wood to avoid compressing gasket sealing surfaces. It is required that the faces of the cylinder heads and block are clean before installation and this is done by the use of gasket removal solvents and gasket scraper, also scraping off of carbon and old gasket material and then the use of a cloth soaked in lacquer thinner or acetone. Look for nicks or scratches on the block and head mating surfaces; emery cloth can be used for minor damages while machining major damages. Accompany the chase with the correct size tap, clean the head bolt holes by spraying brake clean into each hole and blowing out with compressed air. Centre the new gaskets over the dowels in the block and then lift the heads onto the block to avoid damage to the gaskets. Apply medium strength thread locking compound on the new 8mm head bolts and thread them, then the new 11mm head bolts and turn them by hand and tighten them to finger tight and then get to torquing in the recommended sequence up to the required torque of four steps. Replace the knock sensor O-rings and fit the engine valley cover, tighten the bolts to the torque and fit the coolant bleed pipe with new gaskets at joints, tighten the bolts to the torque. The rest of the steps are the opposite of the removal which, after that, top up the cooling system, and replace the engine oil and filter. Run it for a test and look for any signs of normal functioning and also if there are any signs of leakage of coolants or oil.
    Posted by GMPartsGiant Specialist
    Q:
    How to remove and install the left and right cylinder heads in 4.3L V6 and 5.0L,5.7L,7.4L V8 engine on Chevrolet Express? Posted by Customer
    A:
    If there is rear air conditioning and left cylinder head removal is required, the rear air conditioning system must first be emptied by a holder of this license. Startings with the removal of the cable of the negative terminal of the battery, followed by the removal of the engine cooling fan as well as the valve cover(s). After that, it is necessary to remove the upper and lower intake manifolds, as well as the exhaust manifolds, and take off the pushrods. When searching for the right cylinder head, you have to take off the alternator mounting bracket, and, for 2018 and newer 4.3L engines, you have to also take off the fuel rail and injectors with the cylinder head. For the left cylinder head you will need to remove the engine ground wire, if equipped, the coolant gauge temperature sender, unscrew the filling nut and disconnect the auxiliary evaporator tube from the refrigerant line manifold, unbolt the air conditioning compressor from its bracket and tilt it out of the way without disconnecting hoses, and finally the air conditioning compressor/power steering pump mounting bracket. Secure the power steering pump and bracket aside, while it is necessary to make sure that affixing bracket does not rest upon the radiator. For 2018 and later 4.3L engines: also remove the fuel rails and injectors and the oil dipstick tube mounting bolt from the rear of the cylinder head. With a new cylinder head gasket acquire cardboard and draw the pattern of the cylinders especially the head bolts, it should include direction of the engine for easy identification. Undo the cylinder head bolts gradually in antisense of the patterns that were used when tightening them by 1/4 turn per round of loosening and place the bolts in the cardboard as they are removed. If any shriek is encountered during the lifting of the cylinder head(s) then it is put off with a block of wood and the help of a hammer and they are placed on wood block(s) while refueling. While aligning make sure that the mating surfaces of the cylinder heads and block are free from contaminants and it's done using gasket scraper and further cleaned using lacquer thinner or acetone. Verify if there are any nicks, scratch or any sharp edges on the surfaces that are intended to mate, if so, then one will have to file or machine the mating surfaces. Run the threads in the cylinder head bolt holes with a tap and free the threads with a die. Align each new gasket over the dowel pins in the block and in case of the use of steel gaskets, apply the requested sealant and then accurately fit the cylinder heads onto the block without interfering with the gaskets. Apply a layer of a non hardening sealant on the threads of the cylinder head bolts before reinstalling them at their original positions tightening them until they are just hand tightened and following the right pattern to tighten them up to the right torque. The reverse follows as the remaining installation steps that are almost similar to the removal process. Last but not the least, replace the engine oil and filter and then turn on the engine and look for the oil and water leakage if any.
    Posted by GMPartsGiant Specialist
    Q:
    How to remove and install cylinder heads in V8 engine on Chevrolet Monte Carlo? Posted by Customer
    A:
    Before or during this procedure, therefore, there will be the need to buy a new set of 11 mm head bolts. Start with the removal of the cable from the minus terminal of the battery and then drain the cooling system. Thoroughly unbolt the intake manifold and the coolant air bleed pipe out of the way; unbolt both exhaust manifolds from the cylinder heads but leave them connected to the exhaust pipes, however, loosely. Then, take off the valve covers; then the rocker arms, pushrods, maintaining all the parts in order for reassembly. At the back side pull out the drive belt and the drive belt idler pulley, and the alternator and its bracket with help of rotating the drive belt tensioner, remove the lower alternator mounting bracket bolt. On the front side, disconnect the top engine mount strut; and the drivebelt once more. When replacing the pulley use the correct power steering pulley removal tool to get at the bolt located at the back of the rim or remove the power steering pump so as to have access to it. Take out the three coolant manifold bolts which are fitted to the left end of the cylinder head. You should now turn the head bolts in the opposite way that you tightened them with repetitions of the quarters until you are able to take them out by hand, remember the various lengths and sizes for the correct reassembly of the head with the new bolts on. Place your hands under the head(s) and raise it/ them off the engine, in case there is resistance make use of a pry bar or a long screwdriver in the intake port , then place the heads on block of wood in order not to have an impact on the gasket sealing area. Removal of the gaskets should be done using gasket removal solvents and a gaskets scraper to reduce chances of having residues of the carbon and old gasket on the mating surfaces of the cylinder heads and block. Using a cloth dipped in lacquer thinner or acetone clean the surfaces of the aluminium heads being careful not to scratch them. Surface conditioner-any sharp edges on mating surfaces should be smoothed down; this is done using emery cloth in the cases of minor damage, whilst major damage is likely to necessitate the use of a machine. Thread the head bolts with a tap or spray brake cleaner and clean the debris with compressed air to the eye protection. The new gaskets have to be fitted into the corresponding dowels in the block with the head gasket positioned properly; the heads are then put on the block without moving them as this will cause the gaskets to go out of place. Apply on the threads of the new 8mm head bolts a median strength threadlocking compound, phrase the 11 mm head bolts and tighten the 8mm head bolts with your fingers and then follow the correct sequence to torque the 11mm bolts in four stages. The rest of the steps is essentially the process of installation but in reverse followed by the addition of coolant and change of oil and filter. Switch on the engine and ensure all is well and in particular if there is any leakage with the compressor coolant or oil.
    Posted by GMPartsGiant Specialist
    Q:
    How to remove and install a cylinder head in V6 engine on Chevrolet Impala? Posted by Customer
    A:
    To perform the removal of the cylinder head, the following should be done; Turn off the car's engine and disconnect the cable from the negative terminal of the battery and lastly drain the engine coolant. Subsequently, take off the lower intake manifold, rocker arms, pushrods ,dipstick, dipstick tube and exhaust manifolds. Then remove spark plug wires, their brackets and spark plugs, besides the alternator. Turn each cylinder head bolt a quarter turn in the reverse sequence in which they were tightened until they can be unscrewed by hand; discard the bolts since new ones will be used and identify the positions of the studs. Make sure that the engine is cold before you are freeing any of the bolts. Carefully raise the head off of the engine, do not pry between the head and block as damage may occur, to break the gasket's bond use a hammer and block of wood. After removal of the cover, place it on wooden blocks in order to avoid destruction of the gasket surface. For installation, the mating surfaces of the cylinder head and block should be clean; carbon and old gasket material should be removed from the head/block surface with a gasket scraper and cleaned with lacquer thinner or acetone. Remove any debris from the top side of the lifter valley before installing the new valance and maintain cleanliness throughout the buildup process by covering the lifts with shop rags, It is recommended to inspect the mating faces of the valve for any damages before embarking on the buildup process and repair if there are some damages. Prior to that, drinking a tap on the threads in the head bolt holes is necessary, after that install a new gasket on the dowel pins with the right side up. Ensure that the head is very gently put back on to the block without damaging the gasket, use new cylinder head bolts, tighten them as per the pattern to the prescribed torque, and then turn each bolt by the required degree. At last, perform the other steps of the installation in a sequence opposite to the removal, replace the engine oil and filter and fill the coolant.
    Posted by GMPartsGiant Specialist
    Q:
    How to remove and install a cylinder head in six cylinder engine on Chevrolet Trailblazer? Posted by Customer
    A:
    Before getting to the process of removing the cylinder head the first step is to drain the engine coolant. Next, take off the valve cover and the exhaust manifold gathering after that, the timing chain with the sprockets. After that, it is required to undone the seventeen cylinder head bolts in reverse order with which they were tightened, and then, carefully, because of its weight, lift the cylinder head off of the engine where help is preferable. If the cylinder head is stuck do not attempt to pry it between the block and the head, instead place a casting protrusion or a wooden block on the head and use a mallet to apply moderate pressure. Any dirt or debris must be cleaned off the mating face of the engine block and the cylinder head before replacement of the cylinder head gasket the two alignment dowel pins must however not be misplaced or lost. Ensure you use a precision straight edge and the feeler gages to check of the surface against the required specification. When it is time to install the Cylinder Head, make sure that the number 1 cylinder is at Top Dead Center and use new Cylinder Head Bolts . Install a new head gasket and align the dowel pin holes to the corresponding blocks on the engine block and then get the cylinder head properly seated on the block. Do not attempt to use the old cylinder head bolts, instead, it is required that new cylinder head bolts are installed and hand tightened and then tightened in a sequence to a particular torque setting . The following assembly is done in the reverse order starting with replacing oil filter and oil and the last is the coolant.
    Posted by GMPartsGiant Specialist
    Q:
    How to remove cylinder heads on V8 engine on V8 engine on Chevrolet Tahoe? Posted by Customer
    A:
    To take away the cylinder heads, initially disconnect the battery cable and let out the cooling system while making sure that fuel system pressure is relieved. Unfasten intake manifold, coolant pipe, exhaust manifold(s), valve cover(s), rocker arms, pushrods as well as coolant air bleed pipe. For the left cylinder head, remove alternator with its bracket and detach ground strap from back of cylinder head. For right cylinder head take off dipstick tube and disconnect ground cables from front of cylinder head. Loosen the head bolts gradually in reverse order of tightening sequence until they can be removed by hand. Carefully remove the head(s) from the engine so as to prevent damage to mating surfaces. Put heads on blocks of wood for storing. When putting them back, ensure that both cylinder heads and block mating surfaces are clear of debris and clean up with a gasket scraper and brake cleaner checking for any possible machining damage as well. If necessary chase thread holes in block with a tap or brake cleaner followed by compressed air then replace all head bolts with new ones. Place new gaskets onto dowels in block before placing heads on top without interfering with position of gaskets then tighten head bolts to specified torque in recommended sequence using specified tools. Finally install coolant pipe using new gaskets; proceed to reverse removal steps thereafter; add coolant; change oil and filter; start engine & check for proper operation/leaks.
    Posted by GMPartsGiant Specialist
    Q:
    How to remove and reinstall a cylinder head in inline engine on GMC Canyon? Posted by Customer
    A:
    Before putting off the cylinder head, the following steps should be followed; Drain the engine coolant. Thoroughly, you have to take out the valve cover as well as the exhaust manifold, further to the timing chain and the sprockets and do not allow the camshafts to rotate after the timing chain is unloaded. Loosen all cylinder head bolts-there are 13 bolts for the four-cylinder engine and 15 bolts for the five-cylinder engine; use the reverse sequence as it was during the tightening process and replace the old bolts with brand new ones which should be used for retightening. Gently raise the cylinder head off the engine with help, do not pry between the block and head but use a casting or a wooden block and a hammer if it is bonded. Take off the cylinder head gasket and prepare the area of the engine block and the cylinder head without scratching the aluminum or loosing the dowel pins of alignment by using solvents only. Using the precision straightedge and the feeler gauge, one ought to check the surfaces. For installation, the number 1 cylinder head must be pointing at the top-dead-centre and it is highly recommended that new cylinder head bolts be used. Cooled a new head gasket on the block in such a manner that the dowel pins fit correctly, after which the cylinder head must be installed on top of the gasket layer. New cylinder head bolts should be fitted and hand tightened, and then tightened further in the specified sequence to the correct torque. Last, perform the reverse of disassembly, and when replacing the coolant, also do a change of the engine oil and filter.
    Posted by GMPartsGiant Specialist
    Q:
    How to remove cylinder heads on V8 engine on V8 engine on Chevrolet Silverado? Posted by Customer
    A:
    To take away the cylinder heads, initially disconnect the battery cable and let out the cooling system while making sure that fuel system pressure is relieved. Unfasten intake manifold, coolant pipe, exhaust manifold(s), valve cover(s), rocker arms, pushrods as well as coolant air bleed pipe. For the left cylinder head, remove alternator with its bracket and detach ground strap from back of cylinder head. For right cylinder head take off dipstick tube and disconnect ground cables from front of cylinder head. Loosen the head bolts gradually in reverse order of tightening sequence until they can be removed by hand. Carefully remove the head(s) from the engine so as to prevent damage to mating surfaces. Put heads on blocks of wood for storing. When putting them back, ensure that both cylinder heads and block mating surfaces are clear of debris and clean up with a gasket scraper and brake cleaner checking for any possible machining damage as well. If necessary chase thread holes in block with a tap or brake cleaner followed by compressed air then replace all head bolts with new ones. Place new gaskets onto dowels in block before placing heads on top without interfering with position of gaskets then tighten head bolts to specified torque in recommended sequence using specified tools. Finally install coolant pipe using new gaskets; proceed to reverse removal steps thereafter; add coolant; change oil and filter; start engine & check for proper operation/leaks.
    Posted by GMPartsGiant Specialist
    Q:
    How to remove cylinder heads on V8 engine on V8 engine on GMC Sierra? Posted by Customer
    A:
    To take away the cylinder heads, initially disconnect the battery cable and let out the cooling system while making sure that fuel system pressure is relieved. Unfasten intake manifold, coolant pipe, exhaust manifold(s), valve cover(s), rocker arms, pushrods as well as coolant air bleed pipe. For the left cylinder head, remove alternator with its bracket and detach ground strap from back of cylinder head. For right cylinder head take off dipstick tube and disconnect ground cables from front of cylinder head. Loosen the head bolts gradually in reverse order of tightening sequence until they can be removed by hand. Carefully remove the head(s) from the engine so as to prevent damage to mating surfaces. Put heads on blocks of wood for storing. When putting them back, ensure that both cylinder heads and block mating surfaces are clear of debris and clean up with a gasket scraper and brake cleaner checking for any possible machining damage as well. If necessary chase thread holes in block with a tap or brake cleaner followed by compressed air then replace all head bolts with new ones. Place new gaskets onto dowels in block before placing heads on top without interfering with position of gaskets then tighten head bolts to specified torque in recommended sequence using specified tools. Finally install coolant pipe using new gaskets; proceed to reverse removal steps thereafter; add coolant; change oil and filter; start engine & check for proper operation/leaks.
    Posted by GMPartsGiant Specialist
    Q:
    How to remove cylinder heads on V8 engine on V8 engine on Chevrolet Suburban? Posted by Customer
    A:
    To take away the cylinder heads, initially disconnect the battery cable and let out the cooling system while making sure that fuel system pressure is relieved. Unfasten intake manifold, coolant pipe, exhaust manifold(s), valve cover(s), rocker arms, pushrods as well as coolant air bleed pipe. For the left cylinder head, remove alternator with its bracket and detach ground strap from back of cylinder head. For right cylinder head take off dipstick tube and disconnect ground cables from front of cylinder head. Loosen the head bolts gradually in reverse order of tightening sequence until they can be removed by hand. Carefully remove the head(s) from the engine so as to prevent damage to mating surfaces. Put heads on blocks of wood for storing. When putting them back, ensure that both cylinder heads and block mating surfaces are clear of debris and clean up with a gasket scraper and brake cleaner checking for any possible machining damage as well. If necessary chase thread holes in block with a tap or brake cleaner followed by compressed air then replace all head bolts with new ones. Place new gaskets onto dowels in block before placing heads on top without interfering with position of gaskets then tighten head bolts to specified torque in recommended sequence using specified tools. Finally install coolant pipe using new gaskets; proceed to reverse removal steps thereafter; add coolant; change oil and filter; start engine & check for proper operation/leaks.
    Posted by GMPartsGiant Specialist
    Q:
    How to remove cylinder heads on V8 engine on GMC Yukon? Posted by Customer
    A:
    To take away the cylinder heads, initially disconnect the battery cable and let out the cooling system while making sure that fuel system pressure is relieved. Unfasten intake manifold, coolant pipe, exhaust manifold(s), valve cover(s), rocker arms, pushrods as well as coolant air bleed pipe. For the left cylinder head, remove alternator with its bracket and detach ground strap from back of cylinder head. For right cylinder head take off dipstick tube and disconnect ground cables from front of cylinder head. Loosen the head bolts gradually in reverse order of tightening sequence until they can be removed by hand. Carefully remove the head(s) from the engine so as to prevent damage to mating surfaces. Put heads on blocks of wood for storing. When putting them back, ensure that both cylinder heads and block mating surfaces are clear of debris and clean up with a gasket scraper and brake cleaner checking for any possible machining damage as well. If necessary chase thread holes in block with a tap or brake cleaner followed by compressed air then replace all head bolts with new ones. Place new gaskets onto dowels in block before placing heads on top without interfering with position of gaskets then tighten head bolts to specified torque in recommended sequence using specified tools. Finally install coolant pipe using new gaskets; proceed to reverse removal steps thereafter; add coolant; change oil and filter; start engine & check for proper operation/leaks.
    Posted by GMPartsGiant Specialist
    Q:
    How should the new head bolts be installed for the 2005 Chevrolet Trailblazer? Posted by Customer
    A:
    Coat the threads of the new 8mm head bolts with a medium-strength threadlocking compound before installing them, followed by the new 11mm head bolts, tightening them finger tight and then to the specified torque in the recommended sequence.
    Posted by GMPartsGiant Specialist
    See expert answers on similar Cylinder Head
    If you have any questions about this product, please don't hesitate to ask us. We will be happy to help you!

Genuine GM Part 12629058, the Right Choice

To ensure reliability, purchase GM part # 12629058 Head Assembly, Cyl (W/ Valve). It is sometimes referred to as Hummer Cylinder Head. Directly from GM, genuine parts are superb with regards to quality, longevity, and fit. Every single part passed stringent quality testing, so you can be sure that it's safe, durable, and built to perform like your original parts. This part fits specific Hummer H3, H3T models.

GMPartsGiant.com is a leading supplier of genuine GM parts and accessories such as GM 12629058 Head Assembly, Cyl (W/ Valve). You're certainly in the right place if you're searching for the great cost-effective OEM GM parts. Look no further than our vast inventory of genuine GM parts offered at unbeatable online prices, all of which are backed by the manufacturer's warranty. Not to forget, our hassle-free return policy and quick delivery service ensure a smooth shopping experience for you. For detailed Hummer parts information, click here.

Why choose GM Parts Giant

  • Dedicated Service

    Your complete satisfaction is our #1 goal

  • Lowest Prices

    Best deals on genuine OE parts from dealerships

  • Fast Delivery

    Orders are processed and delivered promptly