Make sure this part fits

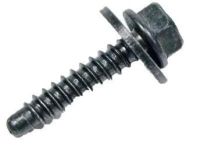
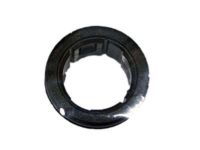
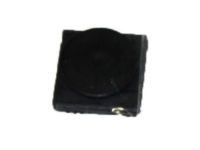
Hummer 11561629 Nut, Push In

2003-2010 Hummer

Customer Questions & Expert Answers (28)
GM 11561629 Nut, Push In
  • Part Description
    RETAINER, Instrument Panel
  • Replaces
    15235111
  • Manufacturer
    General Motors
Make sure this part fits
$7.27 MSRP: $11.44
You Save: $4.17 (37%)
Ships in 1-3 Business Days
1
ADD TO CART
  • Related Parts
  • Product Specifications
  • Vehicle Fitment
  • Customer Questions & Expert Answers
  • Product Specifications

    BrandGenuine Hummer
    Manufacturer Part Number11561629
    Part DescriptionRETAINER, Instrument Panel
    Item Dimensions0.5 x 0.5 x 0.5 inches
    ConditionNew
    Replaces15235111
    ManufacturerGeneral Motors
    SKU11561629
    WarrantyThis genuine GM part is guaranteed by GM's factory warranty.
    Shipping & ReturnShipping Policy Return Policy
    Warning: California's Proposition 65
  • Vehicle Fitment

    Year Make Model Engine Important vehicle option details
    2003-2009 Hummer H28 Cyl 6.0L, 8 Cyl 6.2L, 8 Cyl 6.2L FlexH2 HUMMER, PICKUP, SUV
    2006-2010 Hummer H35 Cyl 3.5L, 5 Cyl 3.7L, 8 Cyl 5.3LCREW CAB, SUV
    2009-2010 Hummer H3T5 Cyl 3.7L, 8 Cyl 5.3LCREW CAB, SUV
  • Customer Questions & Expert Answers

    Q:
    I am wonder if this is complete and correct part for my vehicle. Posted by GMPartsGiant Specialist
    A:
    You can Select Your Vehicle to check if 11561629 fits your vehicle.
    Posted by GMPartsGiant Specialist
    Q:
    How to remove various components of the Center Console on Buick Enclave? Posted by Customer
    A:
    First, remove the front seats and the shifter console trim. Disconnect the transmission shift cable from the shifter and disconnect the cable from the center console. Remove the center console mounting fasteners. lift up the console, disconnect any electrical connectors, then remove the console. The installation is the reverse of removal.
    Posted by GMPartsGiant Specialist
    Q:
    How to remove the center console on Cadillac CTS? Posted by Customer
    A:
    To begin with the 2007 and earlier models, the front seats need to be put to their rear position; the console side trim panels should be pried out; the bolts in front of the console on each side removed and the seats should then be moved forward. Fourth, take out the four bolts at the rear of console, each on the two sides of the car. Depress the shift lever trim ring by pushing on the part-number tab and pull the trim ring and wiring away from the console. Raise the console and pull out all the electrical connectors before taking out the center console: the process of center console installation is the reverse of its removal. For 2008 and later models, move the front seats to their farthest forward position and lift console outer trim. Release the shift boot from the shift console trim ring and, in case of models with manual transmission, the shifter handle must also be pulled out. To remove this it is necessary to pry out the shift console trim ring and for vehicles with manual transmission the shift boot and the ring are to be removed as one piece. For 2010 and later models: there are several screws on the back side of the panel to be removed, then the top center console top panel can be pulled up forward. Take the console storage compartment fasteners and then lift out the compartment, finally, disconnect by the connectors. Fold the forward most part of the rear seats completely backward, then dismantle the carpet entirely so as to access the bolts, then put back the seats. Raise the carpet to unscrew the rear bolts of the console, two of them while others can be at the top side of the console. Last of all, raise the console, pull out all the electrical connectors and then at last, you can pull out the center console while installation is the reverse of the process.
    Posted by GMPartsGiant Specialist
    Q:
    How to remove the Center Console on Cadillac DTS? Posted by Customer
    A:
    Apply the parking brake and place the gear shift lever in neutral and remove the left and right side trim panels and the gear shift trim plate by gently prying them out of their retaining clips with a flat-blade screwdriver. Remove the left and right side floor console screws, then lift the console up and over the shift lever. Disconnect any electrical connectors and remove the console from the vehicle. Installation is the reverse of removal.
    Posted by GMPartsGiant Specialist
    Q:
    How to remove the Center Console and overhead consoles on Chevrolet Avalanche? Posted by Customer
    A:
    To take out the center floor console, you should first remove the front seats and either pull or pry the front tray out. Also, any electrical connectors for wiring harnesses that go to the main instrument panel must be disconnected by you and then forward trim on each side of the console removed. Be careful so as not to damage anything while sliding the console out of the vehicle. To remove the front overhead console, therefore, what is required is removal of map light lens and mounting screws before pulling or prying down on it in order to release its retainers. Last but not least, unplug all electrical connectors and get rid of this unit. On rear overhead console, remove DVD player if equipped mount screws; pull or pry down on it in order to release its retainers; unplug all electrical connectors and take it off. Conversely, set up these devices using an opposite way which one used during their removal process.
    Posted by GMPartsGiant Specialist
    Q:
    How to remove the Center Console on Cadillac Escalade? Posted by Customer
    A:
    To remove the full center floor console, start by prying off the center console trim panel using a flat bladed trim tool, beginning at a corner and working around until all fasteners are released, then remove the trim panel. Move both seats forward and use the trim tool to pry loose the rear edge of the side panels; the driver's side panel can be slid rearward after releasing it, while the passenger side panel requires releasing pressure clips with the trim tool before removal. Next, remove the two screws securing the center console to the dash panel, which are located under the upper panel trim. Pull back the carpet to expose four screws securing the back part of the center console to the body, located on the rear lower section on each side. Tilt the back of the console toward the dash to disconnect electrical connectors, then lift the console and pull it toward the rear of the vehicle for removal, with installation being the reverse of removal. For the half center console, slide the front seats back to remove the front bolts, then slide them forward to remove the rear bolts. Lift the console to disconnect electrical connectors before removing it, with installation being the reverse of removal. For the overhead console, pry off the center trim with a flat bladed trim tool, disconnect electrical connectors, remove two mounting screws, and pull the console down to release remaining clips. Disconnect electrical connectors again, with installation being the reverse of removal. If equipped with a DVD player in the rear overhead console, remove mounting screws, pull or pry the console down to release retainers, unplug electrical connectors, and remove the console, with installation being the reverse of removal.
    Posted by GMPartsGiant Specialist
    Q:
    How to remove and replace the center console on Chevrolet Camaro? Posted by Customer
    A:
    Slide the front seats all the way to the rear and carefully pry off the console outer trim panels from both sides of the center console. Remove the rear cover fasteners and lift the rear cover off. Pull up on the parking brake handle and place the shifter in low gear or all the way to the back. Using a trim tool, pry the rear of the shift console trim up, then rotate the trim panel over and disconnect the electrical connectors. For models equipped with gauges, remove the gauge assembly mounting screws and gauges from the shift console trim panel. Remove the transmission control shift knob and shift indicator panel. With the rear cover off the center console, disconnect the electrical connectors to the power outlet and USB outlet. To replace the power outlet or USB outlet from the storage compartment, pull the outlets from the storage compartment and disconnect the electrical connectors. Remove the console fasteners, then lift the console up and out, disconnecting any remaining clips. Disconnect all electrical connectors from the console and remove it. Installation is the reverse of removal.
    Posted by GMPartsGiant Specialist
    Q:
    How to remove and install the center fold down stowage and center console on Chevrolet Corvette? Posted by Customer
    A:
    To remove the center fold down stowage (if equipped), open the stowage lid, then take out the four screws securing the stowage compartment to the rear of the center console and brackets. Pull the stowage compartment up and off the brackets, and installation follows the reverse process. For the rear section of the center console, first remove the center fold down stowage compartment (if equipped), then open the center console door. Use a small flat bladed screwdriver or trim tool to pull up on the back part of the traction control switch to disengage the tabs, and disconnect the electrical connector. Pry the trim caps off the console fasteners, remove the four nuts securing the rear section, and disconnect the power supply socket. Lift the rear of the console slightly and pull it backward to disengage the front tabs, then disconnect the electrical connections between the rear section and the center console before removing the rear section from the vehicle, with installation being the reverse of removal. For the front section, start by removing the rear storage compartment and the rear center console section, ensuring to press in on the edges of the shift boot for manual transmission vehicles to release the tabs. Remove the ashtray to access the hidden screw behind it, and do the same with the instrument panel accessory trim grill. Take out the screws securing the center console trim, apply slight pressure near the curved part of the trim while pulling it toward the center of the vehicle, and lift the rear section slightly to clear the upright tabs. Pull the console trim out enough to disconnect the electrical connections, and for manual transmission vehicles, turn the shift boot trim at an angle to pass it through the console trim plate, while for automatic transmission vehicles, the shift stalk and gear selector remain in place. Installation is the reverse of removal.
    Posted by GMPartsGiant Specialist
    Q:
    How to remove the center console and front seats on Chevrolet Colorado? Posted by Customer
    A:
    On models with manual transmission and a small console, lift up on the console to release the retainers holding it to the floor, and for 2008 and later models, remove the two inner rear seat track bolts from both seats. For models with a large console, open the console lid and remove the screws securing the storage bin, then lift the bin off and carefully pry up the console tray. Remove the passenger front bucket seat in regular-cab models, or the two front bucket seat track bolts in other models. Next, remove the console mounting screws, which include those under the storage bin and two floor bolts at the rear of the console. Installation follows the reverse order of removal.
    Posted by GMPartsGiant Specialist
    Q:
    How to remove and install the Center Console on Chevrolet Cobalt? Posted by Customer
    A:
    Take the cable off the negative battery connection point. Push the brake, block the wheels, and shift the transmission into Neutral. When using a manual transmission, detach the shift knob. Then use a flat tool to lift a small piece of the shifter boot, and separate it from the stick. For cars with automatic transmission, utilize a plastic trim tool to free the shift bezel. Stick a trim tool underneath the trim panel surrounding the parking brake handle to lift it up. Unplug the two electrical connectors under the front panel and the ones controlling the power outlets before lifting off the top trim plate. Carefully remove the left and right side panels. Unscrew the two screws holding the back armrest portion of the console by taking out the back cup holder, and then removing the two bolts. Carefully unpunch the screws in front of the console. Grab the main panel and pull it off by loosening the screws in the middle of the console. Then lift and forward pull the panel out. Installation is the reverse of removal. Reconnect the battery.
    Posted by GMPartsGiant Specialist
    Q:
    How to remove the Center Console on Chevrolet Equinox? Posted by Customer
    A:
    Remove the screw covers and screws from the lower sides of the console, then lift the console. Disconnect the electrical connector for the wiring harness before removing the console entirely from the floor. Remember, installation is simply the reverse of removal.
    Posted by GMPartsGiant Specialist
    Q:
    How to disconnect and remove the Center Console on Chevrolet Cruze? Posted by Customer
    A:
    Disconnect the cable from the negative battery terminal. Use a trim tool to pry out the trim panel from each side of the console. For 2015 and earlier models, pry out the transaxle shifter bezel and disconnect the electrical connectors from the panel. Remove the center storage compartment screws and pull the storage compartment out of the console. Pry out the rear panel to disengage the retaining clips and disconnect the electrical connector. Remove the top trim plate screw cover and the screw. Open the armrest, remove the small piece of carpet at the bottom of the storage compartment, and take out the mounting screws. Remove the perimeter mounting screws around the console, lift off the main console panel, and disconnect the electrical connectors at the front. Reconnect the battery. For 2016 and later models, remove the instrument panel fuse block access cover from the front of the console and disengage the access cover frame fasteners, carefully prying the panel away from the instrument panel. On manual transaxle models, place the gear shift lever into reverse, disengage the retaining tabs around the shift boot, and lift it up to disconnect the electrical connectors. On automatic transaxle models, disengage the clips starting at the rear of the boot, lift it over the shift handle, and remove the shift lever knob. For models with a parking brake handle, pull up on the handle and use a trim tool to disengage the brake lever boot retaining clips. There are three mounting screws on both sides of the console; slide the front seats to access and remove the screws. Lift the console up, disconnect any electrical connectors, and remove the console. Installation is the reverse of removal.
    Posted by GMPartsGiant Specialist
    Q:
    How to remove and install the center console on Chevrolet Impala? Posted by Customer
    A:
    Turn the ignition key to the On position, depress the brake pedal, then place the shifter in the drive position. Disconnect the cable from the negative battery terminal. Remove the center console shift lever trim panel by carefully prying it off with a trim stick. Remove the console retaining screws by taking out the fasteners at the front of the console, opening the lid to the console bin, and removing the mat before taking out the four fasteners. Carefully lift the console up and over the shifter, disconnect any electrical connectors, then remove it from the vehicle. Installation is the reverse of removal. Move the shift lever back into the Park position, turn the ignition key to off, then reconnect the cable to the negative terminal of the battery.
    Posted by GMPartsGiant Specialist
    Q:
    How to remove and install the center console on Chevrolet Monte Carlo? Posted by Customer
    A:
    Turn the ignition key to the On position, depress the brake pedal, then place the shifter in the drive position. Disconnect the cable from the negative battery terminal. Remove the center console shift lever trim panel by carefully prying it off with a trim stick. Remove the console retaining screws by taking out the fasteners at the front of the console, opening the lid to the console bin, and removing the mat before taking out the four fasteners. Carefully lift the console up and over the shifter, disconnect any electrical connectors, then remove it from the vehicle. Installation is the reverse of removal. Move the shift lever back into the Park position, turn the ignition key to off, then reconnect the cable to the negative terminal of the battery.
    Posted by GMPartsGiant Specialist
    Q:
    How to remove the center console on Chevrolet Malibu? Posted by Customer
    A:
    For 2015 and earlier models (and 2016 Malibu Limited), begin by using a plastic trim tool to pry out the center dash trim panel and vents surrounding the radio and air control assemblies. Next, remove the shift lever knob and boot, then pry up and take out the shift indicator panel from the center console trim plate. Continue by prying out and removing the center console trim plate from the top of the console, moving the front seats all the way back to pry out and remove the center console side trim panels. Remove the four screws securing the lowest dash control panel above the center console, pull out the panel, and disconnect the electrical connectors. Pry out and remove the center console trim panel at the rear, along with the lower-rear fastener trim covers. Next, remove the center console fasteners, which include four along the bottom edges (two in front and two in back) and two securing the console to the dash. Finally, disconnect any electrical connectors and remove the center console from the vehicle, with installation being the reverse of removal. For 2016 and later models (except 2016 Malibu Limited), place the shift lever in the Neutral position and disconnect the cable from the negative terminal of the battery. Remove the shift lever knob and shift panel, then disconnect the main electrical connector to the console and remove the console front bolts, ensuring to release the red safety tab on the main connector before lifting the bail arm. Remove the dust cap and the front and rear center console side screws, adjusting the seat as necessary to access all fasteners. Lift and slide the console slightly rearward, then carefully guide it out of the vehicle, with installation being the reverse of removal.
    Posted by GMPartsGiant Specialist
    Q:
    How to remove the Center Console and overhead consoles on Chevrolet Silverado? Posted by Customer
    A:
    To take out the center floor console, you should first remove the front seats and either pull or pry the front tray out. Also, any electrical connectors for wiring harnesses that go to the main instrument panel must be disconnected by you and then forward trim on each side of the console removed. Be careful so as not to damage anything while sliding the console out of the vehicle. To remove the front overhead console, therefore, what is required is removal of map light lens and mounting screws before pulling or prying down on it in order to release its retainers. Last but not least, unplug all electrical connectors and get rid of this unit. On rear overhead console, remove DVD player if equipped mount screws; pull or pry down on it in order to release its retainers; unplug all electrical connectors and take it off. Conversely, set up these devices using an opposite way which one used during their removal process.
    Posted by GMPartsGiant Specialist
    Q:
    How to remove the center console and overhead consoles on GMC Sierra? Posted by Customer
    A:
    To take out the center floor console, you should first remove the front seats and either pull or pry the front tray out. Also, any electrical connectors for wiring harnesses that go to the main instrument panel must be disconnected by you and then forward trim on each side of the console removed. Be careful so as not to damage anything while sliding the console out of the vehicle. To remove the front overhead console, therefore, what is required is removal of map light lens and mounting screws before pulling or prying down on it in order to release its retainers. Last but not least, unplug all electrical connectors and get rid of this unit. On rear overhead console, remove DVD player if equipped mount screws; pull or pry down on it in order to release its retainers; unplug all electrical connectors and take it off. Conversely, set up these devices using an opposite way which one used during their removal process.
    Posted by GMPartsGiant Specialist
    Q:
    How to remove various components of the Center Console on Chevrolet Traverse? Posted by Customer
    A:
    First, remove the front seats and the shifter console trim. Disconnect the transmission shift cable from the shifter and disconnect the cable from the center console. Remove the center console mounting fasteners. lift up the console, disconnect any electrical connectors, then remove the console. The installation is the reverse of removal.
    Posted by GMPartsGiant Specialist
    Q:
    How to remove and install the center console on Pontiac G6? Posted by Customer
    A:
    Turn the ignition key to the On position, depress the brake pedal, and place the shifter in the drive position. Disconnect the cable from the negative battery terminal. Remove the center console side panels by carefully detaching them. Remove the console retaining screws located at the front and rear of the center console. Pry up the rear of the parking brake lever bezel using a plastic trim tool or a screwdriver wrapped with tape, then remove the bezel. Carefully lift the console up and over the shifter, disconnect any electrical connectors, and remove it from the vehicle. Installation is the reverse of removal. Move the shift lever back into the Park position, turn the ignition key to Out, and reconnect the cable to the negative terminal of the battery.
    Posted by GMPartsGiant Specialist
    Q:
    How to begin the process of removing the center console on Chevrolet Trailblazer? Posted by Customer
    A:
    The procedure requires stopping wheel movement because the vehicle needs shifting out of Park position and releasing the handbrake lever. You can remove the shift lever setscrew and loosen its setscrew preceding a process to free the clips at the boot's bottom while lifting the knob and boot off the shift lever. Begin by unlocking the console lid and removing six storage bin maintaining screws which hold the console together. Finish by lifting the storage bin away from the place. You should remove the console mounting screws but keep the parking brake lever in the fully extended position. Reach below the console to disconnect the electrical wires then raise the parking brake level half down to remove the console from the car. The front overhead console removal requires you to detach its electrical connectors after first disengaging the front tabs and then removing the rear screws followed by lowering the console. The overhead rear console needs removal by getting rid of four attachment screws before lowering the console to remove it completely. The procedure to install items follows the same steps as uninstallation.
    Posted by GMPartsGiant Specialist
    Q:
    How to remove the center floor Center Console and overhead consoles on Chevrolet Suburban? Posted by Customer
    A:
    To take out the center floor console, you should first remove the front seats and either pull or pry the front tray out. Also, any electrical connectors for wiring harnesses that go to the main instrument panel must be disconnected by you and then forward trim on each side of the console removed. Be careful so as not to damage anything while sliding the console out of the vehicle. To remove the front overhead console, therefore, what is required is removal of map light lens and mounting screws before pulling or prying down on it in order to release its retainers. Last but not least, unplug all electrical connectors and get rid of this unit. On rear overhead console, remove DVD player if equipped mount screws; pull or pry down on it in order to release its retainers; unplug all electrical connectors and take it off. Conversely, set up these devices using an opposite way which one used during their removal process.
    Posted by GMPartsGiant Specialist
    Q:
    How to remove the center floor Center Console and overhead consoles on Chevrolet Tahoe? Posted by Customer
    A:
    To take out the center floor console, you should first remove the front seats and either pull or pry the front tray out. Also, any electrical connectors for wiring harnesses that go to the main instrument panel must be disconnected by you and then forward trim on each side of the console removed. Be careful so as not to damage anything while sliding the console out of the vehicle. To remove the front overhead console, therefore, what is required is removal of map light lens and mounting screws before pulling or prying down on it in order to release its retainers. Last but not least, unplug all electrical connectors and get rid of this unit. On rear overhead console, remove DVD player if equipped mount screws; pull or pry down on it in order to release its retainers; unplug all electrical connectors and take it off. Conversely, set up these devices using an opposite way which one used during their removal process.
    Posted by GMPartsGiant Specialist
    Q:
    How to remove the center console and overhead consoles on GMC Yukon? Posted by Customer
    A:
    To take out the center floor console, you should first remove the front seats and either pull or pry the front tray out. Also, any electrical connectors for wiring harnesses that go to the main instrument panel must be disconnected by you and then forward trim on each side of the console removed. Be careful so as not to damage anything while sliding the console out of the vehicle. To remove the front overhead console, therefore, what is required is removal of map light lens and mounting screws before pulling or prying down on it in order to release its retainers. Last but not least, unplug all electrical connectors and get rid of this unit. On rear overhead console, remove DVD player if equipped mount screws; pull or pry down on it in order to release its retainers; unplug all electrical connectors and take it off. Conversely, set up these devices using an opposite way which one used during their removal process.
    Posted by GMPartsGiant Specialist
    Q:
    How to remove the Center Console on GMC Terrain? Posted by Customer
    A:
    Remove the screw covers and screws from the lower sides of the console, then lift the console. Disconnect the electrical connector for the wiring harness before removing the console entirely from the floor. Remember, installation is simply the reverse of removal.
    Posted by GMPartsGiant Specialist
    Q:
    How to remove the center console and front seats on GMC Canyon? Posted by Customer
    A:
    On models with manual transmission and a small console, lift up on the console to release the retainers holding it to the floor, and for 2008 and later models, remove the two inner rear seat track bolts from both seats. For models with a large console, open the console lid and remove the screws securing the storage bin, then lift the bin off and carefully pry up the console tray. Remove the passenger front bucket seat in regular-cab models, or the two front bucket seat track bolts in other models. Next, remove the console mounting screws, which include those under the storage bin and two floor bolts at the rear of the console. Installation follows the reverse order of removal.
    Posted by GMPartsGiant Specialist
    Q:
    How to remove and install the Center Console on Saturn ION? Posted by Customer
    A:
    Take off the negative battery connector before continuing. With your parking brake on and blocking both wheels, change your transmission into Neutral. To remove the shifter, unscrew the knob on manual transmission cars, then lift the front lip of the shifter boot off the lever and take out the boot. Use a trim tool to lift the middle accessory panel; the cupholder comes out attached to that part. Disconnect the electrical connector, if equipped. Before pulling off the bezel around the shifter, use a thin plastic tool to peel it out easily on models with automatic transmission. Remove the top trim plate of the console. Carefully remove the left and right side panels. Rubber boot covering the parking brake handle, lift the boot off the handle. Pull off the screws holding the back part of the console, then disconnect its electrical wire. Start by unscrewing the front of the console panel and then take it off. Installation is the reverse of removal. Reconnect the battery.
    Posted by GMPartsGiant Specialist
    Q:
    How to disconnect and remove the Center Console on Saturn Vue? Posted by Customer
    A:
    Disconnect the cable from the negative battery terminal. Remove the screws from the lower sides of the console, lifting it while disconnecting any wiring as you go; adjusting the seats may be necessary to access the screws. For early models, pull out the liner from the cup holder to access and remove the screw beneath it. Lift the back of the console and disconnect the wiring harness if equipped. Remove the console from the floor, separating the upper section from the lower if needed by removing two screws from each side and disconnecting the wiring. Installation is the reverse of removal.
    Posted by GMPartsGiant Specialist
    Q:
    How do you install the front seats for the 2012 GMC Acadia? Posted by Customer
    A:
    Simply reverse the steps of removal.
    Posted by GMPartsGiant Specialist
    See expert answers on similar Center Console
    If you have any questions about this product, please don't hesitate to ask us. We will be happy to help you!

Genuine GM Part 11561629, the Right Choice

To ensure reliability, purchase GM part # 11561629 Nut, Push In. It is sometimes referred to as Hummer Center Console. Directly from GM, genuine parts are superb with regards to quality, longevity, and fit. Every single part passed stringent quality testing, so you can be sure that it's safe, durable, and built to perform like your original parts. This part fits specific Hummer H2, H3, H3T models.

GMPartsGiant.com is a leading supplier of genuine GM parts and accessories such as GM 11561629 Nut, Push In. You're certainly in the right place if you're searching for the great cost-effective OEM GM parts. Look no further than our vast inventory of genuine GM parts offered at unbeatable online prices, all of which are backed by the manufacturer's warranty. Not to forget, our hassle-free return policy and quick delivery service ensure a smooth shopping experience for you. For detailed Hummer parts information, click here.

Why choose GM Parts Giant

  • Dedicated Service

    Your complete satisfaction is our #1 goal

  • Lowest Prices

    Best deals on genuine OE parts from dealerships

  • Fast Delivery

    Orders are processed and delivered promptly