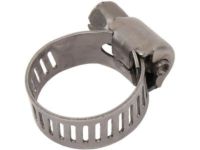
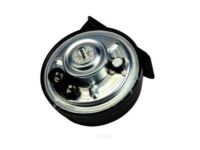
Make sure this part fits

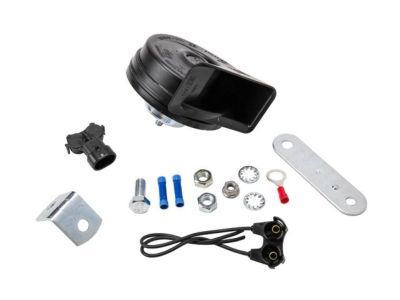
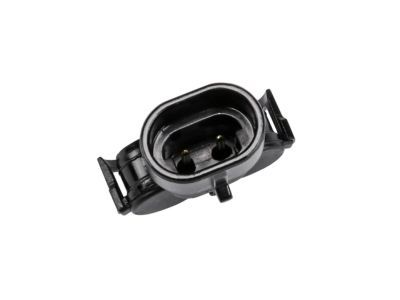
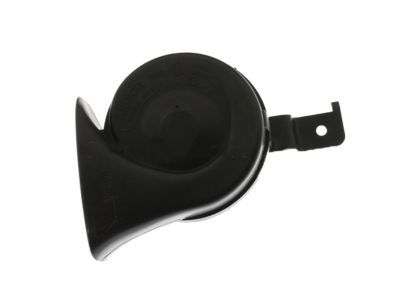
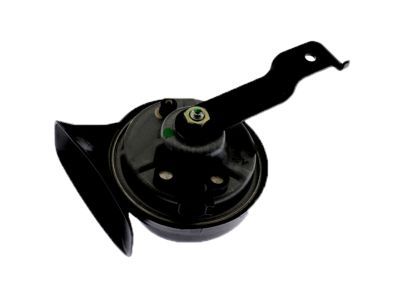
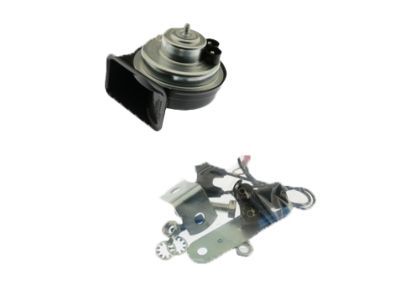
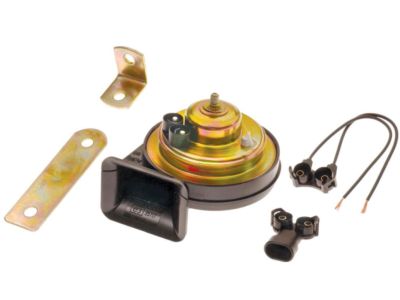
Oldsmobile 84594590 HORN KIT,SINGLE (LOW NOTE)

1982-2004 Oldsmobile

Customer Questions & Expert Answers (35)
GM 84594590 HORN KIT,SINGLE (LOW NOTE)
  • Part Description
    HORN KIT,SINGLE (LOW NOTE)
  • Replaces
    01999193, 02029366, 01999276, 01999284, 01999247, 01999194, 01892163, 01999198, 01892240, 01999249, 01999241, 01999252, 01892162, 01999160, 01999714, 10456443, 01999169, 01999218, 15017320, 01999172, 15014988, 15043345, 15248349, 01999159, 15172409, 1892240, 1999159, 1999172, 1999169, 1999241, 1999714, 1999247, 1999252, 1999284, 1999095, 1999276, 1999715, 2029366, 1999193, 1999160, 1999194, 25696075, 84614017, 22658714, 89046916, 01999095, 01999715, 01999221, 10402064, 10414427, 10298957, 10456327, 12368065, 12368062, 12368064, 15030677, 15059526, 15013182, 10456321, 15125048, 15072099, 15710911, 15018062, 1892163, 1892162, 15922907, 1999221, 1999218, 1999249, 25718727, 1999198, 89046918, 15857765, 19301082
  • Manufacturer
    General Motors
Make sure this part fits
$48.86 MSRP: $76.83
You Save: $27.97 (37%)
Ships in 1-2 Business Days
1
ADD TO CART
  • Related Parts
  • Product Specifications
  • Vehicle Fitment
  • Customer Questions & Expert Answers
  • Product Specifications

    BrandGenuine Oldsmobile
    Manufacturer Part Number84594590
    Part DescriptionHORN KIT,SINGLE (LOW NOTE)
    Other NamesControl Module, Horn, Lower Note Horn
    Item Dimensions6.6 x 4.3 x 4.5 inches
    Item Weight0.90 Pounds
    ConditionNew
    Fitment TypeDirect Replacement
    Replaces01999193, 02029366, 01999276, 01999284, 01999247, 01999194, 01892163, 01999198, 01892240, 01999249, 01999241, 01999252, 01892162, 01999160, 01999714, 10456443, 01999169, 01999218, 15017320, 01999172, 15014988, 15043345, 15248349, 01999159, 15172409, 1892240, 1999159, 1999172, 1999169, 1999241, 1999714, 1999247, 1999252, 1999284, 1999095, 1999276, 1999715, 2029366, 1999193, 1999160, 1999194, 25696075, 84614017, 22658714, 89046916, 01999095, 01999715, 01999221, 10402064, 10414427, 10298957, 10456327, 12368065, 12368062, 12368064, 15030677, 15059526, 15013182, 10456321, 15125048, 15072099, 15710911, 15018062, 1892163, 1892162, 15922907, 1999221, 1999218, 1999249, 25718727, 1999198, 89046918, 15857765, 19301082
    ManufacturerGeneral Motors
    SKU84594590
    WarrantyThis genuine GM part is guaranteed by GM's factory warranty.
    Shipping & ReturnShipping Policy Return Policy
    Warning: California's Proposition 65
  • Vehicle Fitment

    Year Make Model Engine Important vehicle option details
    1992-1999 Oldsmobile 886 Cyl 3.8L4 DOOR, 50TH ANNIVERSARY 4 DOOR, LSS 4 DOOR, ROYALE 4 DOOR, ROYALE LS, ROYALE LS 4 DOOR, ROYALE LSS 4 DOOR
    1982-1990 Oldsmobile 986 Cyl 3.0L, 6 Cyl 3.8L, 6 Cyl 4.1L, 6 Cyl 4.3L Diesel, 8 Cyl 5.0L, 8 Cyl 5.7L DieselREGENCY 2 DOOR, REGENCY 4 DOOR, REGENCY BROUGH 2 DOOR, REGENCY BROUGH 4 DOOR, REGENCY BROUGHAM, TOURING SEDAN
    1992-1998 Oldsmobile Achieva4 Cyl 2.3L, 4 Cyl 2.4L, 6 Cyl 3.1L, 6 Cyl 3.3L2 DOOR, 4 DOOR, S 2 DOOR, S 4 DOOR, SC 2 DOOR, SEDAN LEVEL I, SEDAN LEVEL II, SL 2 DOOR, SL 4 DOOR
    1999-2004 Oldsmobile Alero4 Cyl 2.2L, 4 Cyl 2.4L, 6 Cyl 3.4L2 DOOR, 4 DOOR, GL COUPE 2 DOOR, GL SEDAN 4 DOOR, GX 2 DOOR, GX SEDAN 4 DOOR, LEVEL I 2 DOOR, LEVEL I 4 DOOR, LEVEL II COUPE 2 DOOR, LEVEL II SEDAN 4 DOOR
    1995-1999 Oldsmobile Aurora8 Cyl 4.0L4 DOOR, AURORA
    2002-2004, 1996-1998, 1991-1994 Oldsmobile Bravada6 Cyl 4.2L, 6 Cyl 4.3L4 DOOR, BRAVADA
    1985-1991 Oldsmobile Calais4 Cyl 2.3L, 4 Cyl 2.5L, 6 Cyl 3.0L, 6 Cyl 3.3L2 DOOR, 4 DOOR, INTERNATIONAL 2 DOOR, INTERNATIONAL 4 DOOR, S 2 DOOR, S 4 DOOR, SL 2 DOOR, SL 4 DOOR, SUPREME 2 DOOR, SUPREME 4 DOOR
    1982-1992 Oldsmobile Custom Cruiser8 Cyl 5.0L, 8 Cyl 5.7L, 8 Cyl 5.7L Diesel2 DOOR, 4 DOOR, BROUGHAM 2 DOOR, BROUGHAM 4 DOOR, BROUGHAM LS 4 DOOR, RWD, STATION WAGON
    1982-1999 Oldsmobile Cutlass4 Cyl 2.2L, 4 Cyl 2.3L, 4 Cyl 2.5L, 6 Cyl 2.8L, 6 Cyl 3.0L, 6 Cyl 3.1L, 6 Cyl 3.3L, 6 Cyl 3.4L, 6 Cyl 3.8L, 6 Cyl 4.3L Diesel, 8 Cyl 4.3L, 8 Cyl 5.0L, 8 Cyl 5.7L Diesel2 DOOR, 4 DOOR, BROUGHAM 2 DOOR, BROUGHAM 2 DOOR NOTCHBACK, BROUGHAM 4 DOOR, BROUGHAM SL 2 DOOR, BROUGHAM STATION WAGON, CUTLASS CALAIS, CUTLASS CRUISER, INTERNAL 2 DOOR, LS 2 DOOR, LS 2 DOOR NOTCHBACK, LS 4 DOOR, LS STATION WAGON, S 2 DOOR, S 4 DOOR, S STATION WAGON, SEDAN LEVEL I, SEDAN LEVEL II, SL 2 DOOR, SL 4 DOOR, SL STATION WAGON, STATION WAGON
    1982-1991 Oldsmobile Delta 886 Cyl 3.0L, 6 Cyl 3.8L, 8 Cyl 4.3L, 8 Cyl 5.0L, 8 Cyl 5.7L Diesel2 DOOR, 4 DOOR, BROUGHAM 2 DOOR, BROUGHAM 4 DOOR, BROUGHAM LS 4 DOOR, ROYALE 2 DOOR, ROYALE 4 DOOR, ROYALE BROUGHAM 2 DOOR, ROYALE BROUGHAM 4 DOOR, RWD, STATION WAGON
    View More
  • Customer Questions & Expert Answers

    Q:
    Do these parts fit my vehicle? Posted by GMPartsGiant Specialist
    A:
    You can Select Your Vehicle to check if 84594590 fits your vehicle.
    Posted by GMPartsGiant Specialist
    Q:
    How to Remove and Install Horns on Buick Enclave? Posted by Customer
    A:
    Remove the inner fender splash shield. There is a horn on each side of the vehicle. Remove the mounting bolt, then detach the horn and disconnect the electrical connector. If you're installing a new horn to the bracket, point the horn bell (opening) downward to prevent water from collecting inside the horn. Installation is the reverse of removal.
    Posted by GMPartsGiant Specialist
    Q:
    How to remove the Horn on Buick Rainier? Posted by Customer
    A:
    Remove the left (driver's side) headlight housing. Detach the battery vent hose from the battery tray. Disconnect the electrical connector, remove the mounting bolt, and detach the horns. Installation is the reverse of removal.
    Posted by GMPartsGiant Specialist
    Q:
    How to diagnose and fix issues with a car horn on Cadillac DeVille? Posted by Customer
    A:
    Check the fuses before beginning electrical diagnosis. Disconnect the electrical connector from the horns. To test the horns, connect battery voltage and ground to the horn terminals with a pair of jumper wires. If either horn doesn't sound, replace it. If the horn does sound, check for voltage at the horn connector when the horn switch is depressed. Check for voltage at the horn while an assistant pushes the horn button. If there's voltage at the connector, check for a bad ground at the horn. If there's no voltage at the horn, check the relay. If the relay is OK, check for voltage to the relay power and control circuits. If either of the circuits is not receiving voltage, inspect the wiring between the relay and the fuse panel. If both relay circuits are receiving voltage, depress the horn switch and check the circuit from the relay to the horn switch for continuity to ground. If there's no continuity, check the circuit for an open. If there's no open circuit, replace the horn switch. If there's continuity to ground through the horn switch, check for an open or short in the circuit from the relay to the switch. If the horn works, but the tone is off, either weak or strained, check the current draw of the horn, using an ammeter during operation. Hook the ammeter between the horn connector and the terminal on the horn. A correctly operating horn should draw 4.5 to 5.5 amps. Use the adjusting screw on the horn to achieve this draw. The horn on is located in the fenderwell. Raise the vehicle and support it securely on jackstands. Remove the front wheel and the fenderwell splash shield for access. Disconnect the electrical connectors and remove the bracket bolts. Installation is the reverse of removal. Make sure the area of the body is clean where the horn bracket attaches. This is the ground point for the horn.
    Posted by GMPartsGiant Specialist
    Q:
    What steps should be taken if the horn does not operate on Cadillac Fleetwood? Posted by Customer
    A:
    However, if the horn will not work then look for the fuse which is blown and replace it accordingly. Check the voltage and grounds in the electrical connection of the horn and examine them while pressing the horn switch; if there is voltage, change the horn assembly. If voltage or ground is missing, other techniques of troubleshooting and circuits are explained in detail in Chassis Electrical section. For horns with an unusual tone, exchange the horn in single horn systems. In dual horn systems, check the operation of the second horn as most of the car horns have high pitch and low pitch horns. One horn can be disconnected at a time to test them and replace the horn which does not work again. Also, check for junk or water formation at the horn and its location; in case it only has one outlet, make sure that is oriented downwards to ensure that there is provision of adequate drainage and no formation of junk.
    Posted by GMPartsGiant Specialist
    Q:
    What steps should be taken if the horn does not operate on Cadillac ElDorado? Posted by Customer
    A:
    However, if the horn will not work then look for the fuse which is blown and replace it accordingly. Check the voltage and grounds in the electrical connection of the horn and examine them while pressing the horn switch; if there is voltage, change the horn assembly. If voltage or ground is missing, other techniques of troubleshooting and circuits are explained in detail in Chassis Electrical section. For horns with an unusual tone, exchange the horn in single horn systems. In dual horn systems, check the operation of the second horn as most of the car horns have high pitch and low pitch horns. One horn can be disconnected at a time to test them and replace the horn which does not work again. Also, check for junk or water formation at the horn and its location; in case it only has one outlet, make sure that is oriented downwards to ensure that there is provision of adequate drainage and no formation of junk.
    Posted by GMPartsGiant Specialist
    Q:
    How to troubleshoot and replace a horn on Chevrolet Astro? Posted by Customer
    A:
    The horns are mounted on the radiator core support behind the radiator grille. If the horns do not sound, first check the fuse and replace it if necessary. To check horn operation, use fused jumper wires to connect battery voltage to the horn electrical terminals; the horn should sound, and if it doesn't, it needs to be replaced. Using a voltmeter or test light, verify that battery voltage is reaching the horn electrical connector when the horn pad is depressed. If no voltage is present, check the circuit and wires for obvious damage or a short. For models equipped with airbags, have the steering wheel horn connections checked by a local dealer service department or other qualified repair shop. To replace a horn, remove the radiator grille, disconnect the electrical connector, remove the mounting bolt, and take it out of the vehicle. Installation is the reverse of removal.
    Posted by GMPartsGiant Specialist
    Q:
    How to inspect the horn assembly on Chevrolet Blazer? Posted by Customer
    A:
    The inspection procedure for the horn assembly involves locating it inside the right fender, next to the battery. If the reading is near 18 amps, the contact points are not open, and the adjustment screw should be turned counterclockwise to open the points and lower the amperage until you reach the proper level. If the horn still doesn't sound, the problem could be in the switch, relay, wiring, or open points. To remove the horn, disconnect the electrical connector, the bracket bolt should be removed, and take the horn out of the engine compartment.
    Posted by GMPartsGiant Specialist
    Q:
    How to remove and install the horn on Chevrolet Beretta? Posted by Customer
    A:
    Detach the cable from the negative terminal of the battery, ensuring that on models equipped with the Delco Loe II audio system, the lockout feature is turned off before disconnecting the battery. Raise the vehicle and secure it on jackstands. Remove the protective panel from the underside of the front left corner of the bumper. Take out the horn mounting bracket bolt, lower the horn, unplug the electrical connector, and remove the horn. Installation follows the reverse order of removal.
    Posted by GMPartsGiant Specialist
    Q:
    How to remove and install a horn on Chevrolet Avalanche? Posted by Customer
    A:
    You need to start by taking off the headlight housing from these SUVs and Chevy trucks. Start by unplugging the horn, then loosen and remove the bolt holding the mounting bracket. Pull out the horn unit along with its mounting hardware. Last, free the horn from its fixture point. Set up the horn by doing the pieces in the opposite order you removed them.
    Posted by GMPartsGiant Specialist
    Q:
    Where are the horns located and How to remove and install them on Chevrolet Corvette? Posted by Customer
    A:
    The horns are located at the lower frontal region of the car, underneath the headlight cowls on the left and right sides. Starting off, one should lift the car and then place it on safety jack stands. Second, take out the lower splash shield. To reach the horn, you need to look for the horn electrical connectors and then remove them. After that undo the MT and HT horn bracket mounting bolt to frame, and with the help of horn take out the horns and bracket as a single unit and then finally remove the horn assembly. The order of installation should be in the opposite manner to that of the removal.
    Posted by GMPartsGiant Specialist
    Q:
    What should be checked first if the horn proves inoperable on Chevrolet Caprice? Posted by Customer
    A:
    If the horn proves inoperable, the first check should be the fuse, which can be readily identified at the fuse box under the lower left side of the dashboard. If the fuse is in good condition, disconnect the electrical lead at the horn and run a jumper wire from a 12-volt source to the wiring terminal on the horn; if the horn does not blow, the fault lies in the grounding of the horn or the horn itself. If current is not reaching the horn, indicated by the horn sounding from the above test, there is a failure in the circuit before the horn. In most cases, a failure of the horn relay is indicated if the circuit before the horn is at fault, with other checks including bent metal contacts on the horn actuator or loose or broken wires in the system. The horn relay is located in the wiring system, usually under the dashboard near the fuse box, and when checking or replacing it, be aware that the threaded stud is always hot, as shorting this stud to ground could destroy a fusible link, disabling the vehicle until the link is replaced.
    Posted by GMPartsGiant Specialist
    Q:
    How to remove the Horn on Chevrolet Colorado? Posted by Customer
    A:
    To replace the horn on your vehicle it is essential that you remove the grille, disconnect the electrical connector, loosen and remove the mounting bolt, and you can finally detach the horn. Installation is the reverse of removal. You should tighten the mounting bolts to the proper torque specification.
    Posted by GMPartsGiant Specialist
    Q:
    What should be checked first if the horn proves inoperable on Chevrolet El Camino? Posted by Customer
    A:
    If the horn proves inoperable, the first check should be the fuse, which can be readily identified at the fuse box under the lower left side of the dashboard. If the fuse is in good condition, disconnect the electrical lead at the horn and run a jumper wire from a 12-volt source to the wiring terminal on the horn; if the horn does not blow, the fault lies in the grounding of the horn or the horn itself. If current is not reaching the horn, indicated by the horn sounding from the above test, there is a failure in the circuit before the horn. In most cases, a failure of the horn relay is indicated if the circuit before the horn is at fault, with other checks including bent metal contacts on the horn actuator or loose or broken wires in the system. The horn relay is located in the wiring system, usually under the dashboard near the fuse box, and when checking or replacing it, be aware that the threaded stud is always hot; shorting this stud to ground could destroy a fusible link, disabling the vehicle until the link is replaced.
    Posted by GMPartsGiant Specialist
    Q:
    Where are the horns located in the engine compartment and how do you replace them on Chevrolet Express? Posted by Customer
    A:
    The horns are situated in the left front corner of the engine compartment, behind and below the left headlight. To replace the horn(s), disconnect the electrical connector and remove the horn mounting nut. After that, take off the horn mounting nuts and detach the horns from their mounting bracket. Installation follows the reverse order of removal.
    Posted by GMPartsGiant Specialist
    Q:
    Where are the horns located and how do you remove them on Chevrolet Impala? Posted by Customer
    A:
    The horns are mounted at the front right side of the car, in a cavity beneath the right headlamp assembly and behind the right end of the bumper cover. First, take out the right, or passenger's side headlight housing. Then, turn to the right front corner of the chimney and then remove the electrical connector from the horns. Then, slip the horn mounting bracket bolt followed by pulling out the two horns along with the horn mounting bracket as a single unit. When the horns and mounting bracket are assembled, either or both of the horns can be disconnected from the mounting bracket by unscrewing them if necessary. Installation is done in the reverse sequence to the removal.
    Posted by GMPartsGiant Specialist
    Q:
    How to inspect the horn assembly on Chevrolet S10? Posted by Customer
    A:
    The inspection procedure for the horn assembly involves locating it inside the right fender, next to the battery. If the reading is near 18 amps, the contact points are not open, and the adjustment screw should be turned counterclockwise to open the points and lower the amperage until you reach the proper level. If the horn still doesn't sound, the problem could be in the switch, relay, wiring, or open points. To remove the horn, disconnect the electrical connector, the bracket bolt should be removed, and take the horn out of the engine compartment.
    Posted by GMPartsGiant Specialist
    Q:
    How to remove and install a horn on Chevrolet Suburban? Posted by Customer
    A:
    You need to start by taking off the headlight housing from these SUVs and Chevy trucks. Start by unplugging the horn, then loosen and remove the bolt holding the mounting bracket. Pull out the horn unit along with its mounting hardware. Last, free the horn from its fixture point. Set up the horn by doing the pieces in the opposite order you removed them.
    Posted by GMPartsGiant Specialist
    Q:
    How to remove the Horn on Chevrolet Trailblazer? Posted by Customer
    A:
    Remove the left (driver's side) headlight housing. Detach the battery vent hose from the battery tray. Disconnect the electrical connector, remove the mounting bolt, and detach the horns. Installation is the reverse of removal.
    Posted by GMPartsGiant Specialist
    Q:
    Where are the horns located and how do you remove them on Chevrolet Monte Carlo? Posted by Customer
    A:
    The horns are mounted at the front right side of the car, in a cavity beneath the right headlamp assembly and behind the right end of the bumper cover. First, take out the right, or passenger's side headlight housing. Then, turn to the right front corner of the chimney and then remove the electrical connector from the horns. Then, slip the horn mounting bracket bolt followed by pulling out the two horns along with the horn mounting bracket as a single unit. When the horns and mounting bracket are assembled, either or both of the horns can be disconnected from the mounting bracket by unscrewing them if necessary. Installation is done in the reverse sequence to the removal.
    Posted by GMPartsGiant Specialist
    Q:
    How to Remove and Install Horns on Chevrolet Traverse? Posted by Customer
    A:
    Remove the inner fender splash shield. There is a horn on each side of the vehicle. Remove the mounting bolt, then detach the horn and disconnect the electrical connector. If you're installing a new horn to the bracket, point the horn bell (opening) downward to prevent water from collecting inside the horn. Installation is the reverse of removal.
    Posted by GMPartsGiant Specialist
    Q:
    How to remove and install a horn on Chevrolet Tahoe? Posted by Customer
    A:
    You need to start by taking off the headlight housing from these SUVs and Chevy trucks. Start by unplugging the horn, then loosen and remove the bolt holding the mounting bracket. Pull out the horn unit along with its mounting hardware. Last, free the horn from its fixture point. Set up the horn by doing the pieces in the opposite order you removed them.
    Posted by GMPartsGiant Specialist
    Q:
    How to detach the cable from the negative terminal of the battery and access the horn locations on Pontiac Grand Prix? Posted by Customer
    A:
    Detach the cable from the negative terminal of the battery, ensuring that the lockout feature of the Theft lock audio system is turned off before disconnecting the battery. Open the hood to access the horns, which can be found in various locations: some are in the engine compartment in front of the left strut tower behind the air cleaner and battery, others are attached to the radiator support below the hood latch, and some are located behind the right headlight housing. Identify the horn location specific to the model. For vehicles with horns mounted in front of the left strut tower, remove the air cleaner assembly, take out the two bolts from the left side engine compartment cross brace, loosen the remaining bolt, and move the brace aside, then remove the windshield washer reservoir and the battery. For horns mounted at the front of the engine compartment by the hood latch, remove the headlight housing panel or the air deflector panel above the hood latch to access the horns. For horns located behind the right headlight housing, remove the headlight housing. Next, remove the horn mounting bracket bolt, lower the horn, unplug the electrical connector, and take out the horn. Installation follows the reverse order of removal.
    Posted by GMPartsGiant Specialist
    Q:
    How to remove the Horn on GMC Canyon? Posted by Customer
    A:
    To replace the horn on your vehicle it is essential that you remove the grille, disconnect the electrical connector, loosen and remove the mounting bolt, and you can finally detach the horn. Installation is the reverse of removal. You should tighten the mounting bolts to the proper torque specification.
    Posted by GMPartsGiant Specialist
    Q:
    How to remove and install a horn on GMC Yukon? Posted by Customer
    A:
    on Chevy truck models, remove the headlight housing and disconnect the electrical connector. Next, remove the horn mounting bracket bolt and remove the horn and bracket. Detach the horn from its mounting bracket. Installation is the reverse of removal.
    Posted by GMPartsGiant Specialist
    Q:
    What is the first thing to check if the horn is not working on Oldsmobile Cutlass? Posted by Customer
    A:
    If the horn is not working, the first thing to check is the fuse. Look at the fuse box under the dashboard to identify a blown fuse. If the fuse is fine, disconnect the electrical lead at the horn and use a jumper wire to connect a 12-volt source to the wiring terminal on the horn. If the horn still doesn't blow, the problem may be with the grounding of the horn or the horn itself. If the horn does sound, then there is a failure in the circuit before the horn. This could be due to a faulty horn relay, bent metal contacts on the horn actuator, or loose/broken wires in the system. The horn relay is usually located under the dashboard near the fuse box. Be cautious when checking or replacing the horn relay as the threaded stud is always hot and shorting it to ground could damage a fusible link, disabling the vehicle until it is replaced.
    Posted by GMPartsGiant Specialist
    Q:
    How to inspect the horn assembly on GMC Jimmy? Posted by Customer
    A:
    The inspection procedure for the horn assembly involves locating it inside the right fender, next to the battery. If the reading is near 18 amps, the contact points are not open, and the adjustment screw should be turned counterclockwise to open the points and lower the amperage until you reach the proper level. If the horn still doesn't sound, the problem could be in the switch, relay, wiring, or open points. To remove the horn, disconnect the electrical connector, the bracket bolt should be removed, and take the horn out of the engine compartment.
    Posted by GMPartsGiant Specialist
    Q:
    How to Remove and Install Horns on GMC Acadia? Posted by Customer
    A:
    Remove the inner fender splash shield. There is a horn on each side of the vehicle. Remove the mounting bolt, then detach the horn and disconnect the electrical connector. If you're installing a new horn to the bracket, point the horn bell (opening) downward to prevent water from collecting inside the horn. Installation is the reverse of removal.
    Posted by GMPartsGiant Specialist
    Q:
    How to inspect the horn assembly on GMC Sonoma? Posted by Customer
    A:
    The inspection procedure for the horn assembly involves locating it inside the right fender, next to the battery. If the reading is near 18 amps, the contact points are not open, and the adjustment screw should be turned counterclockwise to open the points and lower the amperage until you reach the proper level. If the horn still doesn't sound, the problem could be in the switch, relay, wiring, or open points. To remove the horn, disconnect the electrical connector, the bracket bolt should be removed, and take the horn out of the engine compartment.
    Posted by GMPartsGiant Specialist
    Q:
    What is the first thing to check if the horn is not working on Oldsmobile Omega? Posted by Customer
    A:
    To troubleshoot a car horn, check the fuse first. If it's intact, use a jumper wire to connect a 12-volt source to the wiring terminal on the horn. If it sounds, it's likely a problem with the circuit before the horn. If it does not blow, the problem may be with the grounding of the horn or the horn itself. Other possible issues include bent metal contacts on the actuator or faulty wires. When replacing the relay, be careful not to short the threaded stud to the ground as it could damage the vehicle.
    Posted by GMPartsGiant Specialist
    Q:
    Where are the horns located and how do you remove them on Pontiac G6? Posted by Customer
    A:
    The horns are installed at left front area of the vehicle, it is located behind the left end of the bumper cover and also in the void beneath the left headlight housing. Start with the left front head light housing which should be pulled off. Next, point out the horns at the particular area which is mentioned above. C1 One was to unhook the electrical clip that was from the horn and the second was to unscrew the horn holding bolt which made it easy to pull out the two horns with the holder as one unit. Thus, once both horns and mounting bracket are detached, it may be necessary to unlodge either or both horns from the mounting bracket by unbolting the horns where necessary. To culminate here, installation proceeds in the opposite sequence to removal.
    Posted by GMPartsGiant Specialist
    Q:
    What systems are linked to the Body Control Module (BCM) for the 2007 Chevrolet Equinox? Posted by Customer
    A:
    The door locks, power windows, ignition lock and security system, interior lights, Daytime Running Lights system, horn, windshield wipers, heating/air conditioning system, and power mirrors are all linked to the Body Control Module.
    Posted by GMPartsGiant Specialist
    See expert answers on similar Horn
    Q:
    What needs to be removed in order to remove the horn on an SUV or Chevy truck for the 2008 GMC Sierra? Posted by Customer
    A:
    The headlight housing must be removed.
    Posted by GMPartsGiant Specialist
    See expert answers on similar Horn
    Q:
    What needs to be done after removing the fasteners and bumper cover trim panel on a GMC truck for the 2010 Chevrolet Silverado? Posted by Customer
    A:
    The electrical connector must be disconnected from the horn.
    Posted by GMPartsGiant Specialist
    See expert answers on similar Horn
    Q:
    What is the first thing to check if the horn is not working for the 1982 Pontiac Phoenix? Posted by Customer
    A:
    The first thing to check is the fuse.
    Posted by GMPartsGiant Specialist
    See expert answers on similar Horn
    If you have any questions about this product, please don't hesitate to ask us. We will be happy to help you!

Genuine GM Part 84594590, the Right Choice

To ensure reliability, purchase GM part # 84594590 HORN KIT,SINGLE (LOW NOTE). It is sometimes referred to as Oldsmobile Horn. Directly from GM, genuine parts are superb with regards to quality, longevity, and fit. Every single part passed stringent quality testing, so you can be sure that it's safe, durable, and built to perform like your original parts. This part fits specific Oldsmobile Bravada, Custom Cruiser, Cutlass models.

GMPartsGiant.com is a leading supplier of genuine GM parts and accessories such as GM 84594590 HORN KIT,SINGLE (LOW NOTE). You're certainly in the right place if you're searching for the great cost-effective OEM GM parts. Look no further than our vast inventory of genuine GM parts offered at unbeatable online prices, all of which are backed by the manufacturer's warranty. Not to forget, our hassle-free return policy and quick delivery service ensure a smooth shopping experience for you. For detailed Oldsmobile parts information, click here.

Why choose GM Parts Giant

  • Dedicated Service

    Your complete satisfaction is our #1 goal

  • Lowest Prices

    Best deals on genuine OE parts from dealerships

  • Fast Delivery

    Orders are processed and delivered promptly