Make sure this part fits

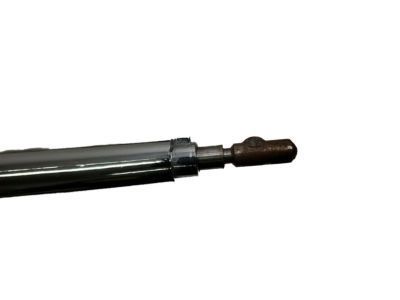
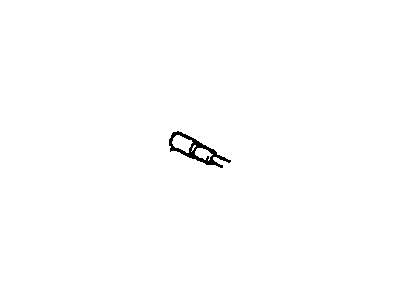
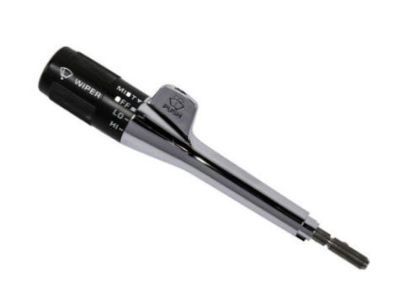
Oldsmobile 22510143 Lever Assembly, Direct Sign & Headlamp Dimmer Switch

1982-1991 Oldsmobile

Customer Questions & Expert Answers (6)
GM 22510143 Lever Assembly, Direct Sign & Headlamp Dimmer Switch
  • Part Description
    LEVER, Turn Signal Control
  • Manufacturer
    General Motors
Make sure this part fits
$21.78 MSRP: $52.77
You Save: $30.99 (59%)
1
ADD TO CART
  • Related Parts
  • Product Specifications
  • Vehicle Fitment
  • Customer Questions & Expert Answers
  • Product Specifications

    BrandGenuine Oldsmobile
    Manufacturer Part Number22510143
    Part DescriptionLEVER, Turn Signal Control
    Other NamesCombination Switch, Signal Lever
    Item Dimensions8.3 x 3.3 x 3.2 inches
    Item Weight0.50 Pounds
    ConditionNew
    Fitment TypeDirect Replacement
    ManufacturerGeneral Motors
    SKU22510143
    WarrantyThis genuine GM part is guaranteed by GM's factory warranty.
    Shipping & ReturnShipping Policy Return Policy
    Warning: California's Proposition 65
  • Vehicle Fitment

    Year Make Model Engine Important vehicle option details
    1988-1990, 1985 Oldsmobile 986 Cyl 3.8L, 6 Cyl 4.3L DieselREGENCY 2 DOOR, REGENCY 4 DOOR, REGENCY BROUGH 2 DOOR, REGENCY BROUGH 4 DOOR, REGENCY BROUGHAM, TOURING SEDAN
    1987-1990 Oldsmobile Custom Cruiser8 Cyl 5.0LSTATION WAGON
    1982-1989 Oldsmobile Cutlass4 Cyl 2.3L, 4 Cyl 2.5L, 6 Cyl 2.8L, 6 Cyl 3.0L, 6 Cyl 3.8L, 6 Cyl 4.3L Diesel, 8 Cyl 4.3L, 8 Cyl 5.0L, 8 Cyl 5.7L Diesel2 DOOR, 4 DOOR, BROUGHAM 2 DOOR, BROUGHAM 2 DOOR NOTCHBACK, BROUGHAM 4 DOOR, BROUGHAM SL 2 DOOR, BROUGHAM STATION WAGON, CUTLASS CALAIS, CUTLASS CRUISER, LS 2 DOOR, LS 2 DOOR NOTCHBACK, LS 4 DOOR, LS STATION WAGON, S 2 DOOR, SL 2 DOOR, SL 4 DOOR, SL STATION WAGON, STATION WAGON
    1987-1991 Oldsmobile Delta 886 Cyl 3.8L2 DOOR, 4 DOOR, BROUGHAM 2 DOOR, BROUGHAM 4 DOOR, ROYALE 2 DOOR, ROYALE 4 DOOR, ROYALE BROUGHAM 2 DOOR, ROYALE BROUGHAM 4 DOOR
    1984-1987 Oldsmobile Firenza4 Cyl 1.8L, 4 Cyl 2.0L, 6 Cyl 2.8L2 DOOR, 2 DOOR NOTCHBACK, 2 DOOR PLAIN BACK HATCHBACK, 4 DOOR, BROUGHAM 2 DOOR, BROUGHAM 2 DOOR NOTCHBACK, BROUGHAM 2 DOOR PLAIN BACK, BROUGHAM 4 DOOR, BROUGHAM STATION WAGON, STATION WAGON
    1983-1984 Oldsmobile Omega4 Cyl 2.5L, 6 Cyl 2.8L2 DOOR, 4 DOOR, BROUGHAM 2 DOOR, BROUGHAM 4 DOOR
  • Customer Questions & Expert Answers

    Q:
    I would like to confirm if this is the correct part number for my vehicle. Please advise. Thank you. Posted by GMPartsGiant Specialist
    A:
    You can Select Your Vehicle to check if 22510143 fits your vehicle.
    Posted by GMPartsGiant Specialist
    Q:
    How should you properly remove and install the turn signal switch on Buick Regal? Posted by Customer
    A:
    For models excluding Tilt and Telescope Columns and those equipped with air bags, always support the steering wheel and avoid bending the steering column. Begin by removing the steering wheel and the three cover screws along with the trim cover. The redesigned lock plate on 1976 and later columns can be removed by inserting a screwdriver into the cover slot and prying it out at two slots to prevent breakage. Next, depress the lock plate, remove the snap ring, and take out the lock plate, spring, and horn contact signal cancelling cam. Position the turn signal lever to the right turn position, remove the attaching screw, and take out the lever. For models with a dimmer switch on the column, remove the actuator arm screw and the arm. Pull the turn signal lever straight out, depress the hazard warning knob to remove it, and take out any screws if present. Remove the three mounting screws for the turn signal switch, the instrument panel lower trim panel, and disconnect the turn signal harness. Remove the four bracket attaching screws and the bracket, then for 1977 and later models with automatic transmissions, loosen the shift indicator needle attaching screw and remove the needle. Support the column while removing the two steering column bolts, ensuring it does not drop suddenly. Remove the bracket and wiring from the column, loosely reinstall the column supporting bolts if removed, and pull the switch straight up with the wire protector and harness. For Tilt and Telescope Columns, disconnect the battery ground, remove the steering wheel and lock plate, and the upper bearing preload spring. Position the turn signal lever to the right turn position, remove the lever and screw, and for columns with dimmer switches, remove the actuator arm and screw before pulling the turn signal arm straight out. Remove the hazard warning knob by pushing in and taking out the retaining screw. Center the column and remove the three turn signal switch attaching screws, the instrument panel lower trim pad, and disconnect the turn signal harness. Remove the toe pan bolts and the four bolts attaching the bracket assembly to the jacket, then remove the shift indicator retaining clip. Support the column and remove the bracket assembly, taking out the wire protector from the turn signal wiring and pulling the switch and wiring from the column. Before installation, coat all moving parts with lithium-based grease, insert the switch wiring into the column, place the switch in the right turn position, and push it straight down until seated. Install the switch attaching screws, tighten them to 25 ft. lbs. (34 Nm), position the turn signal in the center, connect the wiring to the harness, and install the hazard warning knob and turn signal lever. Install the lock plate, carrier, and steering wheel, followed by the wiring protector and bracket, tightening the bracket bolts to 18 ft. lbs. (24 Nm) and the nuts to 24 ft. lbs. (32 Nm). Install the shift indicator needle or clip, position the connector in the bracket on the right side of the jacket, and finally install the instrument panel lower trim pad and reconnect the battery ground. For air bag equipped models, follow the procedure for removing the steering wheel and air cushion module, then remove the three screws from the retainer and cover, carefully lifting them from the column. Insert a screwdriver blade into the locking tab and lift the slip ring from the column, remove the lock plate, spring, and horn contact signal cancelling cam. Position the turn signal lever to the right turn position, remove the attaching screw, and take out the lever, also removing the actuator arm if applicable. Pull the turn signal lever straight out, depress the hazard warning knob to remove it, and take out any screws if present. Remove the three mounting screws for the turn signal switch, the instrument panel lower trim panel, and disconnect the turn signal harness. Remove the four bracket attaching screws and the bracket, then remove the bracket and wiring from the column, loosely reinstalling the column supporting bolts if removed. Pull the switch straight up with the wire protector and harness. To replace the slip ring, align it with the slot in the bowl and push it into position, ensuring all locking tabs are securely positioned. Install the cover and retainer, aligning it over the locating tab, and tighten the screws to 15 inch lbs. (2 Nm).
    Posted by GMPartsGiant Specialist
    Q:
    How should you properly remove and install the turn signal switch on Buick Century? Posted by Customer
    A:
    For models excluding Tilt and Telescope Columns and those equipped with air bags, always support the steering wheel and avoid bending the steering column. Begin by removing the steering wheel and the three cover screws along with the trim cover. The redesigned lock plate on 1976 and later columns can be removed by inserting a screwdriver into the cover slot and prying it out at two slots to prevent breakage. Next, depress the lock plate, remove the snap ring, and take out the lock plate, spring, and horn contact signal cancelling cam. Position the turn signal lever to the right turn position, remove the attaching screw, and take out the lever. For models with a dimmer switch on the column, remove the actuator arm screw and the arm. Pull the turn signal lever straight out, depress the hazard warning knob to remove it, and take out any screws if present. Remove the three mounting screws for the turn signal switch, the instrument panel lower trim panel, and disconnect the turn signal harness. Remove the four bracket attaching screws and the bracket, then for 1977 and later models with automatic transmissions, loosen the shift indicator needle attaching screw and remove the needle. Support the column while removing the two steering column bolts, ensuring it does not drop suddenly. Remove the bracket and wiring from the column, loosely reinstall the column supporting bolts if removed, and pull the switch straight up with the wire protector and harness. For Tilt and Telescope Columns, disconnect the battery ground, remove the steering wheel and lock plate, and the upper bearing preload spring. Position the turn signal lever to the right turn position, remove the lever and screw, and for columns with dimmer switches, remove the actuator arm and screw before pulling the turn signal arm straight out. Remove the hazard warning knob by pushing in and taking out the retaining screw. Center the column and remove the three turn signal switch attaching screws, the instrument panel lower trim pad, and disconnect the turn signal harness. Remove the toe pan bolts and the four bolts attaching the bracket assembly to the jacket, then remove the shift indicator retaining clip. Support the column and remove the bracket assembly, taking out the wire protector from the turn signal wiring and pulling the switch and wiring from the column. Before installation, coat all moving parts with lithium-based grease, insert the switch wiring into the column, place the switch in the right turn position, and push it straight down until seated. Install the switch attaching screws, tighten them to 25 ft. lbs. (34 Nm), position the turn signal in the center, connect the wiring to the harness, and install the hazard warning knob and turn signal lever. Install the lock plate, carrier, and steering wheel, followed by the wiring protector and bracket, tightening the bracket bolts to 18 ft. lbs. (24 Nm) and the nuts to 24 ft. lbs. (32 Nm). Install the shift indicator needle or clip, position the connector in the bracket on the right side of the jacket, and finally install the instrument panel lower trim pad and reconnect the battery ground. For air bag equipped models, follow the procedure for removing the steering wheel and air cushion module, then remove the three screws from the retainer and cover, carefully lifting them from the column. Insert a screwdriver blade into the locking tab and lift the slip ring from the column, remove the lock plate, spring, and horn contact signal cancelling cam. Position the turn signal lever to the right turn position, remove the attaching screw, and take out the lever, also removing the actuator arm if applicable. Pull the turn signal lever straight out, depress the hazard warning knob to remove it, and take out any screws if present. Remove the three mounting screws for the turn signal switch, the instrument panel lower trim panel, and disconnect the turn signal harness. Remove the four bracket attaching screws and the bracket, then remove the bracket and wiring from the column, loosely reinstalling the column supporting bolts if removed. Pull the switch straight up with the wire protector and harness. To replace the slip ring, align it with the slot in the bowl and push it into position, ensuring all locking tabs are securely positioned. Install the cover and retainer, aligning it over the locating tab, and tighten the screws to 15 inch lbs. (2 Nm).
    Posted by GMPartsGiant Specialist
    Q:
    How to Remove and Replace the Turn Signal Switch on Chevrolet El Camino? Posted by Customer
    A:
    Disconnect the negative battery cable and remove the steering wheel, then take off the steering column trim cover at the base of the dashboard. For late models, pry out the plastic cover plate at the end of the steering column using a screwdriver in the provided slots. Remove the lock plate from the steering column, which is secured by a snap ring in a groove on the steering shaft; depress the lock plate to relieve pressure on the snap ring and use a special U-shaped tool to assist in its removal. Slide off the cancelling cam, upper bearing preload spring, and thrust washer from the end of the shaft. Remove the turn signal lever attaching screw and take out the turn signal lever from the side of the column. Push in on the hazard warning knob and unscrew it from the threaded shaft, then remove the three mounting screws for the turn signal assembly. Pull the switch wiring connector out of the bracket on the steering column jacket, tape the connector terminals to prevent damage, and feed the wiring connector up through the column support bracket to pull the switch wiring harness and connectors out the top of the steering column. For installation, reverse the removal steps, ensuring the wiring harness is in the protector as it is positioned. Before placing the thrust washer, upper bearing preload spring, and cancelling cam, confirm that the switch is in the neutral position and the warning knob is pulled out, and always use a new snap ring on the shaft for the lock plate.
    Posted by GMPartsGiant Specialist
    Q:
    What should be done after placing the lever in the center position for the 1985 Chevrolet Astro? Posted by Customer
    A:
    Carefully pry off the side cover from the steering column.
    Posted by GMPartsGiant Specialist
    See expert answers on similar Turn Signal Switch
    Q:
    What is the procedure for removing the plastic cover plate on the 1983 Oldsmobile Cutlass steering columns? Posted by Customer
    A:
    Pry out the plastic cover plate at the end of the steering column using a screwdriver in the slots provided.
    Posted by GMPartsGiant Specialist
    See expert answers on similar Turn Signal Switch
    If you have any questions about this product, please don't hesitate to ask us. We will be happy to help you!

Genuine GM Part 22510143, the Right Choice

To ensure reliability, purchase GM part # 22510143 Lever Assembly, Direct Sign & Headlamp Dimmer Switch. It is sometimes referred to as Oldsmobile Turn Signal Switch. Directly from GM, genuine parts are superb with regards to quality, longevity, and fit. Every single part passed stringent quality testing, so you can be sure that it's safe, durable, and built to perform like your original parts. This part fits specific Oldsmobile 98, Custom Cruiser, Cutlass models.

GMPartsGiant.com is a leading supplier of genuine GM parts and accessories such as GM 22510143 Lever Assembly, Direct Sign & Headlamp Dimmer Switch. You're certainly in the right place if you're searching for the great cost-effective OEM GM parts. Look no further than our vast inventory of genuine GM parts offered at unbeatable online prices, all of which are backed by the manufacturer's warranty. Not to forget, our hassle-free return policy and quick delivery service ensure a smooth shopping experience for you. For detailed Oldsmobile parts information, click here.

Why choose GM Parts Giant

  • Dedicated Service

    Your complete satisfaction is our #1 goal

  • Lowest Prices

    Best deals on genuine OE parts from dealerships

  • Fast Delivery

    Orders are processed and delivered promptly