Why choose GMPartsGiant
- Optimal Shopping Experience
Want to buy parts for your vehicle? Look no further than GMPartsGiant.com, the best place for Chevrolet K1500 genuine parts. For years, all of our Chevrolet K1500 parts and accessories have been expedited directly from dedicated dealers and backed by the manufacturer's warranty, so buying from GMPartsGiant.com is always risk-free.
- Dedicated Customer Service
Our first-class customer service team is committed to providing you with the best assistance possible. Dedicated representatives are standing by to assist you by email, live chat, or phone. Every effort is made to ensure your order for OEM Chevrolet K1500 parts arrives fast no matter your location in the nation, so your vehicle is up and running and back on the road.
- Unbeatable Prices
What makes us the best online source for Chevrolet K1500 parts and truck parts? Our goal is to offer the lowest prices. You get giant savings shopping with GMPartsGiant.com. With a complete parts catalog, we cover a full selection of affordable OEM Chevrolet K1500 parts and pickup parts with a huge inventory.
Popular Genuine Chevrolet K1500 Parts
- Engine Parts View More >
- Fuel System, Exhaust, Emission System Parts View More >
- Brakes Parts View More >
- Transmission - Automatic Parts View More >
- Frames, Springs, Shocks, Bumpers Parts View More >
- Cooling System, Grille, Oil System Parts View More >
- Front Axle, Front Suspension, Steering Parts View More >
- Front End Sheet Metal, Heater Parts View More >
Shop Genuine Chevrolet K1500 Parts with GMPartsGiant.com
The Chevrolet K1500, a full-size pickup truck produced by General Motors from 1988 to 2002, is part of the renowned fourth generation of the C/K series. Noted for its versatility, the K1500 offers various drivetrain options, including gasoline and diesel engines. Noteworthy versions include the powerful 1996 4.3L V6, the 1998 5.0L V8, and the impressive 7.4L V8, each delivering strong horsepower and torque figures. A Detroit Diesel V8 is also available for diesel aficionados. Complementing the engine range, a variety of transmission options are offered, from 3-speed to 5-speed automatic and manual versions, ensuring responsive and smooth gear shifts. Torsion front suspension, front anti-roll bar, and a front torsion bar further contribute to the pickup's sturdy handling and respectable acceleration. The K1500 is also notable for its diversity in body styles, offering a 2-door compact, extended cab pickup, 4-door crew cab pickup, and 2-door/4-door chassis cab. Depending on the model, its length ranges from 194.5 in to 218.5 in, with a width of around 76.8 in to 77.1 in, and a height of approximately 73.2 in. The interior is spacious, featuring increased legroom and seat travel, along with a driver-centered dashboard layout that seamlessly combines digital and analog instruments. Offering a tachometer option in 1991, the K1500 remains a standout choice for those seeking a reliable and robust pickup truck.
Despite its high-quality reputation, the Chevrolet K1500 truck has some common issues reported by owners. One prevalent problem is with the engine, which can exhibit increased noise after long-term use, difficulties starting, misfires, surging or hesitation, increased fuel consumption, and sluggish acceleration. These signs often indicate a faulty spark plug. Another common problem is transmission failure, evident when gears slip, the vehicle doesn't accelerate properly, gear shifting is difficult, and the transmission surges or lags. Additionally, a shuddering sensation and a whirring noise at startup, coupled with dirty transmission fluid, may suggest a need for torque converter replacement. Some owners have also reported problems with the exhaust system, such as excessive noise, unusual engine performance, and a burnt smell in the engine bay, indicating a failing exhaust manifold or exhaust manifold gasket. Besides these major issues, owners should not neglect components like the door handle, which ensures safety by keeping the door properly shut, and the washer reservoir, which aids the windshield wiper in maintaining clear visibility.
Choosing OEM products can lead to long-term cost savings on maintenance and repairs since they offer the highest level of durability, thanks to their strict manufacturing processes. Welcome to your ultimate destination for affordable OEM Chevrolet K1500 parts, like Transmission - Manual, Rear Body Structure, Moldings & Trim, Cargo Stowage. Here at our website, we not only provide genuine Chevrolet K1500 parts, such as Transfer Case at unbeatable prices, but also guarantee their quality with the manufacturer's warranty. Coupled with our dedicated customer service and swift delivery, we're confident you won't find a better deal anywhere else.
Chevrolet K1500 Parts Questions & Answers
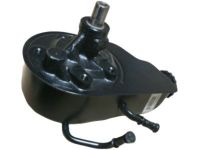
- Q: How to remove the power steering pump on Chevrolet K1500?A: To remove the power steering pump, start by disconnecting the cable from the negative terminal of the battery. Then, remove the serpentine drivebelt. Use a special power steering pump pulley remover to remove the pulley from the pump. Position a drain pan under the pump and disconnect the pressure and return hoses from the backside of the pump. Plug the hoses to prevent contaminants from entering. Remove the pump mounting fasteners and lift the pump from the vehicle, being careful not to spill fluid on painted surfaces. To install the pump, position it in the mounting bracket and secure it with bolts and a nut. Connect the hoses to the pump and tighten the fittings securely. Press the pulley onto the shaft using a special pulley installer tool or a fabricated alternative tool. Install the drivebelt and fill the power steering reservoir with the recommended fluid. Finally, bleed the system.
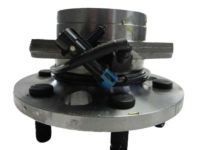
- Q: How to remove and replace a wheel hub on Chevrolet K1500?A: The hub and bearing assembly is a sealed unit and requires replacement if faulty. Begin by loosening the driveaxle/hub nut and wheel lug nuts. Elevate the vehicle on jackstands, remove the wheel, and set aside the brake caliper and disc. Remove the hub nut and the assembly-to-knuckle bolts. Use a puller to detach the hub assembly from the driveaxle, protecting its end with a rag. For installation, follow the reverse process, lubricate driveaxle splines, and tighten all components to the recommended torque.
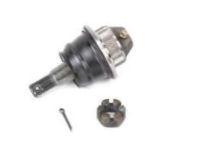
- Q: How to check the upper and lower ball joint on Chevrolet K1500?A: To check the upper balljoint, loosen lug nuts, raise the front of the vehicle, support it on jackstands, apply the parking brake, and remove the wheel. Place a jack under the lower control arm, raise slightly, and watch for movement at the balljoint, indicating wear. For the lower balljoint, measure the distance between the tip of the balljoint stud and the grease fitting, lower the jack, and remeasure. A difference exceeding 3/32-inch means replacement is needed. To replace on 2WD models, remove the brake caliper, separate the balljoint from the steering knuckle, drill out the rivets, and install the new balljoint with supplied nuts and bolts. For lower balljoint, take the control arm to a shop for pressing out and in the balljoint. Inspect steering knuckle holes for damage, reconnect balljoints, tighten nuts to torque, install grease fittings, lubricate, and reinstall wheels. The alignment should be checked by a dealer. For 4WD models, procedures are similar, with additional steps including removing the splash shield, disconnecting the tie-rod, removing the drive axle, drilling out rivets, supporting the lower control arm, separating and installing the balljoint, and loading the torsion bar. Finally, reconnect tie-rod, install splash shield, and tighten lug nuts to specified torque.
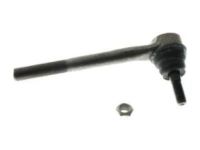
- Q: How to inspect and replace Center Link,Idler Arm,Pitman Arm and Tie Rod on Chevrolet K1500?A: To make sure that the front wheels maintain their alignment, you use a steering linkage to connect the steering gear with them. It encompasses various constituents like the Pitman arm, idler arm, relay rod, tie-rods and steering damper. The Pitman arm moves to and fro on the relay rod from its attachment on the steering gear shaft. On the other end is where the relay rod is supported by an idler arm. The tie-rod assemblies transmit this motion of the relay rod to the steering knuckles. For inspection of steering system: set wheels straight ahead and lock steering wheel; jack up one side of vehicle and attach dial indicator to measure any play in system; if it exceeds specified limit inspect for loosened or damaged components which need replacement; also observe torn ball stud boots, frozen joints & bent or damaged linkage components. To remove and install a tie-rod loosen wheel lug nuts, jack up vehicle then remove wheel, separate tie-rod end from steering knuckle using two-jaw puller, remove nut holding inner tie-rod end to relay rod itself but before unscrewing it measure distance and record it-if part needs replacement lubricate new tie-rod end and adjust it according to recorded dimension-connect outer tie-rod end to steering knuckle again tightening nut used before while inserting new cotter pin-insert inner tie-rod end into relay rod tighten nut holding it there lastly tighten clamp nuts then lower car down again. For removing idler arm loose nut then pry 2-jaw puller apart this will disengage it from relay rod-after taking out idler arm to frame bolts carefully install another one tightening bolts completely-take idler arm ball stud and fix it securely within relay rod by tightening its respective nut till just about hand tightness becomes possible then go ahead with complete application of force originating torque wrench on said fastener as much as required ensuring that nut is tightened to specified torque Installation is the reverse of removal, ensuring the nuts are tightened to the specified torque. Remove Pitman arm from relay rod using puller. Before reassembling, mark Pitman arm and steering gear shaft for proper alignment during installation. Take out Pitman arm nut and washer followed by removing entire thing with a help of a puller. Look at threads on ball stud along with any sealants sealing them again wipe down thread well.


