My Garage
My Account
Cart
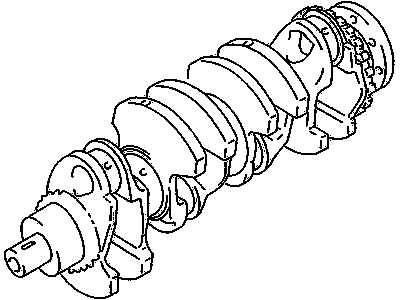
Genuine 2001 Chevrolet Tracker Crankshaft
Crank Shaft- Select Vehicle by Model
- Select Vehicle by VIN
Select Vehicle by Model
orMake
Model
Year
Select Vehicle by VIN
For the most accurate results, select vehicle by your VIN (Vehicle Identification Number).
2 Crankshafts found
- Product Specifications
- Other Name: Crankshaft, Engine; Crankshaft
- Item Weight: 45.00 Pounds
- Item Dimensions: 23.5 x 9.7 x 8.6 inches
- Condition: New
- Fitment Type: Direct Replacement
- SKU: 91177626
- Warranty: This genuine part is guaranteed by GM's factory warranty.
- Product Specifications
- Other Name: Crankshaft (On Esn) ; Crankshaft, Engine; Crankshaft
- Item Weight: 38.00 Pounds
- Item Dimensions: 22.7 x 10.7 x 9.2 inches
- Condition: New
- Fitment Type: Direct Replacement
- SKU: 91177519
- Warranty: This genuine part is guaranteed by GM's factory warranty.
2001 Chevrolet Tracker Crankshaft
We are your prime source for competitively priced and high-quality OEM 2001 Chevrolet Tracker Crankshaft. We provide you with parts that will allow you to save a lot of money without sacrificing quality. All our OEM parts are backed by the manufacturer's warranty and shipped out at a swift rate.
2001 Chevrolet Tracker Crankshaft Parts Questions & Experts Answers
- Q: How to install the crankshaft on 2001 Chevrolet Tracker?A: Assuming cleaning, inspection and necessary repairs have been done on the crankshaft bearings, we need to initiate the process of reassembling an engine with fitting of the crankshaft first. This places the engine with its bottom upwards. Remove main bearing cap bolts carefully and lift off the caps placing them in their proper order for reinstallation. With both block and main bearing caps still containing original inserts, remove these inserts from them. Ensure that all bearing surfaces are spotlessly clean on both the block and caps. After this, wipe the backsides of new main bearing inserts and insert one into each main bearing saddle in block without using lubrication to hold it in place or ensure correct alignment so that they fit correctly. In case they exist, flanged thrust bearings should be put into number three saddle. Clean the bearing surfaces on the crankshaft main bearing journals, and as well clean or inspect oil holes in the crankshaft. Place crankshaft carefully in position within main bearings while ensuring cleanliness. Plastigage is used to determine if there is enough clearance between a crankshaft's journal and its respective pair of bearings before completing installation of a crankshaft; check using plastigage initially to determine whether or not any clearance exists between a shaft's journals and their respective pairs of bearings by cutting appropriate lengths of Plastigage for each journal parallel to its axis Install lower crankcase or main bearing caps progressively tightening bolts according to sequence given for SOHC or DOHC engines. After removing the caps or lower crankcase," compare how wide crushed Plastigage is from side-to-side on each journal with ruler scale provided indicating main bearing oil clearance". Remove Plastigage material from there and continue with final step of installing a crankshaft. Finally , lifting it out slowly, then wipe clean bearing faces inside block before applying thin coating of moly-base grease or engine assembly lube over all surfaces . Let us reinstall it and use lubricants on faces of bearings in caps and then put the caps back. Align thrust surfaces properly while tightening the cap bolts to the specified torques according to sequence for SOHC or DOHC engines. Tap on each end of the crankshaft to align the main bearing and crankshaft thrust surfaces, then retighten all main bearing cap bolts to the specified torque. Check for acceptable clearance at the ends of crankshaft with a feeler gauge or dial indicator if new bearings have been installed and no damage is visible on thrust faces.


