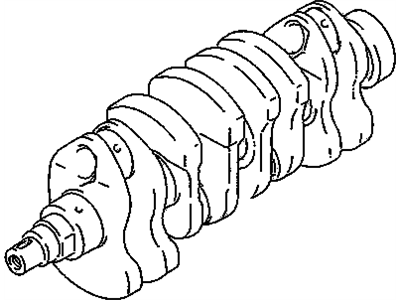
Genuine Chevrolet Tracker Crankshaft

Crank Shaft

Enter your vehicle info to find more parts and verify fitment

  • Select Vehicle by VIN
  • Select Vehicle by Model
Select by VIN
Enter your VIN for the most accurate results.
or
Select by Model
-- Select Make --
-- Select Model --
-- Select Year --

3 Crankshafts found

  • Chevrolet Tracker Crankshaft - 91177626
    View related parts

    Chevrolet Tracker Engine Crankshaft

    Part Number: 91177626
    • Other Name: Crankshaft, Engine; Crankshaft
    More Info
    Fits the following Vehicles:
    • 1999-2004 Chevrolet Tracker | 4 DOOR, CONVERTIBLE | 4 Cyl 2.0L
    Less Info
  • Chevrolet Tracker Crankshaft - 91177510
    View related parts

    Chevrolet Tracker Engine Crankshaft (On Esn)

    Part Number: 91177510
    • Other Name: Crankshaft, Engine (On Esn); Crankshaft
    • Replaces: 96064734
    More Info
    Fits the following Vehicles:
    • 1989-2000 Chevrolet Tracker | 2 DOOR HARD TOP, 4 DOOR, CONVERTIBLE | 4 Cyl 1.6L
    Less Info
  • Chevrolet Tracker Crankshaft - 91177519
    View related parts

    Chevrolet Tracker Engine Crankshaft (On Esn)

    Part Number: 91177519
    • Other Name: Crankshaft (On Esn) ; Crankshaft, Engine; Crankshaft
    More Info
    Fits the following Vehicles:
    • 2001-2004 Chevrolet Tracker | 4 DOOR | 6 Cyl 2.5L
    Less Info

Chevrolet Tracker Crankshaft Parts Questions & Answers

  • Q: How to remove the crankshaft from the engine?
    A: Engine removal is the only way to remove a crankshaft. The end play should be checked before the removal of the crankshaft. With a stem in line with the crank and touching one of the crank throws, mount a dial indicator on it. Zero the dial indicator upon pushing the crank all to the rear then pry it as far as possible and read from the dial indicator to determine end play. Examine for wear of thrust surfaces in case end play is greater than that specified. If no wear is apparent, new thrust bearings will correct this condition. Feeler gauges can also be used if there is no dial indicator. To check clearance between its front face of thrust bearing and its crankshaft, gently push or pry it to engine front direction (towards you) and slip feeler gauges in between them. SOHC engines must have their main bearing caps checked as they may be marked. From front towards back, these should be numbered consecutively. In case they are not marked, number stamping dies or center punches should be used to mark them. While noting stud bolts positions, gradually loosen and remove main bearing caps by hand; gently separate caps from engine block using soft-face hammer taps. Crankshaft's main bearings do not have caps on DOHC engines but instead block uses "lower crankcase" to hold it in place. In order remove lower crank-case screws have to be taken out according to indicated sequence following which care must be taken due to its weight as the author states . Gently lift out the Crankshaft being mindful of how heavy it is when removing it from an engine bay. The caps need to return into their proper places on an engine block together with bearing inserts located within an engine block so that bolts can be tightened finger tight.
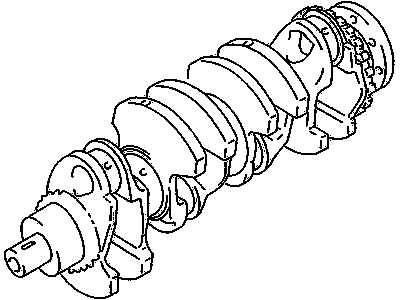
  • Q: How to inspect and repair a crankshaft?
    A: Remove all burrs from the crankshaft oil holes with a stone, file or scraper, ensuring the oil holes are chamfered to prevent damage to new bearings. Check the main and connecting rod bearing journals for uneven wear, scoring, pits and cracks. Rub a penny across each journal several times to reveal its condition-if copper rubs off and is embedded in the crankshaft, the journals should be reground. Clean the crankshaft with solvent and dry it with compressed air, using a stiff brush to clean the oil holes and flush them with solvent. Check the rest of the crankshaft for cracks and other damage, which should be revealed by mag-nafluxing. Measure the diameter of the main and connecting rod journals with a micrometer and compare the results to the Specifications. If the crankshaft journals are damaged, tapered, out of round or worn beyond the limits given in the Specifications, have the crankshaft reground by an automotive machine shop and use the correct size bearing inserts if the crankshaft is reconditioned. Check the oil seal journals at each end of the crankshaft for wear and damage. If the seal has worn a groove in the journal, or if it's nicked or scratched, the new seal may leak when the engine is reassembled. In some cases, an automotive machine shop may be able to repair the journal by pressing on a thin sleeve. If repair isn't feasible, a new or different crankshaft should be installed. Examine the main and rod bearing inserts.
  • Q: How to install the crankshaft?
    A: Assuming cleaning, inspection and necessary repairs have been done on the crankshaft bearings, we need to initiate the process of reassembling an engine with fitting of the crankshaft first. This places the engine with its bottom upwards. Remove main bearing cap bolts carefully and lift off the caps placing them in their proper order for reinstallation. With both block and main bearing caps still containing original inserts, remove these inserts from them. Ensure that all bearing surfaces are spotlessly clean on both the block and caps. After this, wipe the backsides of new main bearing inserts and insert one into each main bearing saddle in block without using lubrication to hold it in place or ensure correct alignment so that they fit correctly. In case they exist, flanged thrust bearings should be put into number three saddle. Clean the bearing surfaces on the crankshaft main bearing journals, and as well clean or inspect oil holes in the crankshaft. Place crankshaft carefully in position within main bearings while ensuring cleanliness. Plastigage is used to determine if there is enough clearance between a crankshaft's journal and its respective pair of bearings before completing installation of a crankshaft; check using plastigage initially to determine whether or not any clearance exists between a shaft's journals and their respective pairs of bearings by cutting appropriate lengths of Plastigage for each journal parallel to its axis Install lower crankcase or main bearing caps progressively tightening bolts according to sequence given for SOHC or DOHC engines. After removing the caps or lower crankcase," compare how wide crushed Plastigage is from side-to-side on each journal with ruler scale provided indicating main bearing oil clearance". Remove Plastigage material from there and continue with final step of installing a crankshaft. Finally , lifting it out slowly, then wipe clean bearing faces inside block before applying thin coating of moly-base grease or engine assembly lube over all surfaces . Let us reinstall it and use lubricants on faces of bearings in caps and then put the caps back. Align thrust surfaces properly while tightening the cap bolts to the specified torques according to sequence for SOHC or DOHC engines. Tap on each end of the crankshaft to align the main bearing and crankshaft thrust surfaces, then retighten all main bearing cap bolts to the specified torque. Check for acceptable clearance at the ends of crankshaft with a feeler gauge or dial indicator if new bearings have been installed and no damage is visible on thrust faces.

Related Chevrolet Tracker Parts