My Garage
My Account
Cart
Genuine 2003 Chevrolet Astro Cylinder Head
Head- Select Vehicle by Model
- Select Vehicle by VIN
Select Vehicle by Model
orMake
Model
Year
Select Vehicle by VIN
For the most accurate results, select vehicle by your VIN (Vehicle Identification Number).
1 Cylinder Head found
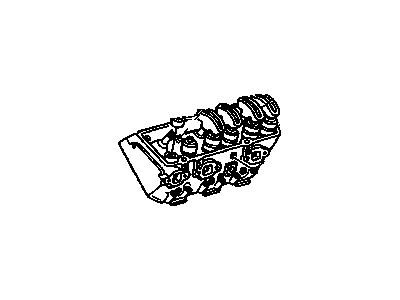
2003 Chevrolet Astro Engine Cylinder Head
Part Number: 12555630$447.07 MSRP: $713.03You Save: $265.96 (38%)Ships in 1-3 Business DaysProduct Specifications- Other Name: Head,Cyl; Cylinder Head
- Item Weight: 34.60 Pounds
- Item Dimensions: 23.5 x 9.9 x 8.9 inches
- Condition: New
- Fitment Type: Direct Replacement
- SKU: 12555630
- Warranty: This genuine part is guaranteed by GM's factory warranty.
2003 Chevrolet Astro Cylinder Head
We are your prime source for competitively priced and high-quality OEM 2003 Chevrolet Astro Cylinder Head. We provide you with parts that will allow you to save a lot of money without sacrificing quality. All our OEM parts are backed by the manufacturer's warranty and shipped out at a swift rate.
2003 Chevrolet Astro Cylinder Head Parts Questions & Experts Answers
- Q: What are the steps involved in the removal and installation process of a cylinder head in four cylinder engine on 2003 Chevrolet Astro?A: To start the procedures of removal, get rid of the negative cable on the battery, then, unscrew the engine cover and if possible for that car disable the anti theft feature if available. Dump the coolant and slide the air cleaner assembly out, then remove the throttle, cruise control and TV cables if any. After that, it will be necessary to pull out the dipstick tube and thermostat housing, thus it will be required to pull out the alternator and brackets. If it's in the way, unbolt the compressor on the AC and swing it to the side for space, but don't disconnect any of the AC unless the system is not under pressure. Remove all the wires and vacuum hoses connected to the cylinder head and manifold and label them so that they can easily be reconnected, also remove the fuel lines from the TBI unit. Lose the upper radiator, water pump bypass/helping and heater hoses and separate the spark plug wires and take out the sparks plugs and label the wires too. Lever off the rocker arm cover and pushrods and then the ignition coil. Lift the car up on scissor jack stands and remove the muffler from the manifold joint. To prevent confusion when tightening head bolts and in case the head has to be removed again, the cylinders and bolt pattern can be drawn on a piece of cardboard and the side to be fitted to the engine marked in red as front. Turn evenly the cylinder head mounting bolts a quarter turn at a time till they can be removed by use of bare hands and keep the bolts in the cardboard that comes with them for later use. Pick the head off the engine, and pry only at the lip on top of the head, at the end of the thermostat housing if it is jammed on, then set the head on some wooden planks to avoid denting. In the process of installation, remove all external parts from the old cylinder head, if it is possible, and transfer them on the new one; the mating surfaces of the cylinder head and the block must be clean. Examine the head for deformation and cracks; and all the carbon and remains of the gasket should be cleaned using a gasket scraper; the surfaces should be cleaned using lacquer thinner or acetone. Check the block and head mating surfaces and if it has minor imperfections then the block is filed in while major imperfections have to be machined. Strike the threads in the head bolt holes with a tap, so that you remove the corrosion on the bolts by cleaning them with a die. Place the new gasket properly on the dowel pins of the block then place the head on the block being careful not to move the gasket. Apply a layer of sealing compound to the threads and the underside of the heads of cylinder head bolt numbers 9 and 10; tighten them slightly. Torque each bolt in sequence to 18 ft-lbs; then, refer to prescribed torque sequences by model year and use an angle of torque as directed. Lastly, return to follow the rest of the installation steps in the reverse, then change the oil and filter, start the engine and check for leaks.


