My Garage
My Account
Cart
Genuine Buick Century Ball Joint
Control Arm Joint- Select Vehicle by Model
- Select Vehicle by VIN
Select Vehicle by Model
orMake
Model
Year
Select Vehicle by VIN
For the most accurate results, select vehicle by your VIN (Vehicle Identification Number).
2 Ball Joints found
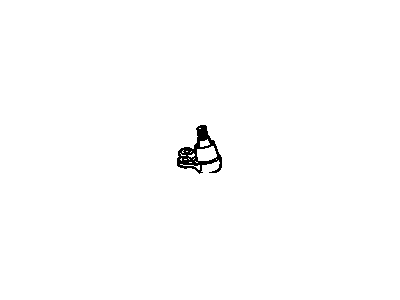
Buick Century Stud Kit,Front Lower Control Arm Ball
Part Number: 88965333$48.27 MSRP: $82.54You Save: $34.27 (42%)Ships in 1-2 Business Days
Buick Century Ball Joint
The Ball Joint is used in Buick Century vehicles, it interfaces the control arms and the steering knuckles and is part of the suspension and steering mechanisms. This component can rotate freely in two planes and helps the car to react to road surface and to steer. Usual material is steel and it consists of the bearing stud and socket with rubber boot for enclosing the ball joint from dirt and to hold the lubricant. In the models of Buick Century may be different kinds of Ball Joints: loaded or non-loaded. Loaded Ball Joints support Vehicle weight whereas unloaded are responsible for positioning without having to bear weight. Periodically, Ball Joints may wear out due to usage and other conditions may include lack of lubrication hence producing noise and misalignment. Available replacement parts include Ball Joints that are adjustable and guarantee that the Buick Century as the right handling symmetry as well as ride comfort.
Each OEM Buick Century Ball Joint we offer is competitively priced and comes with the assurance of the manufacturer's warranty for the part. Furthermore, we guarantee the speedy delivery of your orders right to your doorstep. Our hassle-free return policy is also in place for your peace of mind.
Buick Century Ball Joint Parts Questions & Experts Answers
- Q: How to check and replace the lower ball joints on Buick Century?A:All 1975 and later vehicles feature visual wear indicators on the lower ball joints, with the grease plus screws inserted into the wear indicator that extends from the bottom of the ball joint housing. If the wear indicator is visible, the ball joint is in good condition; if it is parallel with or recessed into the housing, the ball joint is defective. For 1986-87 vehicles, a special ball joint installer tool is required. Begin by raising the front of the vehicle and supporting it on jackstands, then remove the wheel. Disconnect and remove the Shock Absorber, followed by the front stabilizer rod link and the brake reaction rod from the lower Control Arm. For safety and leverage, place a jack about 1/2 inch below the lower ball joint stud. Remove the ball stud cotter pin and loosen the nut slightly without removing it. Use a tool or tap the Steering Knuckle to separate the stud from the knuckle. Once separated, raise the jack against the control arm, remove the nut, and detach the steering knuckle from the tapered stud. Use a ball joint remover to extract the ball joint from the lower control arm. To install, reverse the process, tightening the castellated nut to 85-90 ft. lbs. for 1975-85 vehicles, ensuring alignment with the cotter pin hole. For 1986-87 vehicles, position the ball joint stud in the steering knuckle, install the tool, and tighten the operating nut to 40 ft. lbs., then remove the tool and tighten the nut to 81 ft. lbs., again ensuring proper alignment for the cotter pin.
Related Buick Century Parts
Browse by Year
2005 Ball Joint 2004 Ball Joint 2003 Ball Joint 2002 Ball Joint 2001 Ball Joint 2000 Ball Joint 1999 Ball Joint 1998 Ball Joint 1997 Ball Joint 1996 Ball Joint 1995 Ball Joint 1994 Ball Joint 1993 Ball Joint 1992 Ball Joint 1991 Ball Joint 1990 Ball Joint 1989 Ball Joint 1988 Ball Joint 1987 Ball Joint 1986 Ball Joint 1985 Ball Joint 1984 Ball Joint 1983 Ball Joint 1982 Ball Joint


