My Garage
My Account
Cart
Genuine Buick Skylark Rod Bearing
Engine Connecting Rod Bearing- Select Vehicle by Model
- Select Vehicle by VIN
Select Vehicle by Model
orMake
Model
Year
Select Vehicle by VIN
For the most accurate results, select vehicle by your VIN (Vehicle Identification Number).
10 Rod Bearings found
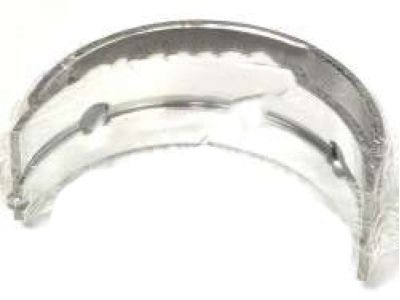
Buick Skylark Connect Rod Bearing Kit
Part Number: 12482060$20.23 MSRP: $40.81You Save: $20.58 (51%)Buick Skylark Bearing Unit,Connect Rod
Part Number: 10181335$16.26 MSRP: $32.80You Save: $16.54 (51%)Buick Skylark Bearing Kit,Connect Rod
Part Number: 12482039$52.80 MSRP: $106.49You Save: $53.69 (51%)Buick Skylark Bearing Kit,Connect Rod
Part Number: 89017700$15.23 MSRP: $25.21You Save: $9.98 (40%)Ships in 1-2 Business Days
Buick Skylark Rod Bearing
The Rod Bearing in Buick Skylark automobiles is an essential part for supporting crankshaft and other connecting rods in order to facilitate the rotation with least friction. These bearings are normally plain bearings and can be bi-metal or tri-metal in design. This assembly is made up of two metals, the outer shell comprises of aluminum alloy while the inner lining is made from silicone for added hardness and better seizure. Therefore, tri-metal bearings consist of a copper-lead alloy and have a lead-tin-copper overlay, thus offering increased strength and elevated fatigue properties. Through the years, the Buick Skylark models have had different Rod Bearing and especially with the performance series, new materials and coatings have been put into practice to increase the rod bearing's ability to endure high mechanical stresses and to decrease the friction. These performance Rod Bearings may exhibit certain eccentricity and are likely to have larger oil ways to fulfill the requirements of high-revving powerplants. This is because the Rod Bearing more often than not will not last as long as it is expected and for it to work appropriately in the engine, adequate oil clearance is required.
Each OEM Buick Skylark Rod Bearing we offer is competitively priced and comes with the assurance of the manufacturer's warranty for the part. Furthermore, we guarantee the speedy delivery of your orders right to your doorstep. Our hassle-free return policy is also in place for your peace of mind.
Buick Skylark Rod Bearing Parts Questions & Experts Answers
- Q: How can pistons and Rod Bearing be properly installed on Buick Skylark?A:With the pistons complete with Piston Rings and connecting rods, they can be installed in the engine. Ensure the cylinder bores are perfectly clean by wiping the cylinder walls several times with a light engine oil and a clean, lint-free cloth. Lubricate the connecting rod bearings and install them into their appropriate rod and rod cap. Lightly coat the pistons, rings, and cylinder walls with light engine oil. To prevent the threaded bolts from possibly damaging the cylinder wall or Crankshaft journal during installation, place a length of rubber or plastic tubing over the connecting rod studs on one rod assembly, using a piston ring compressor and pieces of rubber hose. Check that all the piston ring gaps are positioned properly. Verify that the piston/rod assembly is correctly positioned, noting that most pistons will be marked with an 'F' or a drilled-out area indicating the front of the engine, while the rod bearing tang slots should face the outside of the engine block. Place a piston ring compressor around the piston, ensuring the base is flush with the cylinder block, and tighten it until the rings are flush with the piston surface before pushing the piston assembly into the bore. A wooden hammer handle can be used to tap the top of the piston slightly, holding the ring compressor firmly against the cylinder block until all rings are inside the bore, then continue pushing until the connecting rod is near its installed position. Ensure all bearing surfaces and the crankshaft journal are coated with engine oil, then remove the tubing protector pieces and install the connecting rod bearing cap with bearing to the connecting rod, fitting it over the crankshaft and connecting rod studs. Torque the nuts to specifications and repeat the procedure for all cylinders, using the rubber or plastic tubing on each assembly to prevent damage as the pistons are pushed into place, rotating the crankshaft as necessary to make the connecting rod nuts accessible for tightening.
