My Garage
My Account
Cart
Genuine Oldsmobile Cutlass Piston
Engine Pistons- Select Vehicle by Model
- Select Vehicle by VIN
Select Vehicle by Model
orMake
Model
Year
Select Vehicle by VIN
For the most accurate results, select vehicle by your VIN (Vehicle Identification Number).
43 Pistons found
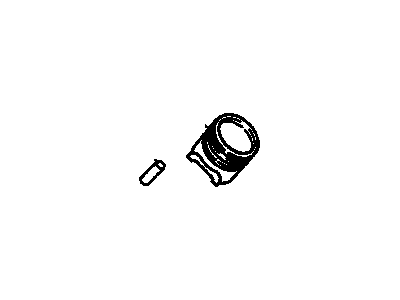
Oldsmobile Cutlass Pstn & Piston Pinion Asm
Part Number: 14102688$54.38 MSRP: $109.66You Save: $55.28 (51%)Oldsmobile Cutlass Piston & Pinion,(Std) (600 Gram)
Part Number: 12353354$60.27 MSRP: $121.54You Save: $61.27 (51%)Oldsmobile Cutlass Piston Asm,(W/ Pinion)
Part Number: 24505806$60.44 MSRP: $121.88You Save: $61.44 (51%)Oldsmobile Cutlass Piston, (W/Pinion)
Part Number: 24576691$93.94 MSRP: $120.83You Save: $26.89 (23%)Ships in 1-2 Business DaysOldsmobile Cutlass Piston Asm,W/Pinion
Part Number: 24501065$29.57 MSRP: $124.15You Save: $94.58 (77%)Ships in 1-2 Business Days
| Page 1 of 3 |Next >
1-20 of 43 Results
Oldsmobile Cutlass Piston
The Piston from Oldsmobile Cutlass is one of the end features of the internal combustion engine where powers from burnings are transformed into the energy needed for the vehicle's movement. It functions in the way that it transmits force developed by the expanding gases to the crank shaft for proper and efficient running of the engine. For the Oldsmobile Cutlass different designs of pistons are used from various years, namely, trunk pistons for both petrol and diesel engines, which are designed to support side forces and oil rings for lubrication. Moreover, racing pistons have been used due to lightweight and strong properties and meeting high RPM requirement. The dissimilarities that occur with these types of pistons include the materials used in its construction as well as differences in the geometry with cooling pockets and oil feed systems that enhance performance and durability in the Oldsmobile Cutlass.
Each OEM Oldsmobile Cutlass Piston we offer is competitively priced and comes with the assurance of the manufacturer's warranty for the part. Furthermore, we guarantee the speedy delivery of your orders right to your doorstep. Our hassle-free return policy is also in place for your peace of mind.
Oldsmobile Cutlass Piston Parts Questions & Experts Answers
- Q: How to remove the Piston and Rod Bearing in V8 engine on Oldsmobile Cutlass?A:Remove the oil pan, oil pump, and Cylinder Heads as previously described. Before forcing the piston assemblies up through the top of the engine block, use a ridge reamer to eliminate the ridge or carbon deposits at the top of each cylinder. Work on one cylinder at a time by turning the engine so the piston is at the bottom of its stroke, placing a rag on top of the piston to catch the cuttings. After removing the ridge, crank the engine until the piston is at the top of the cylinder and then remove the cloth and cuttings, as failure to do so may damage the Piston Rings, pistons, or cylinder walls. Inspect the connecting rods and connecting rod caps for cylinder identification; if not plainly marked, use a small punch to make indentations (left bank-1, 3, 5, 7, right bank-2, 4, 6, 8). Remove the nuts on the connecting rod stud in sequence and lift the cap (with bearing inside) off the Crankshaft, placing the connecting rod cap and bearing on a clean work surface marked for each cylinder. Cover the connecting rod studs with rubber or plastic tubing to prevent damage to the crankshaft or cylinder wall during piston assembly removal. Push the piston/connecting rod assembly out through the top of the cylinder and place it next to its rod cap on the sequenced work area. Repeat these procedures for the remaining seven cylinders, turning the crankshaft as necessary to access the connecting rod nuts, and reuse the rubber or plastic tubing for each assembly. Remove the bearings from the connecting rods and connecting rod caps using a small screwdriver; if the engine has many miles, it is not advisable to reuse the bearings, but if they are to be reinstalled, place them in a numbered rack. If a piston ring expanding tool is available, use it to remove each of the rings from the piston; alternatively, expand the ring just enough to clear the lands of the piston body, then place strips of tin (about ¾ in. wide) under the ring at equal distances around the piston and use a slight twisting motion to 'walk' the ring up and off the top. Place the rings in their 'installed' order adjacent to the piston/connecting rod on the numbered work area. Separating the connecting rod from the piston requires the removal of the piston pin, a task best left to a dealer or automotive machine shop equipped with the proper support tools and an arbor press. Avoid cleaning and inspecting the piston/rod assemblies at this time, as they may need to be replaced with new units depending on the condition of the cylinder block or crankshaft.
