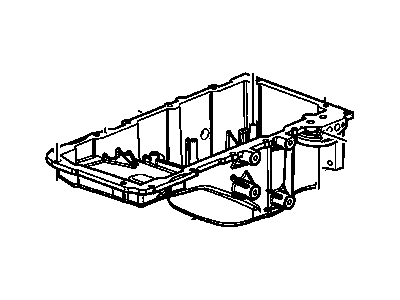
To remove the oil pan, first disconnect the cable from the negative battery terminal. Then, remove the plenum, intake manifold, valve covers, and timing chain cover. With the engine supported on a suitable engine stand, take out the long bolts retaining the oil pan to the rear main oil seal housing, followed by the remaining bolts holding the oil pan to the timing cover and engine block. Pry the oil pan from the engine block at designated points to break the seal, which will also disconnect the oil pickup pipe from the oil pump. If needed, unscrew the oil level sensor from the oil pan, and remove the baffle after taking out the retaining bolts. The oil pickup can be removed once the bolts in the bottom of the oil pan are taken out, and the oil pickup oil seal should be discarded. For installation, clean the mounting surfaces of the oil pan and engine block thoroughly, ensuring no old gasket material or sealer remains. Check the oil pump pickup for any cracks or leaks and ensure the screen is clear. Install a new oil seal to the oil pump pickup, then install the oil pickup and tighten the bolts in the bottom of the oil pan. Reattach the baffle inside the oil pan, securing it with the retaining bolts. Create two aligning studs from bolts with the heads removed and screw them into the oil pan bolt holes to ensure proper alignment. Apply a 1/8-inch wide bead of oxygen sensor safe RTV sealant to the oil pan mating surface with the engine block, as well as to the corners where the front and rear covers meet the block. Install the oil pan and tighten the bolts finger-tight, then remove the threaded dowel pins before tightening the oil pan bolts in the specified torque order, noting that the bolts for the rear main oil seal housing require a different torque. Finally, the remainder of the installation follows the reverse of the removal process, after which the proper type and quantity of oil should be added, and the engine started to check for leaks before returning the vehicle to service.


")
