Make sure this part fits

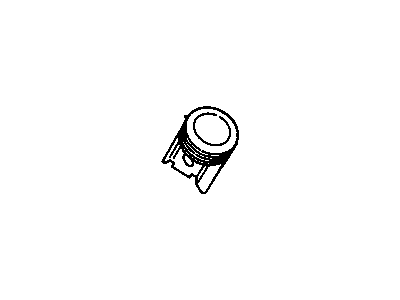
Cadillac 14092910 Piston & Piston Pinion Assembly, (Std)

1985-1986 Cadillac Cimarron

Customer Questions & Expert Answers (7)
GM 14092910 Piston & Piston Pinion Assembly, (Std)
  • Part Description
    PISTON, Engine Piston
  • Manufacturer
    General Motors
  • Manufacturer's Notes
    This part is discontinued.
Make sure this part fits
  • Related Parts
  • Product Specifications
  • Vehicle Fitment
  • Customer Questions & Expert Answers
  • Product Specifications

    BrandGenuine Cadillac
    Manufacturer Part Number14092910
    Part DescriptionPISTON, Engine Piston
    Other NamesPiston
    Item Dimensions4.6 x 4.5 x 4.4 inches
    Item Weight1.80 Pounds
    ConditionNew
    Fitment TypeDirect Replacement
    Require Quantity6
    ManufacturerGeneral Motors
    SKU14092910
    WarrantyThis genuine GM part is guaranteed by GM's factory warranty.
    Shipping & ReturnShipping Policy Return Policy
    Warning: California's Proposition 65
  • Vehicle Fitment

    Year Make Model Engine Important vehicle option details
    1985-1986 Cadillac Cimarron6 Cyl 2.8LCIMARRON
  • Customer Questions & Expert Answers

    Q:
    I am wonder if this is complete and correct part for my vehicle. Posted by GMPartsGiant Specialist
    A:
    You can Select Your Vehicle to check if 14092910 fits your vehicle.
    Posted by GMPartsGiant Specialist
    Q:
    What steps should be followed before installing the piston and connecting rod assemblies on Pontiac Fiero? Posted by Customer
    A:
    Before installing the piston and connecting rod assemblies, ensure the cylinder walls are clean, the top edge of each cylinder is chamfered, and the crankshaft is in place. Remove the connecting rod cap from the number one connecting rod, take out the old bearing inserts, and wipe the bearing surfaces with a clean, lint-free cloth. Clean the back side of the new upper bearing half and lay it in place in the connecting rod, ensuring the tab fits into the recess without hammering or nicking the bearing face, and do not lubricate it at this time. Clean the back side of the other bearing insert and install it in the rod cap, again ensuring the tab fits into the recess without applying lubricant. Position the piston ring gaps properly and slip a section of plastic or rubber hose over the connecting rod cap bolts. Lubricate the piston and rings with clean engine oil, attach a piston ring compressor, and leave the skirt protruding about 1/4-inch to guide the piston into the cylinder. Rotate the crankshaft until the number one connecting rod journal is at bottom dead center, then apply a coat of engine oil to the cylinder walls. With the notch or arrow on top of the piston facing the front of the engine, slip the number one piston/connecting rod assembly into the cylinder bore, resting the bottom edge of the ring compressor on the engine block, and tap the top edge to ensure contact around the circumference. Clean the number one connecting rod journal on the crankshaft and carefully tap the piston into the cylinder while guiding the connecting rod into place on the crankshaft journal, ensuring not to force the piston and checking for any resistance. After installation, check the connecting rod bearing oil clearance before permanently bolting the rod cap in place by laying a piece of Plastigage on the number one connecting rod journal, ensuring it does not cross the oil hole. Clean the connecting rod cap bearing face, remove the protective hoses, install the rod cap, and tighten the nuts to the specified torque without rotating the crankshaft. Remove the rod cap carefully to avoid disturbing the Plastigage and compare the width of the crushed material to the scale on the container to obtain the oil clearance, ensuring it meets specifications. Scrape off any traces of Plastigage, being careful not to scratch the bearing, and apply a uniform layer of moly-base grease or engine assembly lube to both bearing faces. Slide the connecting rod back into place, remove the protective hoses, install the rod cap, and tighten the nuts to the specified torque in three steps. Repeat the procedure for the remaining piston/connecting rod assemblies, keeping all components clean and ensuring the correct piston is used with the notch facing the front of the engine. After all assemblies are installed, rotate the crankshaft by hand to check for binding, and finally, check the connecting rod end play, comparing it to the specified measurement. If using original rods, there should be no change in end play; however, if new rods or a new crankshaft are used, the end play may have changed, necessitating removal for refacing if insufficient or replacement if excessive.
    Posted by GMPartsGiant Specialist
    Q:
    What steps should be taken before removing the piston and connecting rod assemblies on Pontiac Fiero? Posted by Customer
    A:
    Prior to removing the piston and connecting rod assemblies, position the engine upright. Use a ridge reamer to completely eliminate the ridge at the top of each cylinder, following the manufacturer's instructions, as failure to do so may result in piston breakage. Once the cylinder wear ridges are removed, turn the engine upside-down. Before removing the connecting rods, check the end play by mounting a dial indicator aligned with the crankshaft and touching the side of the number one connecting rod cap. Push the connecting rod backward to zero the dial indicator, then push it forward to check the reading; the distance moved indicates the end play, and if it exceeds the service limit, a new connecting rod is necessary. Alternatively, feeler gauges can be used to measure the end play by inserting them between the connecting rod and crankshaft throw until the play is eliminated, with the total thickness equating to the end play. Inspect the connecting rods and caps for identification marks; if absent, use a small punch to create indentations for identification. Loosen each connecting rod cap nut about half a turn, remove the number one connecting rod cap and bearing insert without dropping the insert, and protect the crankshaft journal and cylinder wall by slipping short lengths of plastic or rubber hose over the connecting rod cap bolts before pushing the connecting rod/piston assembly out through the top of the engine with a wooden tool. If resistance is encountered, ensure all ridge material has been removed from the cylinder. Repeat this process for the remaining cylinders, and after removal, reassemble the connecting rod caps and bearing inserts in their respective rods, installing the cap nuts finger tight to prevent accidental damage to the bearing surfaces.
    Posted by GMPartsGiant Specialist
    Q:
    How can the condition of the piston and connecting rod assembly be assessed for the 1985 Buick Skylark? Posted by Customer
    A:
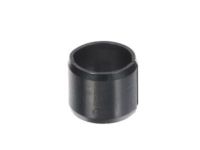
    While the piston is still connected to the connecting rod, swivel the rod back and forth to assess the degree of difficulty. Compare all piston/rod assemblies; if the rods appear loose on the piston pins and move with little or no drag, the piston pins are worn and need replacement.
    Posted by GMPartsGiant Specialist
    See expert answers on similar Piston
    Q:
    How should the piston rings be removed for the 1987 Pontiac Fiero? Posted by Customer
    A:
    A piston ring installation tool should be utilized to carefully remove the rings, avoiding any nicks or gouges on the pistons.
    Posted by GMPartsGiant Specialist
    See expert answers on similar Piston
    Q:
    What does the reading from the dial indicator indicate for the 1988 Pontiac Firebird? Posted by Customer
    A:
    The reading indicates the endplay, which should not exceed the service limit.
    Posted by GMPartsGiant Specialist
    See expert answers on similar Piston
    Q:
    What is the first step in preparing the connecting rod for installation for the 1986 Pontiac Firebird? Posted by Customer
    A:
    Remove the connecting rod cap from the number one connecting rod, take out the old bearing inserts, and wipe the bearing surfaces with a clean, lint-free cloth.
    Posted by GMPartsGiant Specialist
    See expert answers on similar Piston
    If you have any questions about this product, please don't hesitate to ask us. We will be happy to help you!

Genuine GM Part 14092910, the Right Choice

To ensure reliability, purchase GM part # 14092910 Piston & Piston Pinion Assembly, (Std). It is sometimes referred to as Cadillac Piston. Directly from GM, genuine parts are superb with regards to quality, longevity, and fit. Every single part passed stringent quality testing, so you can be sure that it's safe, durable, and built to perform like your original parts. This part fits specific Cadillac Cimarron models.

GMPartsGiant.com is a leading supplier of genuine GM parts and accessories such as GM 14092910 Piston & Piston Pinion Assembly, (Std). You're certainly in the right place if you're searching for the great cost-effective OEM GM parts. Look no further than our vast inventory of genuine GM parts offered at unbeatable online prices, all of which are backed by the manufacturer's warranty. Not to forget, our hassle-free return policy and quick delivery service ensure a smooth shopping experience for you. For detailed Cadillac parts information, click here.

Why choose GM Parts Giant

  • Dedicated Service

    Your complete satisfaction is our #1 goal

  • Lowest Prices

    Best deals on genuine OE parts from dealerships

  • Fast Delivery

    Orders are processed and delivered promptly