Make sure this part fits

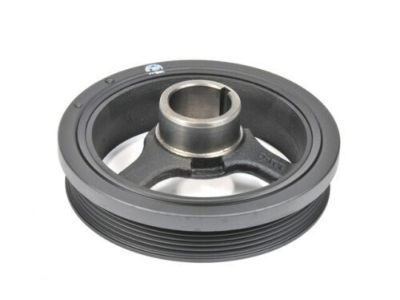
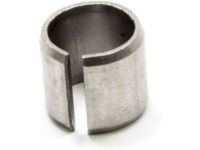
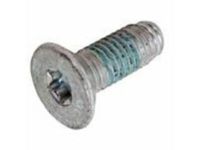
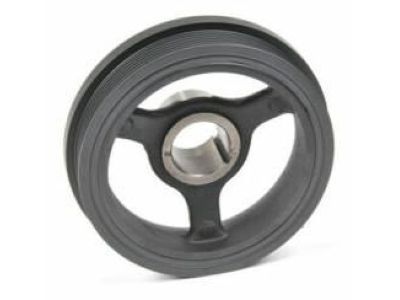
GM 12697768 Balancer Assembly, Cr/Shf

2007-2024 GM

Customer Questions & Expert Answers (14)
GM 12697768 Balancer Assembly, Cr/Shf
  • Part Description
    Balancer Assembly, Cr/Shf
  • Replaces
    12626355, 12674685, 12603181
  • Manufacturer
    General Motors
Make sure this part fits
$62.49 MSRP: $107.81
You Save: $45.32 (43%)
Ships in 1-2 Business Days
1
ADD TO CART
  • Related Parts
  • Product Specifications
  • Vehicle Fitment
  • Customer Questions & Expert Answers
  • Product Specifications

    BrandGenuine GM
    Manufacturer Part Number12697768
    Part DescriptionBalancer Assembly, Cr/Shf
    Item Dimensions7.9 x 7.4 x 3.3 inches
    Item Weight6.50 Pounds
    ConditionNew
    Fitment TypeDirect Replacement
    Replaces12626355, 12674685, 12603181
    ManufacturerGeneral Motors
    SKU12697768
    WarrantyThis genuine GM part is guaranteed by GM's factory warranty.
    Shipping & ReturnShipping Policy Return Policy
    Warning: California's Proposition 65
  • Vehicle Fitment

    Year Make Model Engine Important vehicle option details
    2010-2015, 2007-2008 Buick Allure6 Cyl 3.0L, 6 Cyl 3.6LCX (US)/ALLURE CX (CAN), CX 4 DOOR, CX 4 DOOR SEDAN, CXL 4 DOOR, CXL 4 DOOR SEDAN, CXL(US)/ALLURE CXL(CAN), CXS 4 DOOR, CXS 4 DOOR SEDAN, CXS(US)/Allure CXS(CAN), SPS 4 DOOR SEDAN, SUPER SERIES 4 DOOR
    2008-2024 Buick Enclave6 Cyl 3.6LBASE EXTENDED 4 DOOR SUV, PREMIUM 1 EXTENDED 4 DOOR SUV, PREMIUM 2 EXTENDED 4 DOOR SUV, SPORT UTILITY VEHICLE 2WD, SPORT UTILITY VEHICLE 4WD, SPORT UTILITY VEHICLE AWD
    2010-2016, 2007-2008 Buick LaCrosse6 Cyl 3.0L, 6 Cyl 3.6LCX (US)/ALLURE CX (CAN), CX 4 DOOR, CX 4 DOOR SEDAN, CXL 4 DOOR, CXL 4 DOOR SEDAN, CXL(US)/ALLURE CXL(CAN), CXS 4 DOOR, CXS 4 DOOR SEDAN, CXS(US)/Allure CXS(CAN), SPS 4 DOOR SEDAN, SUPER SERIES 4 DOOR
    2013-2014 Cadillac ATS6 Cyl 3.6L4 DOOR LUXURY SEDAN, 4 DOOR PERFORMANCE SEDAN, 4 DOOR PREMIUM SEDAN, 4 DOOR SEDAN
    2010-2014 Cadillac CTS6 Cyl 3.0L, 6 Cyl 3.6L2 DOOR COUPE, 4 DOOR, 4 DOOR (RHD), 4 DOOR PERFORMANCE SEDAN, 4 DOOR PREMIUM SEDAN, 4 DOOR SEDAN, 4 DOOR SEDAN(RHD), 4 DOOR STATION WAGON, 4 DOOR STATION WAGON(RHD), 4 DOOR WAGON, 4 DOOR WAGON(RHD)
    2010-2016 Cadillac SRX6 Cyl 2.8L, 6 Cyl 3.0L, 6 Cyl 3.6LCROSSOVER 4 DOOR
    2013-2019 Cadillac XTS6 Cyl 3.6L4 DOOR NOTCHBACK, LUXURY 4 DOOR NOTCHBACK, PLATINUM 4 DOOR NOTCHBACK, PREMIUM 4 DOOR NOTCHBACK
    2022-2024 Chevrolet Camaro8 Cyl 6.2L2 DOOR CONVERTIBLE HI PERFORMANCE, 2 DOOR CONVERTIBLE HIGH PERFORMANCE, 2 DOOR COUPE HI PERFORMANCE, 2 DOOR COUPE HIGH PERFORMANCE
    2012-2015 Chevrolet Captiva Sport6 Cyl 3.0LSPORT LT FWD
    2008-2017 Chevrolet Equinox6 Cyl 3.0L, 6 Cyl 3.6LLT SUV, LTZ SUV, SS SUV AWD, SS SUV FWD, SUV AWD, SUV FWD, SUV LT AWD, SUV LT FWD
    View More
  • Customer Questions & Expert Answers

    Q:
    I am wonder if this is complete and correct part for my vehicle. Posted by GMPartsGiant Specialist
    A:
    You can Select Your Vehicle to check if 12697768 fits your vehicle.
    Posted by GMPartsGiant Specialist
    Q:
    How to install a crankshaft pulley in 3.6L V6 engine on Buick Enclave? Posted by Customer
    A:
    This procedure requires a special pulley installation tool and a new crankshaft pulley bolt. Before proceeding, read through the entire procedure and obtain the necessary tools and materials. Start by disconnecting the cable from the negative battery terminal. Raise the vehicle and support it securely on jackstands. Remove the drivebelt. Install an engine support fixture or an engine hoist to the engine lifting bracket on the right side. Alternatively, the engine may be supported from below the oil pan with a floor jack and a block of wood. If this is done, position the wood and the jack to avoid damaging the oil pan. Tighten the engine support chain to remove the weight from the engine mounts. Remove the right side engine mount. Carefully lower the engine about two inches for clearance. Remove the crankshaft pulley bolt. Prevent the crankshaft from turning by removing the starter motor and wedging a large screwdriver or pry bar in the drive plate ring gear teeth. Install a large three-jaw puller on the pulley, and remove the pulley. Make note of how far the pulley is pressed onto the crankshaft. It must be installed in the same position. Use the puller to draw the pulley from the crankshaft. Lubricate the inside of the pulley bore with clean engine oil. Don't let oil contact the outside of the pulley's snout or the oil seal in the timing chain cover. The pulley must only be installed into a dry seal. Obtain a crankshaft pulley installation tool. Use only this tool to press the pulley into place. Install the pulley in its original position. The installation tool should be bottomed on the end of the crankshaft. Remove the installation tool. Install the new crankshaft pulley bolt. Have an assistant wedge the large screwdriver or pry bar in the drive plate ring gear teeth, then tighten the bolt to the torque and angle of rotation. The remainder of installation is the reverse of removal.
    Posted by GMPartsGiant Specialist
    Q:
    How to disconnect the air inlet hoses and remove the crankshaft pulley in 3.2L V6 engine on Cadillac CTS? Posted by Customer
    A:
    Disconnect the air inlet hoses to the throttle body, then the inlet hose to the air filter housing and lift out the air inlet resonator, setting it to the side; if complete removal is necessary, all electrical connectors must be disconnected. Remove the drive belt, then take out the crankshaft pulley bolts and the pulley itself. Install the crankshaft pulley along with the mounting bolts, tightening them to the specified torque. Finally, reinstall all components that were removed earlier.
    Posted by GMPartsGiant Specialist
    Q:
    How to install a new harmonic balancer bolt and balancer in 2.8L, 3.0L, 3.6L V6 engine on Cadillac CTS? Posted by Customer
    A:
    In order to undertake this procedure one is forced to buy a harmonic balancer bolt and a balancer installation tool which is only supplied by special tool makers. To start with, the following steps may be followed; the cable connecting the battery to the negative terminal should be disconnected. Chock the wheels which are still in contact with the ground and then locate the front of the car and lift it up using jackstands. The drivebelts and the splash shield must be removed to provide access to the motor mounts. Then proceed to the removal of the starter motor by using a prybar through the rear of the engine block to hold the ring gear teeth on the flywheel as the harmonic balancer pulley center bolt is loosened. To have the harmonic balancer ready without the balancer, the three-jaw puller is required; the jaws of the puller should be adjusted only to embrace the cylindrical part of the balancer, the outer ring should not be touched; by this time, you have to put an elongated bolt with the Allen's head into the cranking nose in order to protect the threads. Apply clean engine oil to the end of the crankshaft and oil seal before fitting the harmonic balancer onto the crankshaft so that the slot in the hub of the pulley/balancer is aligned to the Woodruff key. Place the crankshaft between your legs and with some help use the old balancer bolt to push the balancer on to the crankshaft. Replace the balancer bolt with a new one, and then tighten this bolt at the particular torque and with the predetermined angle of turn; for this action, a torque angle gauge is required. The other part of the installation is removal and it is done in the reverse sequence.
    Posted by GMPartsGiant Specialist
    Q:
    How to install a new harmonic balancer in 5.7L, 6.0L, 6.2L V8 engine on Cadillac CTS? Posted by Customer
    A:
    This involved the use of a new harmonic balancer bolt, balancer installation tools J 41665 & EN 47812 available only from specialized tool makers. The first step is to un-clamp the cable from the negative terminal of the battery. Lift the front of the car and put it on jack stands, engage the parking brake. Disconnect the splash shield as well as the drive-belt. At the front of the vehicle remove the transmission oil cooler hoses and the power steering cooler hoses if fitted on the radiator. Loosen the harmonic balancer pulley in the same way A pry bar around the harmonic balancer pulley and then use a socket and a breaker bar on the center of the harmonic balancer pulley to remove the center bolt. Take the distance from the balancer to the end of the crankshaft snout for fitting. Remove the balancer from the crank shaft with the help of a puller making sure that the jaws of puller grasped only the inside circle of the balancer not outside ring. For this reason, screw in a long Allen-head bolt into the crankshaft nose to deter the tapered tip of the puller on the crankshaft threads. Fit the balancer washer to the end of the balancer, put the crankshaft pulley/harmonic balancer on the crankshaft and slide it forward until just touching the crankshaft front flange, check that the slot in the hub lines up with the Woodruff key at the end of the crankshaft. By engaging the use of the harmonic balancer installation tool, it is seamlessly placed on the crankshaft pulley/harmonic balancer. In fit the old harmonic balancer bolt and tighten the same to the recommended torque only. Take out the worn bolt and check it that the crankshaft snout to balancer measurement has not altered. If the measurement is out, then twist the harmonic balancer installation tool until the measurement is right. Last, there is the harmonic balancer bolt that has to be replaced and tightened to the required torque and angle, though there is information that on some models, you have to transfer balance weights from the old balancer to the new one. The rest of this installation relies on the inverse of that process.
    Posted by GMPartsGiant Specialist
    Q:
    How to disconnect the cable from the negative terminal of the battery and remove the crankshaft pulley in 3.4L V6 engine on Chevrolet Equinox? Posted by Customer
    A:
    Remove the first end of the cable connecting from the negative terminal of the battery. Pull the parking brake and place the gear lever in PARK, also, (loosen the lug nuts on the RH front wheel), then jack up the FRONT end of the car and place it on two jack stands. Turn the right front wheel outwards, thereby making it easy to unbolt from the car, and then take out the right splash shield from the wheel well. Remove the drivebelt. Take out the bolt exposed at the front of the crankshaft using the pin spanner in order to avoid to turning of crankshaft while operating on pulley bolt. The bolt can normally be quite light but, for this reason, it is advised to use a large breaker bar and a six-point socket. For a post 2006 car, get a new bolt; keep the old one in case of the first pulley installation. If a pin spanner cannot be obtained the starter should be disconnected and a large screw driver placed in between the ring gear teeth to prevent the crank shaft from rotating while an assistant tries to remove the crank shaft pulley bolt. The puller should have three hooks capable of holding the ID of the outer ring of the crankshaft pulley to prevent attachment to the outer ring. This kind of puller has a wide illustration of uses, for instance, to help remove the crankshaft pulley/balancer from the crankshaft: One should slip a spacer across the shaft such as a socket that drops into the hole in the pulley and that bears on the nose of the crankshaft to avoid denting it. Crankshaft key way-put a small amount of RTV sealant on this part of the crankshaft. Take the crankshaft pulley/balancer and place it on the crankshaft and slide it in until it engages the crankshaft, position the slot in the hub to the Woodruff key situation in the end of the crankshaft. With the help of a crankshaft balancer installation tool, the crankshaft pulley/balancer should be pressed on the crankshaft; it is also possible to use the crankshaft bolt for this purpose with a large amount of clean engine oil on the threads to avoid galling. To a 2005 model, fix the old bolt and washer into its respective place before putting some effort to tighten the bolt to the specified torque. For a pre-2006 model, retain the new bolt but replace the washer with the old one you removed; then tighten to the momentary torque and then remove. Replace the new bolt and washer and rotate them to the right torque of the device. The rest of the installation process is a mirror image of the removal process that was explained above.
    Posted by GMPartsGiant Specialist
    Q:
    How to remove and install a front crankshaft pulley and Crankshaft Seal in 2.4L four cylinder engine on Chevrolet Equinox? Posted by Customer
    A:
    To remove the crankshaft pulley, first disconnect the cable from the negative battery terminal and remove the drivebelt. Raise the vehicle and support it securely on jackstands, then take off the splash shield from below the engine compartment by removing its mounting fasteners. Use a breaker bar and socket to remove the crankshaft pulley center bolt, employing a large pin spanner to prevent the pulley from rotating while loosening the bolt; discard the old bolt and obtain a new one for installation. It may be necessary to lock the pulley in position using a strap wrench or a large pin spanner, and wrapping an old drivebelt around the pulley can provide a better grip if using a strap wrench. Slide the puller off the nose of the crankshaft, and if the pulley is stuck, use a puller that bolts to the three threaded holes in the pulley hub, along with a spacer like a deep socket to avoid damaging the crankshaft. Next, use a seal puller to remove the crankshaft front oil seal, taking care not to damage the crankshaft or the seal bore; a screwdriver wrapped with tape can be used as an alternative. Clean the seal bore and check for nicks or gouges, and examine the hub area for signs of abnormal wear or scoring. For installation, coat the lip of the new seal with clean engine oil and drive it into the bore with a seal driver or a socket slightly smaller in diameter than the seal, ensuring the open side of the seal faces into the engine. Lubricate the sealing surface of the hub with clean engine oil, then install the crankshaft pulley/damper using a special installation tool, avoiding the use of a hammer. Install a new center bolt and tighten it to the specified torque, ensuring a new pulley bolt is used. The remainder of the installation follows the reverse order of removal, and finally, reconnect the battery.
    Posted by GMPartsGiant Specialist
    Q:
    How to remove and install a crankshaft pulley in 3.0L and 3.6L V6 engine on GMC Terrain? Posted by Customer
    A:
    As a first step in order to remove the crankshaft pulley you have to make sure you have a special pulley installation tool and a new crankshaft pulley bolt. Start the procedure on preventing the flow of current by removing the negative battery terminal, and properly jacking up the car on stands. Take the drivebelt and then place an engine support fixture/hoist over the engine lifting bracket at the right side, though you can also support the engine from below the oil pan using a floorjack and small wood placed on the oil pan but be careful not to bend the oil pan. Rotate the engine support chain clockwise to lift weight off the engine mounts then remove the right side engine mount to pull the engine down by about two inches. Loosen the crankshaft pulley bolt while securing the crank from rotating by removing it with the starter motor then inserting a large screwdriver or prybar through the drive plate ring gear. A large three jua puller is used to unthread the pulley from damper and ensure that hooks of puller are placed round the center hub not the outer inertia ring and note how much the pulley is pressed on crankshaft for reassembly. To lubricate it for installation, apply clean engine oil to the internal diameters of those holes and avoid oil coming into contact with the outside diameter of the pulley snout or the oil seal in the timing chain cover. Use a crankshaft pulley installation tool to fit the pulley without having to hammer it in as is often the norm. Replace the pulley into its proper position and take out the installing tool and put the new crankshaft pulley bolt then an assistant put the screwdriver or prybar in the ring gear teeth of the driveplate, tighten the bolt of your crankshaft pulley in accordance of the specified torque and angle of rotation of the screwdriver or prybar. Last one is done to complete the installation and this will be in the reverse of the removal steps mentioned above.
    Posted by GMPartsGiant Specialist
    Q:
    How to install a crankshaft pulley in 3.6L V6 engine on GMC Acadia? Posted by Customer
    A:
    This procedure requires a special pulley installation tool and a new crankshaft pulley bolt. Before proceeding, read through the entire procedure and obtain the necessary tools and materials. Start by disconnecting the cable from the negative battery terminal. Raise the vehicle and support it securely on jackstands. Remove the drivebelt. Install an engine support fixture or an engine hoist to the engine lifting bracket on the right side. Alternatively, the engine may be supported from below the oil pan with a floor jack and a block of wood. If this is done, position the wood and the jack to avoid damaging the oil pan. Tighten the engine support chain to remove the weight from the engine mounts. Remove the right side engine mount. Carefully lower the engine about two inches for clearance. Remove the crankshaft pulley bolt. Prevent the crankshaft from turning by removing the starter motor and wedging a large screwdriver or pry bar in the drive plate ring gear teeth. Install a large three-jaw puller on the pulley, and remove the pulley. Make note of how far the pulley is pressed onto the crankshaft. It must be installed in the same position. Use the puller to draw the pulley from the crankshaft. Lubricate the inside of the pulley bore with clean engine oil. Don't let oil contact the outside of the pulley's snout or the oil seal in the timing chain cover. The pulley must only be installed into a dry seal. Obtain a crankshaft pulley installation tool. Use only this tool to press the pulley into place. Install the pulley in its original position. The installation tool should be bottomed on the end of the crankshaft. Remove the installation tool. Install the new crankshaft pulley bolt. Have an assistant wedge the large screwdriver or pry bar in the drive plate ring gear teeth, then tighten the bolt to the torque and angle of rotation. The remainder of installation is the reverse of removal.
    Posted by GMPartsGiant Specialist
    Q:
    How to install a crankshaft pulley in 3.6L V6 engine on Pontiac G6? Posted by Customer
    A:
    This procedure involves the use of a pulley installation tool that this author learned exist in only a few tool making companies and a new crankshaft pulley bolt. First, you want to unplug the cable from the negative terminal of the battery. Lift the vehicle, and set it on secure jackstands; remove the drivebelt. Fix an engine support fixture or engine hoist to the engine lifting bracket on the right side and it is also possible to support the engine with a floor jack provided the wood is placed underneath the oil pan in such a manner that the wood and the jack do not deform the oil pan. Pull the engine support up, thus taking weight off of the engine mounts and remove the right engine mount. Lower the engine two inches for clearance and take off the crankshaft pulley bolt, to prevent the crankshaft from turning you can hold with a large pin spanner or crank the starter and wedge a large screwdriver or prybar in the driveplate ring gear teeth. Take care of how far the pulley is pushed onto the crankshaft for reconstruction. Place a large three jaw puller on the pulley in a manner that the hooks are only placed on the hub and not on the outer edge and use the puller to pull the pulley off the crank shaft. To fit the pulley the inside of the pulley bore should be lubricated with clean engine oil do not allow the oil to come in contact with the outside of the pulley snout or the oil seal in the timing cover. Get the crankshaft pulley installation tool and with the assistance of this tool you have to fix the pulley in its' proper position which it held before the process of its removal. Before the removal of the installation tool the installer should be seated at the end of the crankshaft. Replace the destroyed crankshaft pulley bolt with the new one, tighten it as to the required torque and rotation angle. The rest of the installation goes in the process in reverse order of the removal.
    Posted by GMPartsGiant Specialist
    Q:
    How to disconnect the cable from the negative terminal of the battery and remove the crankshaft pulley in 3.4L V6 engine on GMC Terrain? Posted by Customer
    A:
    Take the cable out of its connection to the negative battery post. Press the parking brake, put the shift lever in Park, and securely raise the front of your car on jackstands. Unwind the lug nuts on the right front wheel before supporting the entire front part of the car. Take the right front wheel and removal of the right splash shield out of the wheel well. Remove the drivebelt. Avoid turning the crankshaft by using a pin spanner on the crankshaft bolt in the front to loosen it, before taking off the pulley bolt at the front. Save the 2006+ bolt and put it in your toolbox for easy installation when first attaching the pulley. If you don't have a pin spanner, your assistant uses a long screwdriver to hold the crankshaft, while you remove the crankshaft pulley bolt. Use a puller with three hooks that locks onto the crankshaft pulley inside rim, keeping clear of anywhere outside to prevent any harm. Use this puller tool to take off the crankshaft pulley/balancer, moving the pulley toward the crankshaft and putting a spacer between them to stop any damage to the crankshaft. Cover the bottom front area of the crankshaft with a tiny amount of RTV sealant to protect the key way. Center the crankshaft pulley/balancer on the crankshaft, making sure the jagged groove of the hub lines up exactly with the Wedge cutout on the crankshaft's endpiece. To put the crankshaft pulley/balancer on the crankshaft, use the crankshaft balancer installation tool. Make sure to either use only clean engine oil on the bolt threads or use the crankshaft bolt during the process to prevent galling. If you have a car that's 2006 or newer, first buy a new bolt. Put back the old bolt and its washer, tighten it following the torque recommendations, and take it out. Put the new bolt and washer in place, and make sure you torque the bolt to the instructions. After taking out parts, we undo everything step by step to complete installation.
    Posted by GMPartsGiant Specialist
    Q:
    How to install a crankshaft pulley in 3.6L V6 engine on Chevrolet Traverse? Posted by Customer
    A:
    This procedure requires a special pulley installation tool and a new crankshaft pulley bolt. Before proceeding, read through the entire procedure and obtain the necessary tools and materials. Start by disconnecting the cable from the negative battery terminal. Raise the vehicle and support it securely on jackstands. Remove the drivebelt. Install an engine support fixture or an engine hoist to the engine lifting bracket on the right side. Alternatively, the engine may be supported from below the oil pan with a floor jack and a block of wood. If this is done, position the wood and the jack to avoid damaging the oil pan. Tighten the engine support chain to remove the weight from the engine mounts. Remove the right side engine mount. Carefully lower the engine about two inches for clearance. Remove the crankshaft pulley bolt. Prevent the crankshaft from turning by removing the starter motor and wedging a large screwdriver or pry bar in the drive plate ring gear teeth. Install a large three-jaw puller on the pulley, and remove the pulley. Make note of how far the pulley is pressed onto the crankshaft. It must be installed in the same position. Use the puller to draw the pulley from the crankshaft. Lubricate the inside of the pulley bore with clean engine oil. Don't let oil contact the outside of the pulley's snout or the oil seal in the timing chain cover. The pulley must only be installed into a dry seal. Obtain a crankshaft pulley installation tool. Use only this tool to press the pulley into place. Install the pulley in its original position. The installation tool should be bottomed on the end of the crankshaft. Remove the installation tool. Install the new crankshaft pulley bolt. Have an assistant wedge the large screwdriver or pry bar in the drive plate ring gear teeth, then tighten the bolt to the torque and angle of rotation. The remainder of installation is the reverse of removal.
    Posted by GMPartsGiant Specialist
    Q:
    How to remove and install a crankshaft pulley and front Crankshaft Seal in four cylinder engine on Pontiac G6? Posted by Customer
    A:
    To get the crankshaft pulley off you will have to unplug the cable for the negative terminal on the battery and take off the drivebelt. Jack up the vehicle and adequately place jackstands then on the lower part of the car, remove the splash shield. Employ a breaker bar and socket to take out the crankshaft pulley center bolt; toss the old bolt and acquire a brand new bolt for replacement. Secure the shaft in position with a strap wrench or a tool if there is no other way; use an old drive belt if insufficient room exists. Slide the puller off the nose of the crankshaft; if the pulley is stuck, use a puller that bolts to the three threaded holes in the pulley hub, together with spacer so that crankshaft is not scratched. Dispose with the crankshaft front oil seal using the seal puller in such way so that it will not harm the crankshaft or the seal bore Clean the seal bore and ensure that there's no nicks or gouges. Looking at the hub area, see whether there is an excessive wear and if the repair sleeve should be used. Cleaning of the lip should be done using clean engine oil and then install the new seal into the bore by use of a seal driver or socket of a size that is slightly smaller than the seal in question and make sure that the open side of the seal is positioned towards the inside of the engine. Apply clean engine oil on the sealing surface of the hub and fix the crankshaft pulley/damper with crankshaft pulley/damper installation tool do not use hammer. Replace damaged center bolt with a new one and tighten it to the required torque; the new pulley bolt has to be used. Last but not the least, they make the conclusion of the installation by reversing the method you have followed to remove the connection and reconnect the battery.
    Posted by GMPartsGiant Specialist
    Q:
    What is the first step in the process for the 2007 Pontiac G6? Posted by Customer
    A:
    Disconnect the cable from the negative terminal of the battery.
    Posted by GMPartsGiant Specialist
    See expert answers on similar Crankshaft Pulley
    If you have any questions about this product, please don't hesitate to ask us. We will be happy to help you!

Genuine GM Part 12697768, the Right Choice

To ensure reliability, purchase GM part # 12697768 Balancer Assembly, Cr/Shf. It is sometimes referred to as GM Crankshaft Pulley, GM Harmonic Balancer. Directly from GM, genuine parts are superb with regards to quality, longevity, and fit. Every single part passed stringent quality testing, so you can be sure that it's safe, durable, and built to perform like your original parts. This part fits specific Cadillac ATS, CTS, SRX models. It fits Chevrolet Camaro, Equinox, Impala. It also fits GMC Acadia, Terrain. This also fits Saturn Aura, Outlook, Vue.

GMPartsGiant.com is a leading supplier of genuine GM parts and accessories such as GM 12697768 Balancer Assembly, Cr/Shf. You're certainly in the right place if you're searching for the great cost-effective OEM GM parts. Look no further than our vast inventory of genuine GM parts offered at unbeatable online prices, all of which are backed by the manufacturer's warranty. Not to forget, our hassle-free return policy and quick delivery service ensure a smooth shopping experience for you. For detailed GMC parts information, click here.

Why choose GM Parts Giant

  • Dedicated Service

    Your complete satisfaction is our #1 goal

  • Lowest Prices

    Best deals on genuine OE parts from dealerships

  • Fast Delivery

    Orders are processed and delivered promptly