
My Garage
My Account
Cart
Genuine 2007 Pontiac G6 Crankshaft Pulley
Crankshaft Pulley Engine Harmonic Balancer- Select Vehicle by Model
- Select Vehicle by VIN
Select Vehicle by Model
orMake
Model
Year
Select Vehicle by VIN
For the most accurate results, select vehicle by your VIN (Vehicle Identification Number).
1 Crankshaft Pulley found
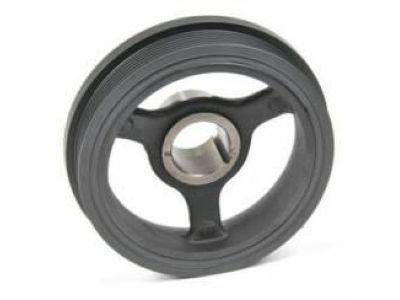
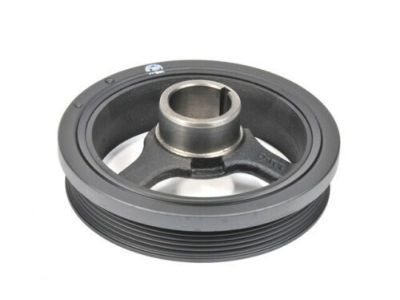
2007 Pontiac G6 Crank Pulley
Part Number: 12697768$67.17 MSRP: $115.89You Save: $48.72 (43%)Ships in 1-2 Business DaysProduct Specifications- Other Name: Balancer, Engine Crankshaft And Camshaft Balancer
- Replaces: 12626355, 12674685, 12603181
- Item Weight: 6.50 Pounds
- Item Dimensions: 7.9 x 7.4 x 3.3 inches
- Condition: New
- Fitment Type: Direct Replacement
- SKU: 12697768
- Warranty: This genuine part is guaranteed by GM's factory warranty.
2007 Pontiac G6 Crankshaft Pulley
We are your prime source for competitively priced and high-quality OEM 2007 Pontiac G6 Crankshaft Pulley. We provide you with parts that will allow you to save a lot of money without sacrificing quality. All our OEM parts are backed by the manufacturer's warranty and shipped out at a swift rate.
2007 Pontiac G6 Crankshaft Pulley Parts Questions & Experts Answers
- Q:How to disconnect the cable from the negative terminal of the battery and remove the crankshaft pulley in 3.5L,3.9L V6 engine on 2007 Pontiac G6?Posted by Kien H.A:Disconnect the cable from the negative terminal of the battery. With the parking brake applied and the shift lever in Park, loosen the lug nuts from the right front wheel, then raise the front of the vehicle and support it securely on jackstands. Remove the right front wheel and the right splash shield from the wheel well. Remove the drivebelt. Support the right side of the subframe with a floor jack, remove the right-side subframe bolts, and loosen the left-side subframe bolts, then partially lower the right side of the subframe. Remove the bolt from the front of the crankshaft using a pin spanner to prevent the crankshaft from turning while loosening the pulley bolt, which is normally very tight; use a large breaker bar and a six-point socket for removal. Obtain a new bolt but save the old one for the initial installation of the pulley. Use a puller with three hooks that can grasp the inside diameter of the outer ring of the crankshaft pulley, ensuring the hooks do not attach to the outside of the pulley. Remove the crankshaft pulley/balancer from the crankshaft using a puller that bears on the crankshaft pulley hub, and use a spacer to avoid damage to the crankshaft. Apply a small amount of RTV sealant onto the crankshaft keyway and allow it to set up slightly. Position the crankshaft pulley/balancer on the crankshaft and slide it on as far as it will go, ensuring the slot in the hub aligns with the Woodruff key in the end of the crankshaft. Using a crankshaft balancer installation tool, press the crankshaft pulley/balancer onto the crankshaft, noting that the crankshaft bolt can also be used for this purpose with clean engine oil on the bolt threads to prevent galling. For a 2005 model, install the old bolt and washer and tighten it to the specified torque. For a 2006 or later model, purchase a new bolt, install the old bolt and washer, tighten it to the specified torque, then remove it. Install the new bolt and washer, tightening it to the specified torque followed by the angle torque. The remaining installation steps are the reverse of removal, ensuring to tighten the subframe bolts to the specified torque.Answered by GM Parts Specialist Raul / Dec 04, 2023
Related 2007 Pontiac G6 Parts
 2007 Pontiac G6 Rod Bearing
 2007 Pontiac G6 Crankshaft Thrust Washer Set
 2007 Pontiac G6 Piston Ring
 2007 Pontiac G6 Crankshaft
 2007 Pontiac G6 Camshaft
 2007 Pontiac G6 Crankshaft Gear
 2007 Pontiac G6 Oil Pump
 2007 Pontiac G6 Oil Pan
 2007 Pontiac G6 Oil Pump Gasket
 2007 Pontiac G6 Oil Pan Gasket
 2007 Pontiac G6 Cam Gear
 2007 Pontiac G6 Harmonic Balancer