Make sure this part fits

Pontiac 10495089 Distributor Ignition Pickup

1985-1992 Pontiac

Customer Questions & Expert Answers (18)
GM 10495089 Distributor Ignition Pickup
  • Part Description
    Coil,Distributor Pick Up ; Coil, Ignition
  • Replaces
    01987964, 1987964
  • Manufacturer
    General Motors
Make sure this part fits
$27.14 MSRP: $51.20
You Save: $24.06 (47%)
Ships in 1-3 Business Days
1
ADD TO CART
  • Related Parts
  • Product Specifications
  • Vehicle Fitment
  • Customer Questions & Expert Answers
  • Product Specifications

    BrandGenuine Pontiac
    Manufacturer Part Number10495089
    Part DescriptionCoil,Distributor Pick Up ; Coil, Ignition
    Other NamesCoil, Ignition Coil, Pick-Up Coil
    Item Dimensions4.1 x 3.2 x 2.1 inches
    Item Weight0.50 Pounds
    ConditionNew
    Fitment TypeDirect Replacement
    Replaces01987964, 1987964
    ManufacturerGeneral Motors
    SKU10495089
    WarrantyThis genuine GM part is guaranteed by GM's factory warranty.
    Shipping & ReturnShipping Policy Return Policy
    Warning: California's Proposition 65
  • Vehicle Fitment

    Year Make Model Engine Important vehicle option details
    1985-1986 Pontiac 60004 Cyl 2.5L, 6 Cyl 2.8L2 DOOR, 4 DOOR, LE 2 DOOR, LE 4 DOOR, LE STATION WAGON, SE 4 DOOR, SE STATION WAGON, STATION WAGON, STE 4 DOOR
    1985-1988 Pontiac Fiero6 Cyl 2.8L2 DOOR, GT 2 DOOR, SE 2 DOOR, SPORT 2 DOOR
    1985-1992 Pontiac Firebird4 Cyl 2.5L, 6 Cyl 2.8L, 6 Cyl 3.1L, 8 Cyl 5.0L, 8 Cyl 5.7L2 DOOR, CONVERTIBLE
    1985-1986 Pontiac Grand Am4 Cyl 2.5L2 DOOR, 4 DOOR, LE 2 DOOR, LE 4 DOOR, SE 2 DOOR, SE 4 DOOR
    1987 Pontiac Grand Prix6 Cyl 4.3L, 8 Cyl 5.0L2 DOOR, BROUGHAM 2 DOOR, LE 2 DOOR
    1985-1986 Pontiac J20004 Cyl 2.0L2 DOOR, 2 DOOR NOTCHBACK, 2 DOOR PLAINBACK HATCHBACK, 4 DOOR, GT 2 DOOR, GT 4 DOOR, GT CONVERTIBLE, LE 2 DOOR NOTCHBACK, LE 4 DOOR, LE CONVERTIBLE, LE STATION WAGON, SE 2 DOOR, SE 4 DOOR, SE CONVERTIBLE, SE HATCHBACK, STATION WAGON
    1986 Pontiac Sunbird4 Cyl 2.0L2 DOOR, 4 DOOR, GT 2 DOOR, GT 4 DOOR, GT CONVERTIBLE, SE 2 DOOR, SE 4 DOOR, SE CONVERTIBLE, STATION WAGON
  • Customer Questions & Expert Answers

    Q:
    I am wonder if this is complete and correct part for my vehicle. Posted by GMPartsGiant Specialist
    A:
    You can Select Your Vehicle to check if 10495089 fits your vehicle.
    Posted by GMPartsGiant Specialist
    Q:
    How to check and remove the Ignition Coil on Chevrolet Blazer? Posted by Customer
    A:
    To check the High Energy Ignition System (HEI), begin by disconnecting the battery's negative terminal. Test the coil for opens and grounds. On the high scale, connect the ohmmeter leads; it should show a very high or infinite resistance value. On the low scale, check the coil's primary resistance, which should indicate a very low or zero resistance value. Also, check the coil's secondary resistance on the high scale; it should not show an infinite resistance. If any values are off, replace the coil. For removal, unplug the coil's high-tension wire and electrical leads, and remove the mounting nuts to take out the coil. The installation process is the reverse of removal.
    Posted by GMPartsGiant Specialist
    Q:
    How to test and remove/install the Ignition Coil on Buick Century? Posted by Customer
    A:
    To test the Coil-In-Cap, start by removing the distributor cap and disconnecting the coil. Use an ohmmeter to check the resistance across the primary connections, ensuring it is close to zero. Then, test the resistance between the primary ground and the coil secondary connector, using both solid wire and dotted line connections. If the readings are infinite, the coil needs to be replaced. For a separately mounted coil, disconnect the secondary lead and unplug the primary leads. Remove the coil from the engine and use an ohmmeter to check the resistance on the high scale. It should be nearly infinite. Then, test the resistance on the low scale, which should be close to zero. Finally, reset the ohmmeter to the high resistance scale and check for continuity. If all three tests pass, the coil is satisfactory. To remove and install the coil-in-cap, mark the high tension wires and disconnect them from the distributor cap. Remove the cap by depressing and rotating the wire type latch. Turn the cap upside down and remove the four bolts holding the coil. Disconnect the primary wiring and remove the coil. Clean the mounting area and inspect the cap for defects before installing a new coil. For a separate cap, disconnect the negative battery cable and remove the secondary coil lead. Disconnect the harness from the coil assembly and remove the mounting screws. Install the new coil, reconnect the harness, and reattach the secondary lead. Finally, reconnect the negative battery cable.
    Posted by GMPartsGiant Specialist
    Q:
    How is the ignition coil tested and replaced within the distributor cap on Cadillac Fleetwood? Posted by Customer
    A:
    Distributor cap contains the ignition coil and as for the connection to the rotor is made through the center terminal. If it is fitted, the capacitor is mounted together with the coil wire harness assembly and its purpose is solely for radio noise suppression. To test the ignition coil, the wiring connectors must be removed at the distributor cap; the position of the wires should also be noted. Subsequently, to dismantle the distributor, unscrew the cap and coil assembly by loosening the four screws. Check the interior and exterior of the cap to see if there is any tracking of the yarn; if there is tracking then replace the cap. This is done by placing the probes of the ohmmeter across the coil terminals-these are the outer terminals at the end of the recessed boss of the cap and if the reading obtained is not close to zero then the coil must be replaced. Next, place the test leads of the ohmmeter across the coil centre contact and the centre terminal of the 3-wire plug on the cap-the meter should be set to its highest scale if the reading is infinite, then the ignition coil should be changed. If no issues are found, the coil is most likely bad and should be reviewed on a scope. For the removal and installation of the vehicle's distributor, begin by unscrewing the negative cable of the battery then; unplug the wiring connectors of the distributor cap and finally, remove the cap off the distributor housing. Subsequently, the screw of the coil cover placed on the top of the cap should be available and then the cover needs to be pulled out. Take out the attaching screws from the cap and then disconnect the ignition coil with leads from the cap and look for the indication of carbon tracking on the inside base on the cap below the coils. Last of all, if necessary, decrement the arc seal of the ignition coil and clean this part using the soft material, and also one should check the cap for its the defected parts and replace if required.
    Posted by GMPartsGiant Specialist
    Q:
    How to remove and install ignition coils in different types of ignition systems on Chevrolet Astro? Posted by Customer
    A:
    To start the High Energy Ignition (HEI) systems in 1994 and earlier models, disconnect the negative terminal of the battery. Unplug the coil's high tension wire and both electrical leads if it is separately mounted on your model; then take off the coil by removing both mounting nuts. On models with the coil in the distributor cap, either push through the top of the hood and remove it by taking out the mounting screws or lift off the cover after removing the coil cover screws. Between TACH and BAT terminals, measure primary resistance of nearly zero if you want to test a coil; replace it if higher. Measure secondary resistance between rotor button in distributor cap and TACH terminal as well as rotor button and BAT terminal which should not read infinite resistance; otherwise, replace a coil. Have various ohmmeter tests done for a separately mounted coil on models with it; then replace a coil if necessary. To install connect then follow backward removal procedure for COILS. For Enhanced Distributor Ignition (EDI) systems in 1995 and later models, you can check the coil without removing it from the engine by first removing engine cover and air cleaner assembly, then detach primary electrical connector from ignition coil. Determine that there is battery voltage at CONTACT switch ON using a voltmeter or test light when testing this kind of a coil; otherwise inspect fuses plus wiring connections. In case any checks fail during ohmmeter measurement of coils' resistances, change coils accordingly. To remove COILS unscrew studs holding them down to intake manifold after disengaging battery negative terminal, unfasten electrical connectors from ignition coils, separate their secondary wires going into distributors and finally strip down engine covers together with air filter housings. A drill punch should be used to remove an old COIL from bracket before swapping for new. Install new COIL onto bracket securing whole assembly to manifold with studs before continuing with the remaining steps in backward order.
    Posted by GMPartsGiant Specialist
    Q:
    How to replace an ignition coil in a distributor on Chevrolet Astro? Posted by Customer
    A:
    Detach the cable from the negative terminal of the battery. Remove the distributor cap and rotor. Remove the distributor from the engine. Detach the pick-up coil leads from the module. Connect one lead of an ohmmeter to the terminal of the pick-up coil lead and the other to ground as shown. Flex the leads by hand to check for intermittent opens. The ohmmeter should indicate infinite resistance at all times. If it doesn't, the pick-up coil is defective and must be replaced. Connect the ohmmeter leads to both terminals of the pick-up coil lead. Flex the leads by hand to check for intermittent opens. The ohmmeter should read one steady value between 500 and 1500 ohms as the leads are flexed by hand. If it doesn't, the pick-up coil is defective and must be replaced. Remove the spring from the distributor shaft. Mark the distributor tang drive and shaft so that they can be reassembled in the same position. If the distributor is equipped with a Hall Effect switch attached to the top of the pick-up coil, remove the two retaining screws. Carefully mount the distributor in a soft-jawed vise and, using a hammer and punch, remove the roll pin from the distributor shaft and gear. Remove the distributor shaft. Remove the driven gear and spacer washers from the end of the shaft, making sure to note the order in which you remove any spacers. Remove the shaft from the distributor. To remove the pick-up coil, remove the thin "C" washer (on four-cylinder models) or the retaining clip. Lift the pick-up coil assembly straight up and remove it from the distributor. Note the order in which you remove the pieces. Reassembly is the reverse of disassembly. Installation is the reverse of removal.
    Posted by GMPartsGiant Specialist
    Q:
    How to replace the Ignition Coil on Chevrolet C1500? Posted by Customer
    A:
    To disconnect the cable from the negative terminal of a battery, detach first if not done earlier the high tension lead of the coil and primary wire connector. Then remove mounting fasteners to separate coil from engine. For 1996 through 2000 models, take away electrical connectors from ignition coil and ignition control module, and unplug coil wire from high-tension terminal. Remove ignition coil/module bracket mounting bolts and pull assembly out through engine. On a workbench, drill center of rivets holding coil to bracket, punch out rivets and remove coil off bracket. Screw new screws into bracket while retaining it with ignition coil. Finally put assembly back on engine and connect electrical connectors as well as fit in the wires into their respective terminals in the coil.
    Posted by GMPartsGiant Specialist
    Q:
    How to remove and install the Ignition Coil on Chevrolet El Camino? Posted by Customer
    A:
    For models before 1974 the process includes disconnecting electrical connections of the unit, and two screws for mounting, which should be marked for reinstallation. For models manufactured from 1975 and up you should begin by removing the battery wire and harness connector from the distributor cap. Then, there is the coil cover which is fixed with three screws and the coil assembly which is fixed by four screws. The best thing to do is to ensure one notes the position of each wire or remove the labels if any then the removal of the coil ground wire as well as the pushing of the leads from the underside of the connectors to remove the coil from the distributor cap. Installation is done in the order of what is illustrated in the figure above and keen attention should be given to the leads to link them to their correct places.
    Posted by GMPartsGiant Specialist
    Q:
    How to remove and install a distributor and ignition coil on Chevrolet K1500? Posted by Customer
    A:
    Disconnect the cable from the negative battery terminal. Caution: On models equipped with the Theftlock audio system, be sure the lockout feature is turned off before performing any procedure which requires disconnecting the battery. Remove the distributor cap and rotor. Remove the distributor from the engine. Detach the ignition coil leads from the module. Mark the distributor shaft and gear so they can be reassembled in the same relationship. Carefully mount the distributor in a vise equipped with soft jaws and, using a hammer and punch, remove the roll pin from the distributor shaft and gear. Pull out the distributor shaft. To remove the ignition coil, mount the distributor shaft in a vise equipped with soft jaws and, using a pin punch and hammer, knock out the roll pin. Remove the driven gear and spacer washers or springs from the end of the shaft-be sure to note their installed order. Remove the shaft from the distributor. To detach the ignition coil, remove the retaining clip. Lift the ignition coil assembly straight up and detach it from the distributor. Installation is the reverse of removal.
    Posted by GMPartsGiant Specialist
    Q:
    How to check the ignition coil on Pontiac Firebird? Posted by Customer
    A:
    To examine the ignition coil, remove the distributor cap, and rotor, and disconnect its wiring from the ignition module. Test for continuity between coil connector terminals and the distributor body; if found, the coil is shorted and needs replacement. Measure the resistance, it should be between 500 and 1,500 ohms and if out of range, replace the coil. To do so, remove the distributor, disconnect the coil leads, mark the distributor gear for reassembly, and remove the gear. Extract the shaft, remove any shields, and pry out the coil using the C-clip. Reinstall in reverse order.
    Posted by GMPartsGiant Specialist
    Q:
    How to remove and install an ignition coil on Pontiac Fiero? Posted by Customer
    A:
    Disconnect the cable from the negative terminal of the battery. Unplug the coil high tension wire and both electrical leads from the coil. Remove both mounting nuts and remove the coil from the engine. Check the coil for opens and grounds by performing the following three tests with an ohmmeter. These three resistance checks will determine whether your separately mounted coil is good or bad. Using the ohmmeter's high scale, hook up the ohmmeter leads as shown. The ohmmeter should indicate a very high, or infinite, resistance value. If it doesn't, replace the coil. Using the low scale, hook up the leads as shown. The ohmmeter should indicate a very low, or zero resistance value. If it doesn't, replace the coil. Using the high scale, hook up the leads. The ohmmeter should not indicate an infinite resistance. If it does, replace the coil. Installation of the new or old coil is the reverse of the removal procedure. Remove the distributor. Turn the four latches and remove the cap and coil assembly from the lower housing. Connect an ohmmeter to both terminals of the cap coil assembly. The reading should be zero, or nearly zero. If it isn't, replace the coil. Connect the ohmmeter between each of the terminals of the coil assembly and the center contact of the cap. Use the high scale on the ohmmeter. Replace the coil only if both readings are infinite. Remove the coil cover attaching screws and lift off the cover. Remove the ignition coil mounting screws and lift the coil; with the leads, from the cap. Remove the ignition coil arc seal. Clean with a soft cloth and inspect the cap for defects. Replace if necessary. Assemble the new coil and cover in the cap. Install the distributor cap. Install the distributor in the engine.
    Posted by GMPartsGiant Specialist
    Q:
    How to replace the ignition coil on Pontiac Fiero? Posted by Customer
    A:
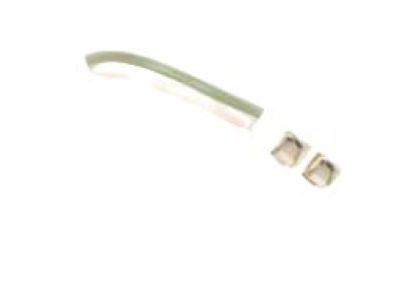
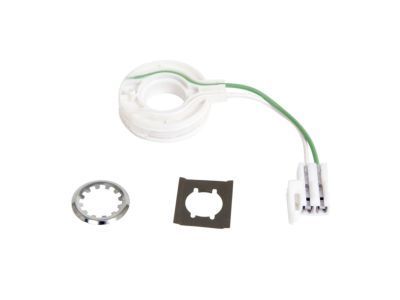
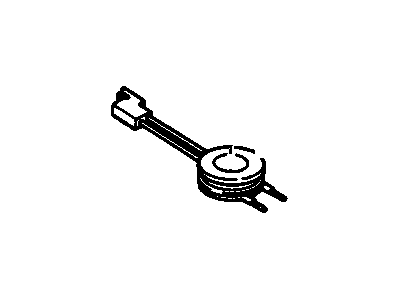
    Start by removing the cap and rotor of the distributor, then remove the distributor itself. Disconnect the pick-up coil leads from the module and use an ohmmeter to test for any faults. There is a need for flexing by hand to identify intermittent opens on the leads with infinity reading at all times on the ohmmeter. Then, connect one end of an ohmmeter to the pick-up coil lead terminal and flex it again checking for intermittent opens as it flexes, with a constant meter reading of 500-1500 ohms. If any of these tests fail, it means that there is a bad pick-up coil. To replace it, mark the distributor gear and shaft for reassembly in the same position, take out roll pin from distributor shaft and gear, and pry off retaining ring. Pull straight up on pick-up assembly and wipe distributor base and module clean before applying silicone lubricant between module base for heat dissipation. Drop in module attaching module base then connect pick-up pole piece assy., retainer assy., install shaft gear parts, roll pin. Ensure that teeth do not touch; after this install rotor/cap then final re-installation of distributor into engine must be made. For V6 remove distibutor from engine; disconnect wiring connector at cap; turn four latches to remove cap/coil assembly from lower housing. Take out rotor and pickup coil lead wires from ignition module. When testing an ohmmeter should be connected between pickup coil lead connector & distributor housing reading infinite resistance. Connect an ohmeter between both terminals of pickup coil lead connector and note steady values between 600-1600 ohms will indicate that you have good ones. If any of these tests fail, it indicates that there is something wrong with its pick-up coil. To replace it: mark distibutor shaft/gear for reassembly; drive out roll pin; remove gear then draw shaft out of distributor. Next, remove the magnetic shield by removing three attaching screws, followed by detaching pick-up coil, magnet and pole piece by taking off C-clip. Put back a new pick-up coil, magnet and pole piece with a thin washer, then reassemble the shaft/gear parts/roll pin making sure teeth do not touch. Inserting rotor/cap then finally reinstalling distributor into engine that is all.
    Posted by GMPartsGiant Specialist
    Q:
    How to remove and install the ignition coil on Oldsmobile Cutlass? Posted by Customer
    A:
    During 1975 and following models disconnect the distributing cap from the wiring harness and battery wire. Three screws securing the coil cover must be unscrewed before removing the coil assembly by removing four screws from the distributor cap. First identify the position of every wire and mark them if needed before removing the coil ground wire and gently pushing the leads from beneath each connector to extract the coil from the distributor cap. You need to reconnect the wires to their original spots as part of installation and make sure the center electrode should exhibit no damage before installing the fresh coil.
    Posted by GMPartsGiant Specialist
    Q:
    How to check and replace the ignition coil on GMC Sonoma? Posted by Customer
    A:
    To check the ignition coil, start by connecting one lead of an ohmmeter to the terminal of the ignition coil lead and the other lead to the ground. Flex the leads by hand to check for intermittent opens, and the ohmmeter should always indicate infinite resistance. If it doesn't, the ignition coil is defective and needs to be replaced. Next, connect the ohmmeter leads to both terminals of the ignition coil lead and flex the leads by hand again. The ohmmeter should read a steady value between 500 and 1,500 ohms as the leads are flexed. If it doesn't, the ignition coil is defective and should be replaced. To remove the ignition coil, start by detaching the cable from the negative terminal of the battery. Then, remove the distributor cap and rotor, and if necessary, remove the distributor itself. Remove the spring clip from the distributor shaft and mark the distributor tang drive and shaft for reassembly. Set the distributor in a vise with a shop rag to protect the shaft, and use a hammer and punch to remove the roll pin from the distributor shaft and gear. Lift the ignition coil assembly straight up and remove it from the distributor, noting the order in which the pieces were removed. Reassembly is the reverse of disassembly.
    Posted by GMPartsGiant Specialist
    Q:
    How to check and replace the ignition coil on GMC Jimmy? Posted by Customer
    A:
    To check the ignition coil, start by connecting one lead of an ohmmeter to the terminal of the ignition coil lead and the other lead to the ground. Flex the leads by hand to check for intermittent opens, and the ohmmeter should always indicate infinite resistance. If it doesn't, the ignition coil is defective and needs to be replaced. Next, connect the ohmmeter leads to both terminals of the ignition coil lead and flex the leads by hand again. The ohmmeter should read a steady value between 500 and 1,500 ohms as the leads are flexed. If it doesn't, the ignition coil is defective and should be replaced. To remove the ignition coil, start by detaching the cable from the negative terminal of the battery. Then, remove the distributor cap and rotor, and if necessary, remove the distributor itself. Remove the spring clip from the distributor shaft and mark the distributor tang drive and shaft for reassembly. Set the distributor in a vise with a shop rag to protect the shaft, and use a hammer and punch to remove the roll pin from the distributor shaft and gear. Lift the ignition coil assembly straight up and remove it from the distributor, noting the order in which the pieces were removed. Reassembly is the reverse of disassembly.
    Posted by GMPartsGiant Specialist
    Q:
    How do I perform a check on the High Energy Ignition System (HEI) for the 1994 Chevrolet S10? Posted by Customer
    A:
    To check the High Energy Ignition System (HEI), start by disconnecting the battery's negative terminal. Use an ohmmeter to test the coil for opens and grounds. First, on the high scale, connect the ohmmeter leads; it should show a very high or infinite resistance value. Then, on the low scale, check the coil's primary resistance, which should indicate a very low or zero resistance value. Also, check the coil's secondary resistance on the high scale; it should not show an infinite resistance. If any values are off, replace the coil. For removal, unplug the coil's high tension wire and electrical leads, and remove the mounting nuts to take out the coil. The installation process is the reverse of removal.
    Posted by GMPartsGiant Specialist
    See expert answers on similar Ignition Coil
    Q:
    How do you check the pick-up coil for the 1994 Chevrolet S10? Posted by Customer
    A:
    Start by connecting one lead of an ohmmeter to the terminal of the pick-up coil lead and the other lead to the ground. Flex the leads by hand to check for intermittent opens, and the ohmmeter should always indicate infinite resistance.
    Posted by GMPartsGiant Specialist
    See expert answers on similar Ignition Coil
    Q:
    How do you replace the coil of the 1991 Pontiac Firebird? Posted by Customer
    A:
    Disconnect the wiring connectors and secondary ignition wire, loosen the coil bracket mounting nuts, and remove the coil. Installation is the reverse of the removal procedure.
    Posted by GMPartsGiant Specialist
    See expert answers on similar Ignition Coil
    If you have any questions about this product, please don't hesitate to ask us. We will be happy to help you!

Genuine GM Part 10495089, the Right Choice

To ensure reliability, purchase GM part # 10495089 Distributor Ignition Pickup. It is sometimes referred to as Pontiac Ignition Coil. Directly from GM, genuine parts are superb with regards to quality, longevity, and fit. Every single part passed stringent quality testing, so you can be sure that it's safe, durable, and built to perform like your original parts. This part fits specific Pontiac 6000, Fiero, Grand Prix models.

GMPartsGiant.com is a leading supplier of genuine GM parts and accessories such as GM 10495089 Distributor Ignition Pickup. You're certainly in the right place if you're searching for the great cost-effective OEM GM parts. Look no further than our vast inventory of genuine GM parts offered at unbeatable online prices, all of which are backed by the manufacturer's warranty. Not to forget, our hassle-free return policy and quick delivery service ensure a smooth shopping experience for you. For detailed Pontiac parts information, click here.

Why choose GM Parts Giant

  • Dedicated Service

    Your complete satisfaction is our #1 goal

  • Lowest Prices

    Best deals on genuine OE parts from dealerships

  • Fast Delivery

    Orders are processed and delivered promptly