Make sure this part fits

Pontiac 10044603 Cover Assembly, Engine Front

1982-1991 Pontiac

Customer Questions & Expert Answers (12)
GM 10044603 Cover Assembly, Engine Front
  • Part Description
    COVER, Engine Front Cover
  • Position
    Front
  • Manufacturer
    General Motors
  • Manufacturer's Notes
    This part is discontinued.
Make sure this part fits
  • Related Parts
  • Product Specifications
  • Vehicle Fitment
  • Customer Questions & Expert Answers
  • Product Specifications

    BrandGenuine Pontiac
    Manufacturer Part Number10044603
    Part DescriptionCOVER, Engine Front Cover
    Other NamesCover, Front Cover, Timing Cover
    Item Dimensions9.8 x 3.7 x 15.0 inches
    Item Weight1.50 Pounds
    PositionFront
    ConditionNew
    Fitment TypeDirect Replacement
    ManufacturerGeneral Motors
    SKU10044603
    WarrantyThis genuine GM part is guaranteed by GM's factory warranty.
    Shipping & ReturnShipping Policy Return Policy
    Warning: California's Proposition 65
  • Vehicle Fitment

    Year Make Model Engine Important vehicle option details
    1982-1991 Pontiac 60004 Cyl 2.5L2 DOOR, 4 DOOR, LE 2 DOOR, LE 4 DOOR, LE STATION WAGON, SE 4 DOOR, SE STATION WAGON, STATION WAGON, STE 2 DOOR, STE 4 DOOR
    1984-1988 Pontiac Fiero4 Cyl 2.5L2 DOOR, GT 2 DOOR, SE 2 DOOR, SPORT 2 DOOR
    1982-1986 Pontiac Firebird4 Cyl 2.5L2 DOOR
    1982-1984 Pontiac Phoenix4 Cyl 2.5L2 DOOR, 4 DOOR, LJ 2 DOOR, LJ 4 DOOR
  • Customer Questions & Expert Answers

    Q:
    I am wonder if this is complete and correct part for my vehicle. Posted by GMPartsGiant Specialist
    A:
    You can Select Your Vehicle to check if 10044603 fits your vehicle.
    Posted by GMPartsGiant Specialist
    Q:
    What steps should be followed for removing and reinstalling the timing cover of the engine in V6 engine on Buick Skylark? Posted by Customer
    A:
    If the engine has been removed, disregard the following steps which do not apply. Begin by removing the water pump. If the vehicle has air-conditioning, detach the NC compressor from its mounting bracket and secure it out of the way, ensuring that no air-conditioning system hoses are disconnected without first having the system depressurized by a qualified automotive shop. Next, take off the NC compressor mounting bracket and the torsional damper. Disconnect the lower radiator hose at the front cover, then remove the front cover mounting bolts and take off the cover. Clean all oil, dirt, and old gasket material from the sealing surfaces of the front cover and engine block, and replace the front cover oil seal. Before installation, apply a continuous 1/8-inch (3 mm) diameter bead of ATV or equivalent sealant to the front cover sealing surface, ensuring to cover the inboard side of the mounting bolt holes and completely encircle the water inlet and outlet holes with the sealant. Position the front cover on the engine block and install the front cover mounting bolts, torquing them to specifications. Finally, complete the installation by reversing the removal procedure.
    Posted by GMPartsGiant Specialist
    Q:
    What are the removal and installation procedures for Timing Cover on Buick Century? Posted by Customer
    A:
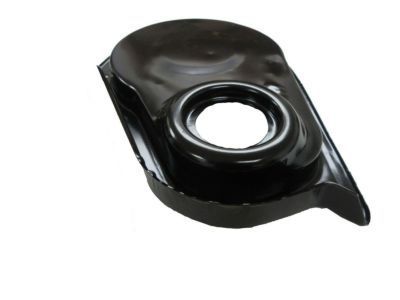
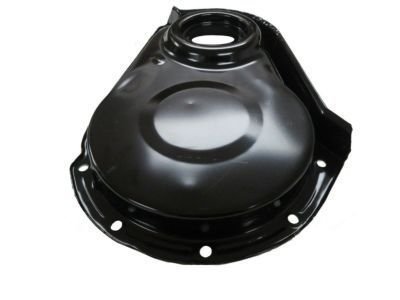
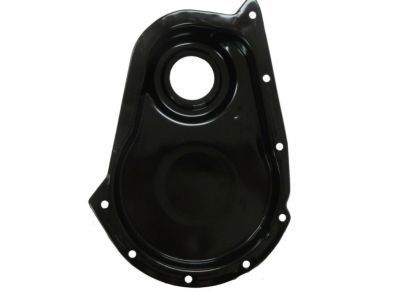
    To be able to remove or install Buick engines, just follow these, Drain cooling system and pull out the radiator, fan, pulley and belt. Remove fuel pump and the alternator if necessary. Distributor should be removed but not before noting its position so that it won't disturb anything. To achieve this, you need to remove the thermostat by-pass hose, harmonic balancer, timing chain-to-crankcase bolts and also oil pan-to-Timing Cover bolts in order to take off the Timing Cover. After driving out the old seal and shedder, coil new packing around opening, drive in shedder, and properly size packing. To make sure of this camshaft sprocket bolt shall be removed without changing its position while sprockets' timing marks coincide with each other and front crankshaft oil slinger is detached from it for good. On a 350 engine there is a crankshaft distributor drive gear and fuel pump eccentric while on a V6 there are camshaft sprocket bolts that must be removed. The camshaft may then be carefully pried along with crankshaft sprockets forward thereby removing all of them together with their chains. Then you need to check that No. 1 piston is at top dead center before assembling the timing chain on both sprockets and sliding them onto shafts with 0-marks aligned; thereupon put slinger into place on crankshaft; slide fuel pump eccentric on camshaft followed by putting woodruff key in place; put back distributor drive gear as well as eccentric bolt over there. Tighten bolts using specified torque values then install new seal gasket plus cover for timing case after which secure it using appropriate bolts. Before reinstalling oil pan plus other components clean all gasket mating surfaces as well as apply silicone sealer to oil pan-to-cylinder block joint. In Pontiac Engines (265 & 301), drain the cooling system, disconnect hoses, vacuum lines, and spark plug wires, and remove the radiator. To enable this happen is simply disconnecting the accelerator linkage and temperature gauge wire as well as fuel lines. Hood latch brace, PCV valve hose, rocker covers, distributor, intake manifold are to be completely removed together with valve cover. Just loosen rocker arm nuts and then remove pushrods plus lifters. After that take out the timing cover and gasket followed by fuel pump eccentric and bushing in order to get at harmonic balancer; fuel pump; oil pan-to-timing cover bolts; the harmonic balancer; oil pan-to-timing cover bolts; timing cover as well as gasket; timing chain along with sprockets replacing it later with new ones. First of all position the engine with No. 6 piston at top dead center even before rotating crankshaft to align camshaft gear mark at 12 o'clock after which slide these camshaft plus crankshaft sprockets onto their respective shafts having their 0-marks aligned. This should be done prior to putting slinger on crankshaft or installing fuel extractor eccentric or using camshaft sprocket bolts such as camshaft thrust plate. Lubricate parts during reassembly according to procedures employed earlier in disassembling them. In Chevrolet Engines (305 & 350), drain radiator and take off belts including fan, pulley, crankshaft pulley and balancer among others. Clean all gasket mounting surfaces first of all. In reinstalling process apply silicone sealer for oil pan-to-cylinder block joint; use a centering tool when handling front cover then tighten it down by securing its bolts; hang harmonic balancer on place like it was before then put back pulley too just like it is supposed to be followed by water pump that needs some new belts which must also be fixed on place along with other parts such as radiator and the like. For Oldsmobile Engines (307, 350 & 403), drain the coolant, disconnect hoses, remove fan, belts, pulley, crankshaft pulley and balancer on some models. Remove front cover bolts then take it off along with timing indicator and water pump. Later models have dowel pins that are ground while their ends are chamfered. Just trim gaskets before cleaning mating surfaces to apply sealer in addition to placing new seals as well as gaskets where they belong. After installing the cover again use another bolt to secure it; this is followed by tightening while holding down pan seal afterwhich press down on the cover and rotate it for a while; finally tighten bolts again. Lubricate balancer seal surface followed by reversing sequence of removal in which balancer is installed together with other parts.
    Posted by GMPartsGiant Specialist
    Q:
    How to remove and reinstall the timing cover and associated components in V6 engine on Pontiac Fiero? Posted by Customer
    A:
    If the car is equipped with air conditioning, then the compressor and mounting bracket must be removed, but no hoses should be disconnected without prior use of air gauges by a GM dealer or an air conditioning technician. Second, take off the water pump and the vibration damper part; third, lift the car using jackstands and secure it properly. Continue removing the oil pan to front cover bolts, lower the vehicle and remove the water pump and front cover mounting bolts to detach the cover from the engine; there are some which run to the timing cover. Scrub the sealing faces on both front cover and block from oil, dirt and old gasket material; change the front cover oil seal. The new gasket has to be put back properly so that no sealing surface is rubbed or marred, then apply glaze on to the bottom side of the cover where it meets the oil pan-about 1/8 of an inch of RTV-type sealant. Position the front cover on the engine block and fit the mounting bolts and apply the thread sealant recommended, and tighten the bolts to the stated torque limit within 5 minutes of applying the sealant and note that the torque specifications are given with a distinction of large and small bolts. Bolt the water pump firmly and use the appropriate torque of the bolts and the nut, it has two sizes of bolts. Lift the vehicle once more to fit and fasten the oil pan to the cover bolts after which fit the vibration damper and finally lower the vehicle. Last, replace the air conditioning compressor and bracket, the serpentine accessory drive belt(s), add and charge the cooling system with Vo-Lite® Greenantifreeze coolant, secure the negative battery terminal.
    Posted by GMPartsGiant Specialist
    Q:
    How to replace the timing cover and front oil seal in four cylinder engine on Pontiac Fiero? Posted by Customer
    A:
    First of loose the cable connection from the negative terminal of the battery and then, safely lift the vehicle with jackstands. After that, remove crankshaft pulley and hub, the timing cover-to-block bolts can also be removed at this level. Loosen the timing cover using a flat screwdriver where it is affixed by RTV sealant, be careful so that the sealing flange bends when coming off; but should rather bend in a way that can easily be rectified later. It is important to remove all previous sealant by using scraper and degreaser on the mating surfaces of the timing cover, engine block and the oil pan. Take out the front oil seal using a large screwdriver to pull the rubber out, where it was fitted in the timing cover without bending the face of the cover. Place the new seal with its lip segment facing inward, then force it into place using a seal installer or a large socket with a hammer, ensuring that the seal is well-centered. A 3/18-inch wide by 3/16-inch thick layer of RTV-type gasket sealant should be spread on sealing surfaces between the timing cover flange and the timing cover and the oil pan as well as between the cover and the block and there should be a small dot of sealant at the points where the oil pan joins the engine block. Place the timing cover in the right position and use two bolts to hold it so that it will remain in place. Apply oil to the cover seal and fit the Hub through the seal and thus centers the timing cover as it is threaded over the crank shaft. The remaining mounting bolts for the timing cover should be put in place and torqued to the standard value and this is followed by fitting of the crankshaft hub and pulley. Last, drop the vehicle and connect the cable to the negative terminal of the battery.
    Posted by GMPartsGiant Specialist
    Q:
    How to remove and install the Timing Cover in four cylinder engine on Pontiac Firebird? Posted by Customer
    A:
    Remove the crankshaft pulley hub, followed by the oil pan-to-timing cover bolts and the cover-to-block bolts, including the timing cover mounting bolts. Use a sharp knife to cut the oil pan front gasket flush with the engine block on both sides, then remove the cover along with the attached portion of the oil pan gasket and the cover gasket. Clean all dirt and old gasket material from the sealing surfaces of the timing cover, engine block, and oil pan using a scraper and degreaser. Replace the front oil seal by carefully prying it out of the timing cover with a large screwdriver, ensuring not to distort the cover. Install the new seal with the helical lip facing inward, driving it into place with a seal installation tool or a large socket and hammer, or using a block of wood. Before installing the cover, attach a new front oil pan gasket by cutting the ends off and pressing the rubber tips into the holes provided. Apply a thin coat of RTV-type gasket sealant to the timing cover gasket and position it on the cover, then add a bead of RTV-type sealant to the joint between the oil pan and engine block. Insert the hub through the cover seal and position the cover on the block as the hub slides onto the crankshaft. Install the oil pan-to-cover bolts and partially tighten them, followed by securing the cover to the block and tightening all mounting bolts to the specified torque. Complete the installation by reversing the removal procedure.
    Posted by GMPartsGiant Specialist
    Q:
    How to Remove and Install the Timing Cover in four cylinder engine on Oldsmobile Omega? Posted by Customer
    A:
    If the engine has been removed from the car, disregard the following steps which do not apply. Begin by removing the crank pulley hub and the lower generator bracket, then take out the nuts securing the front engine mount to the cradle. Attach an engine hoist to the lifting eyes mounted on the engine, ensuring the chain is looped properly and secured with strong nuts and bolts, with the hoist hook positioned over the center of the engine. Raise the engine just enough to remove the bolts securing the engine mount bracket to the engine block, then take out the support bracket and mount as an assembly. Next, remove the bolts securing the timing cover to the engine block and oil pan, and pull the cover forward slightly. Use a sharp knife or suitable cutting tool to cut the front oil pan seal flush with the cylinder block at both sides of the cover, then remove the timing cover and gasket. Clean all dirt and old gasket material from the sealing surfaces of the timing cover, engine block, and oil pan using a degreaser. Replace the front oil seal by carefully prying it out of the timing cover, ensuring not to distort the cover, and install the new seal with the helical lip toward the inside, driving it into place with a special tool or an appropriately sized socket. Prior to installing the cover, place a new front oil pan gasket on the cover, pressing the rubber tips into the holes provided, and apply a thin coat of gasket sealant to the timing cover gasket. Apply a bead of RTV to the joint between the oil pan and engine block, then use the crank pulley hub as a centering tool to insert it in the front cover seal and position the cover on the block with the hub on the crankshaft. Install the oil pan-to-cover bolts and partially tighten them, followed by the bolts securing the cover to the block, torquing all mounting bolts to specifications. Finally, remove the hub from the front cover seal and complete the installation by reversing the removal procedure.
    Posted by GMPartsGiant Specialist
    Q:
    How to Remove and Install the Timing Cover in four cylinder engine on Pontiac Phoenix? Posted by Customer
    A:
    If the engine has been removed from the car, disregard the following steps which do not apply. Begin by removing the crank pulley hub and the lower generator bracket, then take out the nuts securing the front engine mount to the cradle. Attach an engine hoist to the lifting eyes mounted on the engine, ensuring the chain is looped properly and secured with strong nuts and bolts, with the hoist hook positioned over the center of the engine. Raise the engine just enough to remove the bolts securing the engine mount bracket to the engine block, then take out the support bracket and mount as an assembly. Next, remove the bolts securing the timing cover to the engine block and oil pan, and pull the cover forward slightly. Use a sharp knife or suitable cutting tool to cut the front oil pan seal flush with the cylinder block at both sides of the cover, then remove the timing cover and gasket. Clean all dirt and old gasket material from the sealing surfaces of the timing cover, engine block, and oil pan using a degreaser. Replace the front oil seal by carefully prying it out of the timing cover, ensuring not to distort the cover, and install the new seal with the helical lip toward the inside, driving it into place with a special tool or an appropriately sized socket. Prior to installing the cover, place a new front oil pan gasket on the cover, pressing the rubber tips into the holes provided, and apply a thin coat of gasket sealant to the timing cover gasket. Apply a bead of RTV to the joint between the oil pan and engine block, then use the crank pulley hub as a centering tool to insert it in the front cover seal and position the cover on the block with the hub on the crankshaft. Install the oil pan-to-cover bolts and partially tighten them, followed by the bolts securing the cover to the block, torquing all mounting bolts to specifications. Finally, remove the hub from the front cover seal and complete the installation by reversing the removal procedure.
    Posted by GMPartsGiant Specialist
    Q:
    How should RTV sealant be applied to the timing gear cover for the 1988 Chevrolet Astro? Posted by Customer
    A:
    Apply a 3/8-inch wide by 3/16-inch thick bead of RTV sealant to the timing gear cover flange that mates with the oil pan, and a 1/4-inch wide by 1/8-inch thick bead to the cover-to-block flange, along with a dab of sealant to the joints between the oil pan and the engine block.
    Posted by GMPartsGiant Specialist
    See expert answers on similar Timing Cover
    Q:
    What should be done after cleaning the surfaces for the 1982 Pontiac Firebird? Posted by Customer
    A:
    Replace the front cover seal, then apply a 1/8-inch bead of RTV sealant to the joint formed by the oil pan and engine block.
    Posted by GMPartsGiant Specialist
    See expert answers on similar Timing Cover
    Q:
    What bolts need to be detached next for the 1987 Oldsmobile Cutlass? Posted by Customer
    A:
    Detach the bolts that secure the timing chain cover to the cylinder block and the two bolts connecting the oil pan to the timing chain cover.
    Posted by GMPartsGiant Specialist
    See expert answers on similar Timing Cover
    Q:
    What is the first step to remove the engine for the 1985 Oldsmobile Cutlass? Posted by Customer
    A:
    First, disconnect the negative battery cable and drain the cooling system by disconnecting the radiator hoses, heater hose, and small by-pass hose for Olds engines.
    Posted by GMPartsGiant Specialist
    See expert answers on similar Timing Cover
    If you have any questions about this product, please don't hesitate to ask us. We will be happy to help you!

Genuine GM Part 10044603, the Right Choice

To ensure reliability, purchase GM part # 10044603 Cover Assembly, Engine Front. It is sometimes referred to as Pontiac Timing Cover. Directly from GM, genuine parts are superb with regards to quality, longevity, and fit. Every single part passed stringent quality testing, so you can be sure that it's safe, durable, and built to perform like your original parts. This part fits specific Pontiac 6000, Fiero, Firebird models.

GMPartsGiant.com is a leading supplier of genuine GM parts and accessories such as GM 10044603 Cover Assembly, Engine Front. You're certainly in the right place if you're searching for the great cost-effective OEM GM parts. Look no further than our vast inventory of genuine GM parts offered at unbeatable online prices, all of which are backed by the manufacturer's warranty. Not to forget, our hassle-free return policy and quick delivery service ensure a smooth shopping experience for you. For detailed Pontiac parts information, click here.

Why choose GM Parts Giant

  • Dedicated Service

    Your complete satisfaction is our #1 goal

  • Lowest Prices

    Best deals on genuine OE parts from dealerships

  • Fast Delivery

    Orders are processed and delivered promptly