My Garage
My Account
Cart
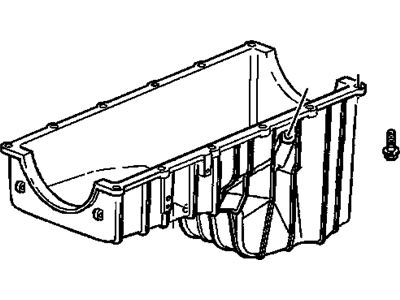
Genuine 1986 Chevrolet El Camino Oil Pan
Oil Drain Pan- Select Vehicle by Model
- Select Vehicle by VIN
Select Vehicle by Model
orMake
Model
Year
Select Vehicle by VIN
For the most accurate results, select vehicle by your VIN (Vehicle Identification Number).
4 Oil Pans found
- Product Specifications
- Other Name: PAN, Transmission Oil
- Replaces: 08648349, 8648349
- Item Weight: 4.40 Pounds
- Item Dimensions: 21.5 x 16.8 x 3.1 inches
- Condition: New
- Fitment Type: Direct Replacement
- SKU: 24202236
- Warranty: This genuine part is guaranteed by GM's factory warranty.
- Product Specifications
- Other Name: PAN, Transmission Oil Pan
- Item Weight: 5.80 Pounds
- Item Dimensions: 21.7 x 14.7 x 2.9 inches
- Condition: New
- Fitment Type: Direct Replacement
- SKU: 8657035
- Warranty: This genuine part is guaranteed by GM's factory warranty.
- Product Specifications
- Other Name: PAN, Engine Oil; Oil Pan
- Item Weight: 8.30 Pounds
- Item Dimensions: 27.3 x 12.8 x 10.7 inches
- Condition: New
- Fitment Type: Direct Replacement
- SKU: 555137
- Warranty: This genuine part is guaranteed by GM's factory warranty.
- Product Specifications
- Other Name: PAN, Engine Oil; Oil Pan
- Item Weight: 8.70 Pounds
- Item Dimensions: 8.8 x 29.8 x 13.1 inches
- Condition: New
- Fitment Type: Direct Replacement
- SKU: 14082348
- Warranty: This genuine part is guaranteed by GM's factory warranty.
1986 Chevrolet El Camino Oil Pan
We are your prime source for competitively priced and high-quality OEM 1986 Chevrolet El Camino Oil Pan. We provide you with parts that will allow you to save a lot of money without sacrificing quality. All our OEM parts are backed by the manufacturer's warranty and shipped out at a swift rate.
1986 Chevrolet El Camino Oil Pan Parts Questions & Experts Answers
- Q: How is the oil pan removed in V8 engine on 1986 Chevrolet El Camino?A: As for the models of 1969 thru 1973 with Mk IV VB engines, it was reported that the oil pan could not be dropped with the engine still in the car because of the lack of the corresponding space; the engine needs to be stripped out for this job to be accomplished. Starting where it is safe, begin by disconnecting the negative terminal of the battery, then disconnecting the air cleaner assembly and the distributor cap to minimise breakages. Remove the attached bolt from the radiator shroud and hang it over the cooling fan of the car. If the vehicle is fitted with a big-block Mark IV engine, then the cars have no oil dipstick or the dipstick tube. Lift the car and place it on a jack stand and then proceed to drain the engine oil into a suitable receptacle. Remove the exhaust crossover pipe by loosening the bolting that is fastened at the manifold flanges, drop the exhaust pipes and then support them by using wire which are passed through the frame. On automatic transmissions: remove the converter under the pan; on manual: remove the starter and the flywheel cover. Turn the engine anti-clock wise until the timing mark is straight down to give room for clearance at the front of the oil pan. Take out the through bolt to each engine mount & lift the engine slightly to allow the oil pan to slide clear of cross member, if necessary using an engine jack, or cherry picker. Another procedure can be performed with the help of a floor jack and placing some wooden plank under the oil pan, focus on emphasizing the weight. Like always, lift it slowly until wood blocks can be placed in-between the frame front cross member and the engine block with little or no interference with the other project areas around the engine. Place the engine down gently on the wood blocks, making sure it is well supported and then remove the oil pan bolts you may get the sizes off the bolts and their positions. Raise the rear of the oil pan slightly until it is about eighteen degrees with the vertical; manoeuvre the front clear of the crossmember, using the rubber mallet sparingly if desired to help free it. Remove all gasket and sealer from the block surfaces and oil pan where the gasket is to sit and make sure you clean these areas properly. Paint a thin layer of sealer to the new side gaskets and place them on to the engine block, the bolt holes must be aligned. Fit front and rear covers by sealer coming into contact with respective side gasket ends. Raise the ban into place and tighten all bolts to the point where they can be finger tightened and then tighten the anchors where the ends of the pan bolts will be inserted. Lower the engine onto its mounts and fit the through bolts and torque to the required standard. The removal process is as follows: Pour the used oil on the ground after the removal process has been completed; Loosen the drain plug and turn the engine for about five minutes; Add the appropriate quantity and grade of oil with the engine running; Check for any oil leaks. If the engine has been pulled out from the car most of the above steps would not be necessary and the pan can be unbolted and lifted right off the engine block and the pan gasket would be replaced with a new one following the previously mentioned cleaning and sealing processes.


